
![Fix Windows 10 Stuck in Automatic Repair Loop [2025 Guide]](https://techgitterofficial.com/wp-content/uploads/2025/08/224.Fix-Windows-10-Stuck-in-Automatic-Repair-Loop-2025-Guide.png)
Hello friends, welcome back to my channel Tech Gitter Official.
In today’s guide, I’ll show you how to fix the Windows 10 automatic repair loop using Command Prompt. If your computer is not starting properly, stuck on “Preparing Automatic Repair”, keeps restarting again and again, or shows “Your PC did not start correctly”, then this tutorial is for you.
Step 1: Enter Recovery Mode and Open Command Prompt
To open the Windows recovery screen:
- Press and hold the Power button to turn off your PC.
- Turn it back on, and when the Windows logo appears, turn it off again.
- Repeat this process three times.
- On the third attempt, your PC should enter Recovery Mode.
👉 If that doesn’t work, create a bootable Windows 10 USB or DVD using Microsoft’s Media Creation Tool. Boot from it and on the first screen, click Repair your computer (bottom-left corner).
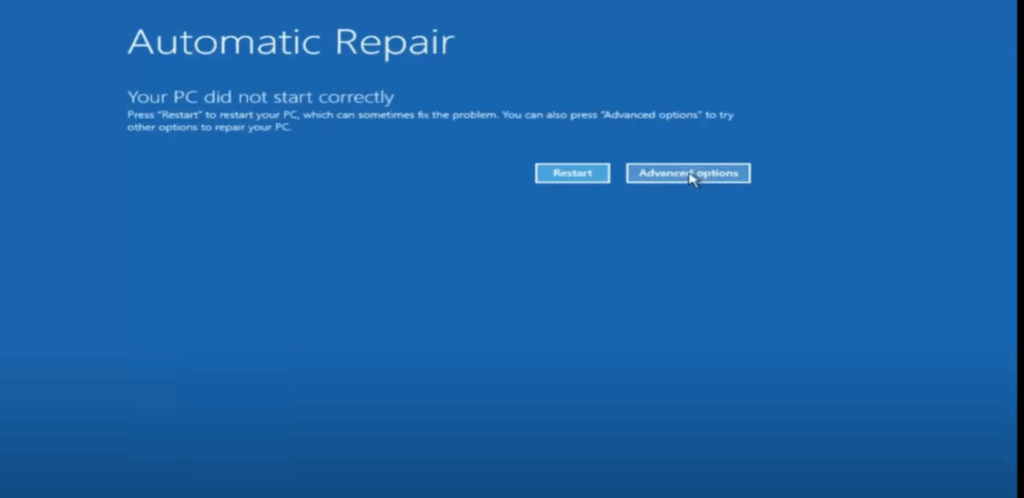
Both methods will take you to the Recovery Options screen.
Step 2: Navigate to Command Prompt
- On the recovery screen, click Advanced options.
- Select Troubleshoot.
- Click Advanced options again.
- Then choose Command Prompt.
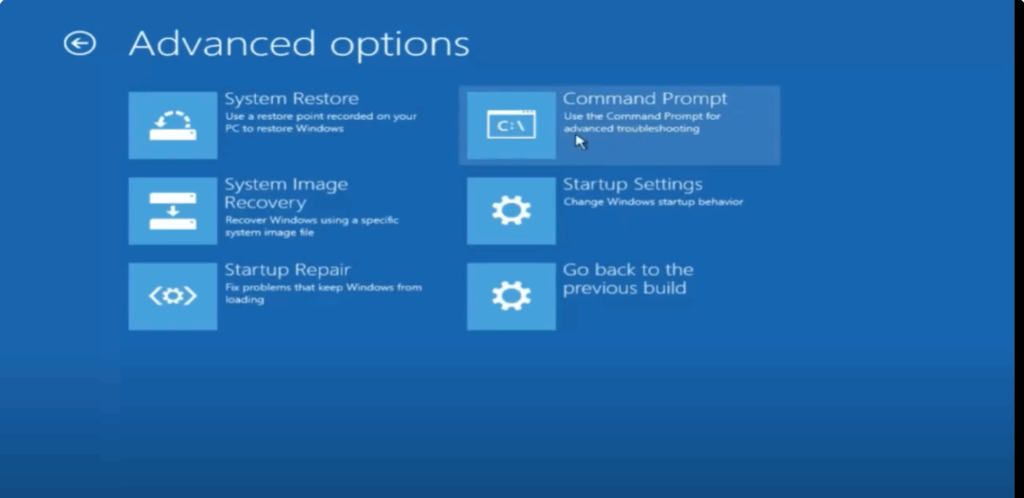
Now we will enter some commands to fix the automatic repair loop.
Step 3: Run Commands in Command Prompt
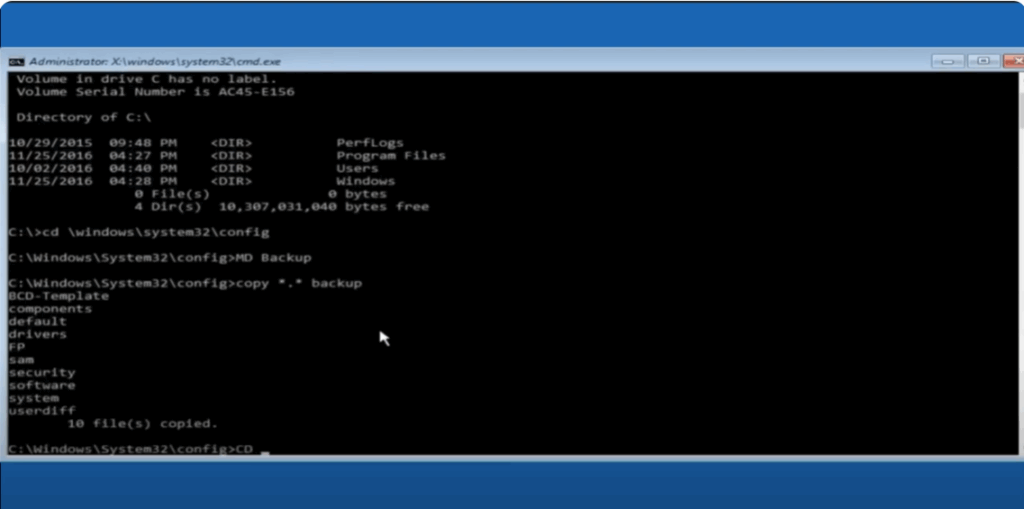
- First, check which drive has the Windows folder.
- Type:
C:→ Press Enter - Then type:
dir→ Press Enter
cd \windows\system32\config→ Press Enter - Type:
- Create a backup folder:
md backup→ Press Enter - Save a copy of current system files:
copy *.* backup→ Press Enter - Go to the RegBack folder:
cd regback→ Press Enter - Check file sizes:
dir→ Press Enter- If all files show zero (0), stop here and try System Restore or Startup Repair.
- If the files have sizes (numbers), continue.
- Restore the backup files:
copy *.* ..→ Press Enter If prompted to overwrite files, type:A→ Press Enter - Close Command Prompt:
exit→ Press Enter - Click Continue to restart your computer.
Final Step: Restart Your PC
Your computer should now boot normally without showing the automatic repair loop.
👉 If it still doesn’t work, go back to the recovery screen and try System Restore, Startup Repair, or use the Reset this PC option.
Conclusion
That’s it! You have successfully learned how to fix the Windows 10 Automatic Repair Loop using Command Prompt.
👍 Don’t forget to Like, Share, and Subscribe to Tech Gitter Official for more tech tutorials.


