

The Windows 11 25H2 December Update (KB5070311) has quietly unlocked a set of powerful new features that many users don’t realize are available by default. While the update installs automatically, several of its best improvements—ranging from productivity enhancements to security upgrades—need to be manually enabled to take full advantage. If you’ve updated your PC recently, you could be missing out on tools designed to make Windows faster, smarter, and more efficient. In this blog, we’ll walk you through how to enable the new Windows 11 25H2 features after the KB5070311 update, so you can maximize your system’s potential right away.

Step 1: Download and Set Up Vive Tool
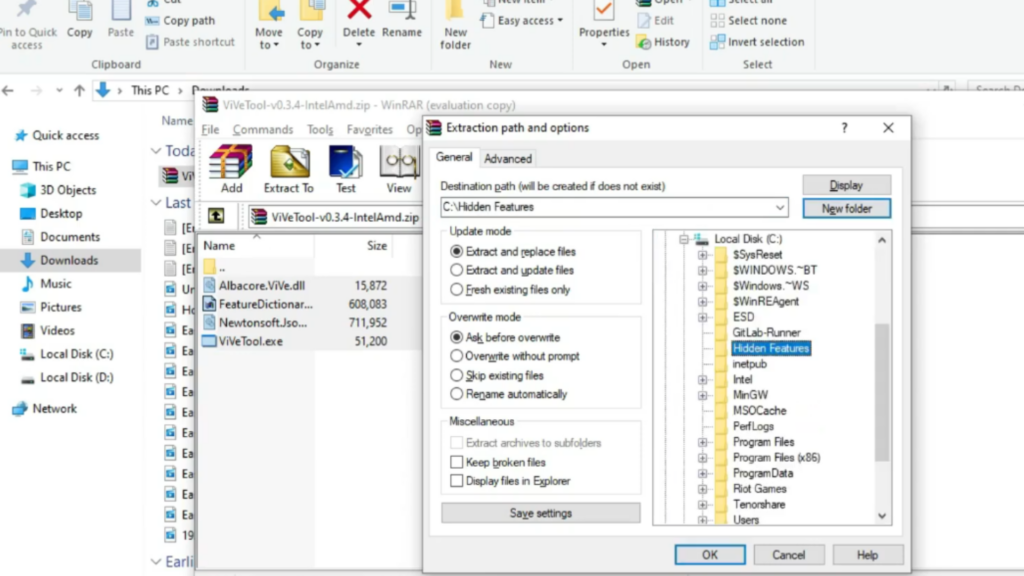
First, we need to set up Vive Tool on our system. Download the latest version of Vive Tool from the article linked in the video description. Make sure you download the correct zip file for Intel or AMD systems.
Once downloaded, open File Explorer, right click the zip file, and select Extract All. Click on Browse and extract the files into a dedicated folder. For example, go to This PC > Local Disk (C:), create a new folder named Hidden Features, and extract the files there. Once done, copy the folder location, as we’ll need it for the next step.

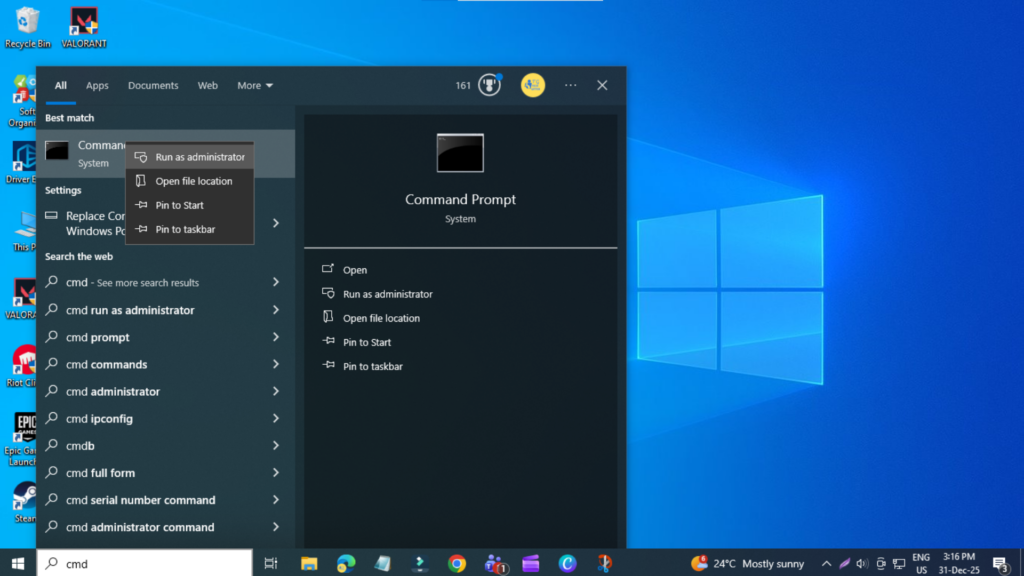
Step 2: Open Command Prompt as Administrator
Now, open the Start menu, type cmd, right click on Command Prompt, and select Run as administrator. When prompted by User Account Control, click Yes.
Inside Command Prompt, type cd, then paste the folder path where you extracted Vive Tool, and press Enter.
Step 3: Enable Windows 11 Feature IDs
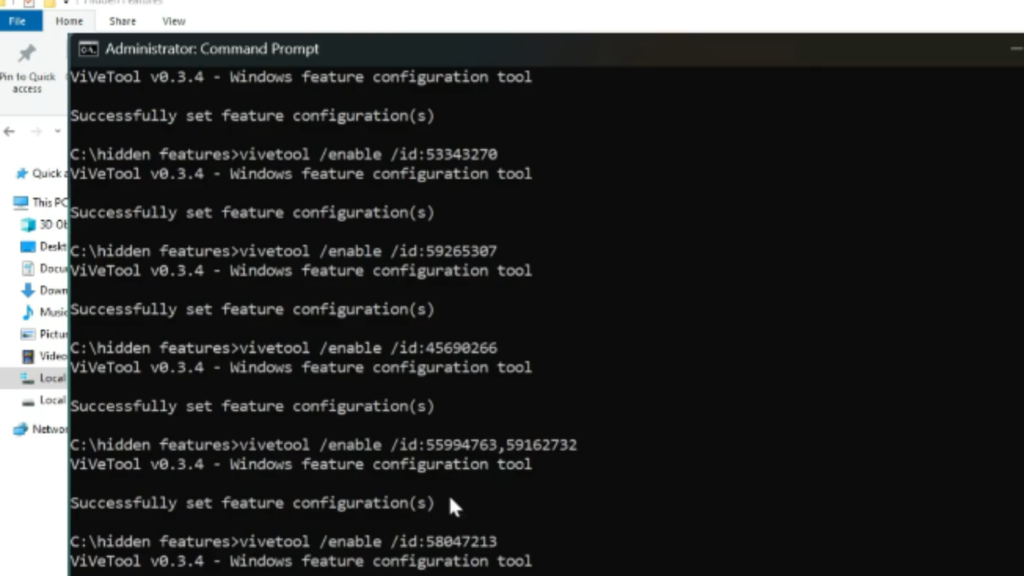
From here, we’ll run several feature IDs to enable the new Windows 11 features. A big shout out to Phantom of Earth on Twitter (X) for discovering and sharing these feature IDs.
First, we’ll enable the main feature bundle. After running the command, you should see a message saying successfully set feature configuration. This bundle enables most of the major new features automatically.
Step 4: Enable Additional Feature Improvements
Next, if you want additional improvements, you can enable extra feature IDs. These include:
- Taskbar auto-hide improvements
- The option to share any window directly from the taskbar
- The new device card on the Settings homepage
- The updated About page
- Cloud file search toggle in File Explorer
- Updated widgets
- The new minimized context menu in File Explorer
Once all commands are completed, close Command Prompt and restart your PC.
Step 5: Enjoy the New Windows 11 Features
After restarting, you’ll notice the changes immediately, such as the new device info card and settings, the updated About section, advanced workspace customization options, the new mobile devices page, improved File Explorer dialogs with dark mode, and the new minimized context menu.
You’ll also see taskbar animation improvements, fixes for taskbar auto-hide issues, updated widgets, enhanced drag-and-drop sharing, and a new option to disable the drag tray under Settings > System > Nearby Sharing.


