
![How to View Saved WiFi Password in Windows 10 [2025 Guide]](https://techgitterofficial.com/wp-content/uploads/2025/08/220.How-to-View-Saved-WiFi-Password-in-Windows-10-2025-Guide.jpg)
Hello friends, welcome back to my channel Tech Gitter Official. In today’s video, I’m going to show you how to easily check your Wi-Fi password on Windows 10. So, if you’ve forgotten your Wi-Fi password and need to connect another device, this quick tutorial is for you.

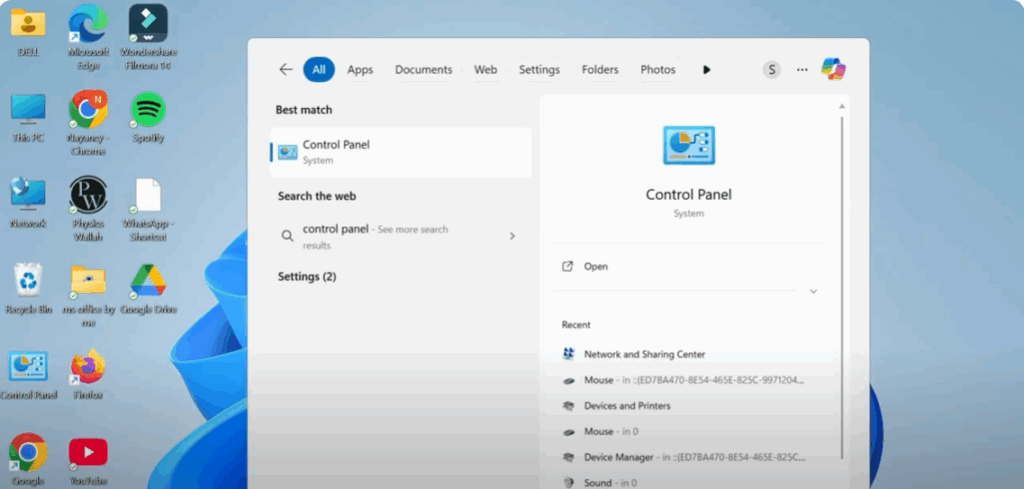
Step 1: Open Control Panel
First, go to your desktop and click on the Start Menu. Now, type Control Panel in the search bar and click on the first result that appears. This will open the Control Panel window.
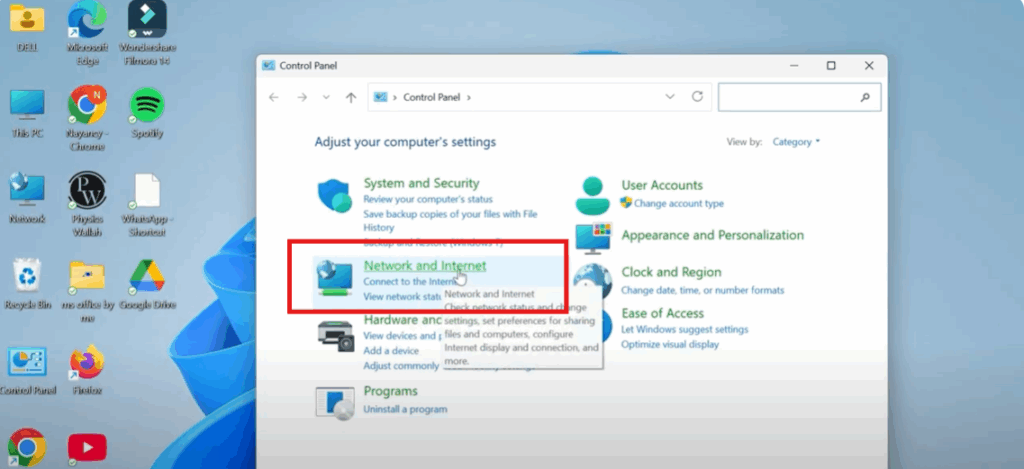
Step 2: Go to Network and Internet
In the Control Panel, look for the section that says Network and Internet and click on it. This will take you to the networking options.
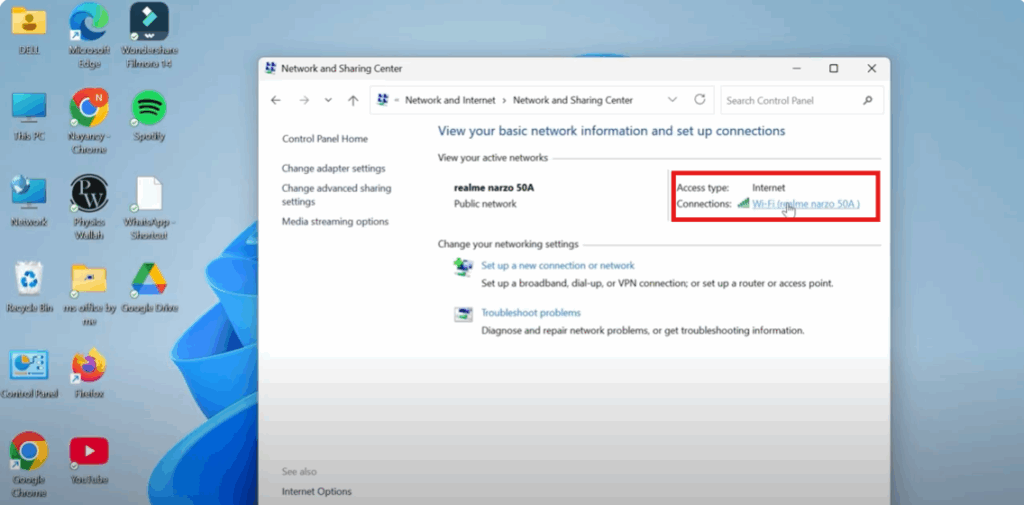
Step 3: Open Network and Sharing Center
Now, click on Network and Sharing Center. Inside the Network and Sharing Center, you’ll see your current network listed next to Connections. Click on the name of that network (it’ll be a blue link).
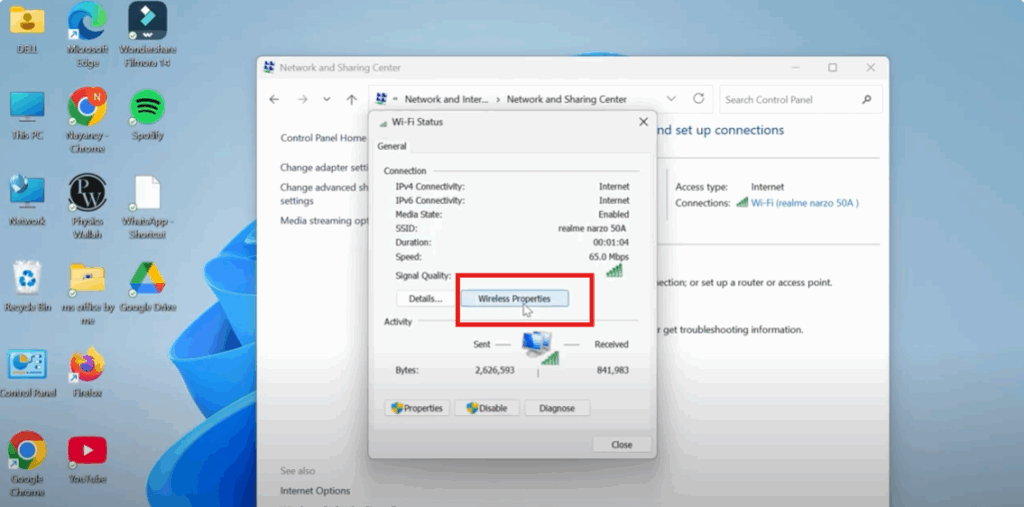
Step 4: Open Wireless Properties
A new window will pop up showing your Wi-Fi connection status. Here, click the Wireless Properties button. It’s located in the middle of that window.
Step 5: View Your Wi-Fi Password
In the Wireless Properties window, click on the Security tab at the top. You’ll now see a field labeled Network Security Key. This is your Wi-Fi password.
To reveal your password, just check the box that says Show Characters.
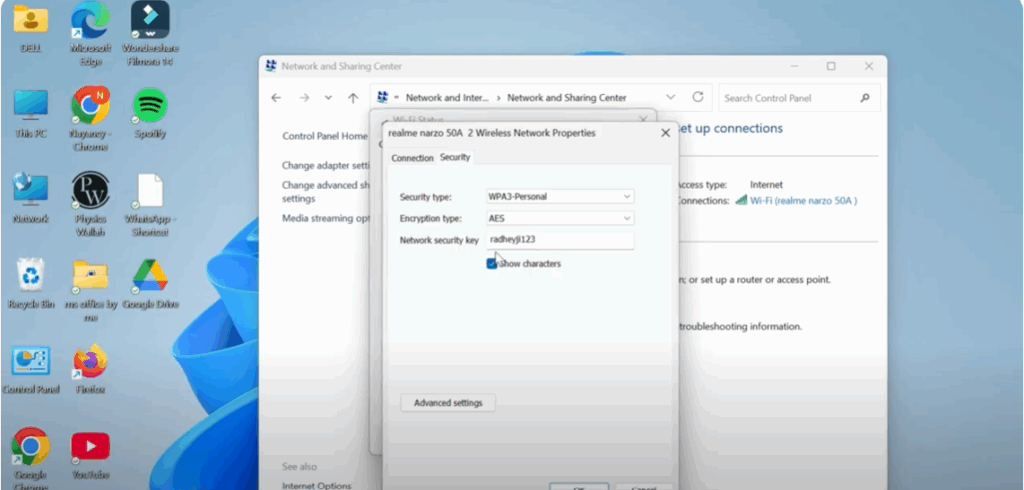
And there it is — your saved Wi-Fi password, plain and simple.
✅ If you found this tutorial helpful, don’t forget to like, share, and subscribe to Tech Gitter Official for more quick fixes and guides.


