

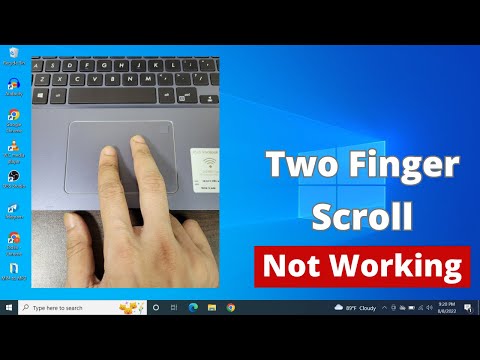
Hello friends, welcome back to my channel Tech Gitter Official. In today’s guide, I’ll walk you through the steps to enable two-finger scrolling on your Windows 10 or 11 laptop.
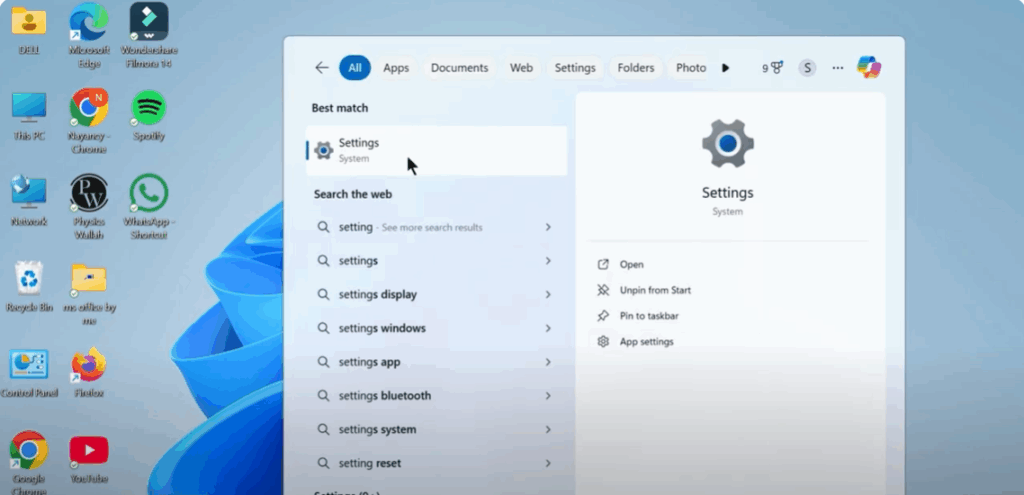
Step 1: Open Settings
- Click on the Start button and type Settings into the search bar.
- Click on it to open the Settings window.
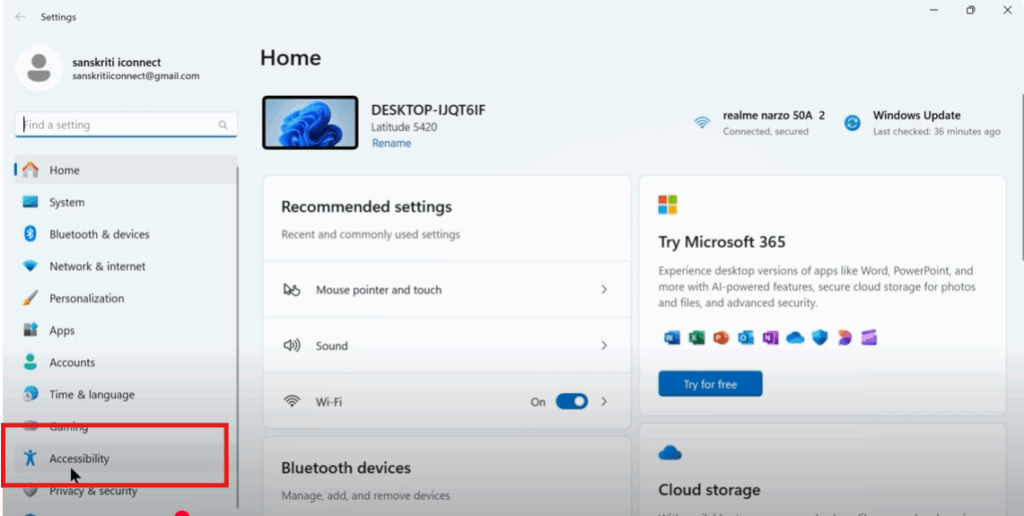
Step 2: Go to Accessibility
- In the Settings window, look at the left-hand menu.
- Scroll down if needed and click on Accessibility.
Step 3: Access Touchpad Settings
- Inside the Accessibility menu, click on Mouse pointer and touch.
- Under this section, find and click on Touchpad.

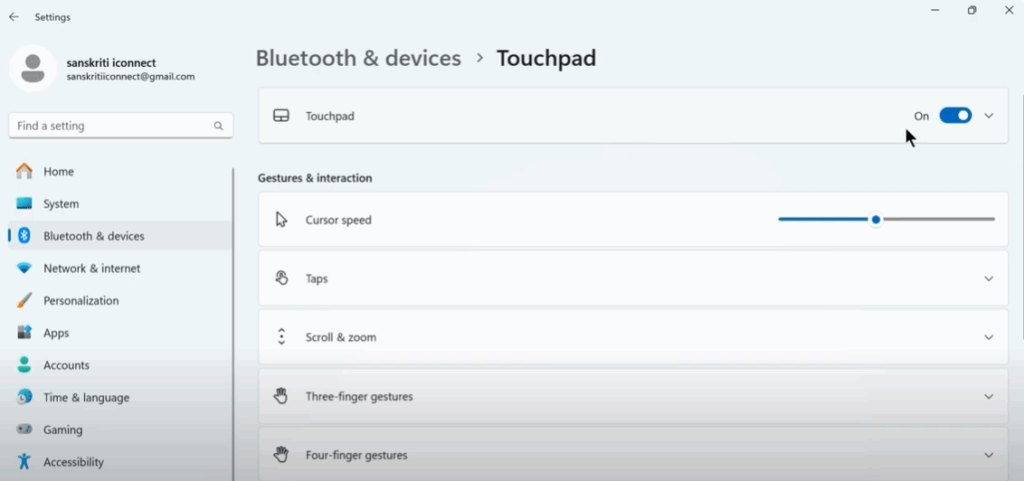
Step 4: Enable the Touchpad
- First, check if the Touchpad switch is turned On.
- If it’s disabled, click on it to enable the touchpad.
- Without this, gestures like two-finger scrolling will not work.
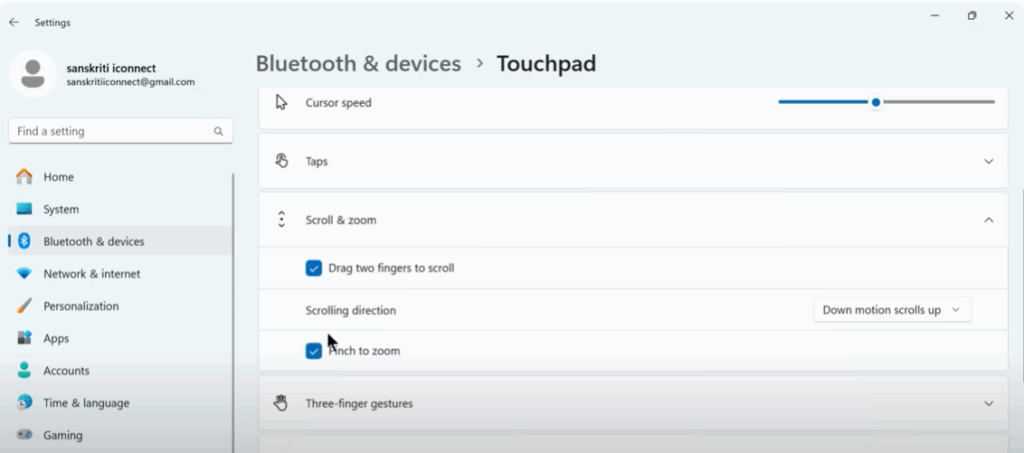
Step 5: Turn On Two-Finger Scrolling
- Scroll down to the Scroll and Zoom section.
- Enable the option “Drag two fingers to scroll.”
- (Optional) You can also check Pinch to zoom if you want that feature.
Now, return to your desktop and test the gesture. Place two fingers on the touchpad and scroll up or down in a webpage or document.
Step 6: If Two-Finger Scroll Still Doesn’t Work
If the scroll is still not working, try this method:
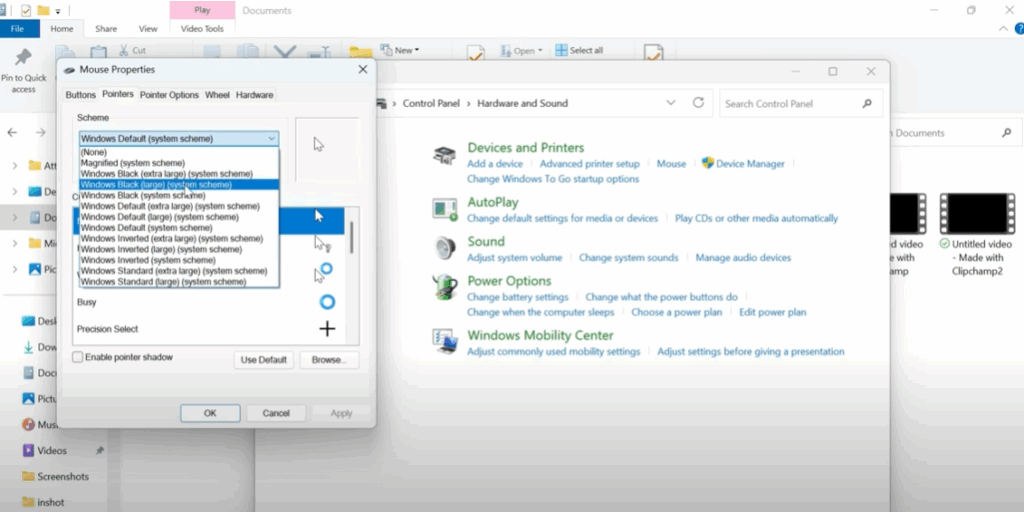
- Open the Search bar and type Control Panel, then open it.
- In Control Panel, change the View by option (top right corner) to Small icons.
- Click on Mouse to open the Mouse settings window.
- Go to the Pointers tab.
- From the dropdown menu, select Windows Black (Large) pointer scheme.
- Click Apply and then OK.
Final Step: Test Again
Go back to your desktop and try two-finger scrolling once more. If everything was set correctly, your touchpad should now respond properly to two-finger gestures.
If you found this tutorial helpful, don’t forget to like, share, and subscribe for more quick tech fixes from Tech Gitter Official.


