
![WiFi Option Not Showing in Windows 10 Here’s the FIX! [Tutorial]](https://techgitterofficial.com/wp-content/uploads/2025/08/108.WiFi-Option-Not-Showing-in-Windows-10-Heres-the-FIX-Tutorial.jpg)
Sometimes you may also face the problem where the Wi-Fi option is missing in your Windows 10 PC. Wi-Fi not showing up could be due to a fault in your hardware or an issue with the router. Additionally, using outdated drivers can also cause this problem.
In this article, we are going to share some solutions that can solve your problem. Follow these steps carefully till the end.
1. Fix Wi-Fi by Checking Computer Hardware
Your computer hardware, such as the network card, may be causing the problem.
- Go to Start menu and search Command Prompt.
- Open it with Run as Administrator.
- Type the command:
ping 127.1.1.1 - Press Enter.
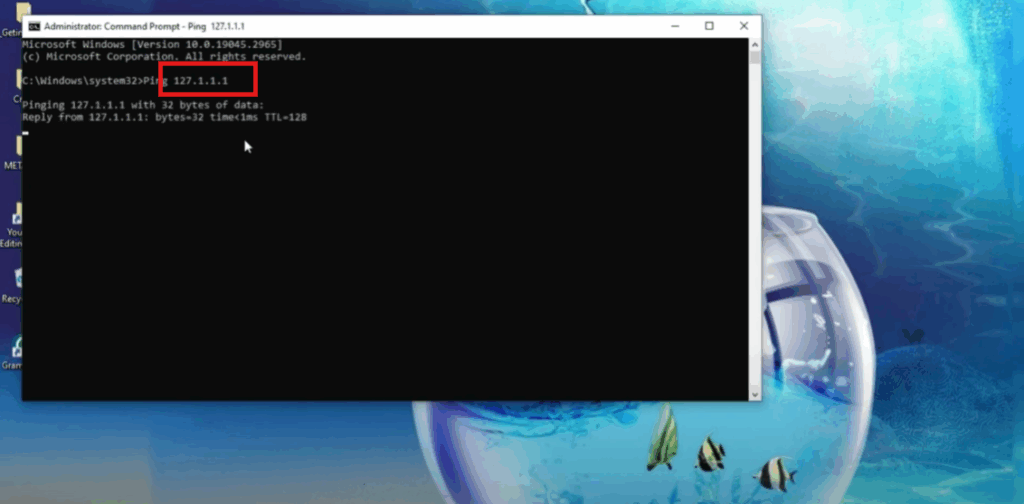
If you’re getting a response, then there is nothing wrong with your computer hardware.
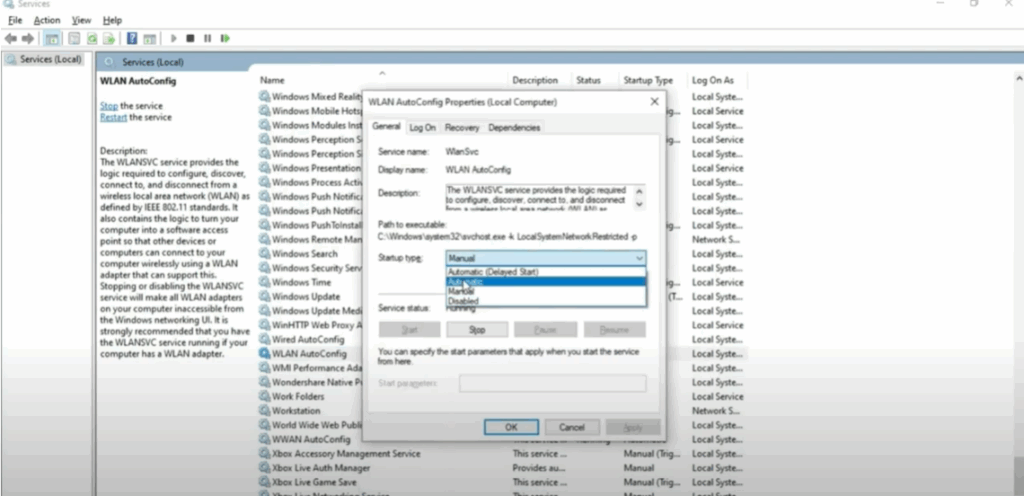
2. Fix Wi-Fi Service Running or Not
To check whether Wi-Fi service is running:
- Press Windows + R on your keyboard.
- Type
services.mscand click OK. - On the screen, go to WLAN AutoConfig.
- Make sure this application is Running.
- If it’s not, click Start.
- Right-click on it → go to Properties → set to Automatic.
- Click Apply → OK.
- Restart your computer.
3. Fix Wi-Fi by Resetting Internet Settings
- Press Windows + R and type:
inetcpl.cpl - Click OK.
- Go to Advanced → click Restore Advanced Settings.
- Apply the changes and click OK.

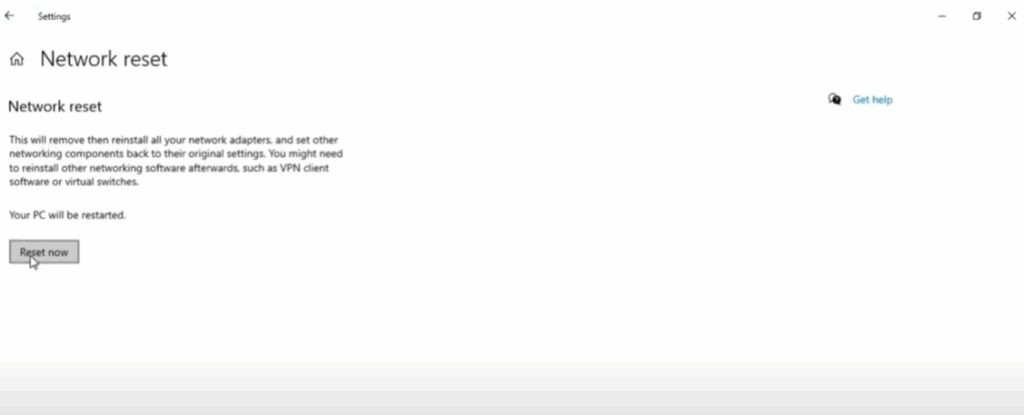
4. Fix Wi-Fi by Network Reset Settings
- Open the Search menu and go to Settings.
- Select Network & Internet.
- If Wi-Fi option is still missing, scroll down and click Network Reset.
- Click Reset Now → your PC will restart and reinstall all network adapters.
5. Fix Wi-Fi by Running Windows Network Troubleshooter
- Go to Search menu → open Troubleshooting Settings.
- Click on Additional Troubleshooters.
- Select Internet Connections → Run the troubleshooter.
- Choose Troubleshoot my connection to the Internet.
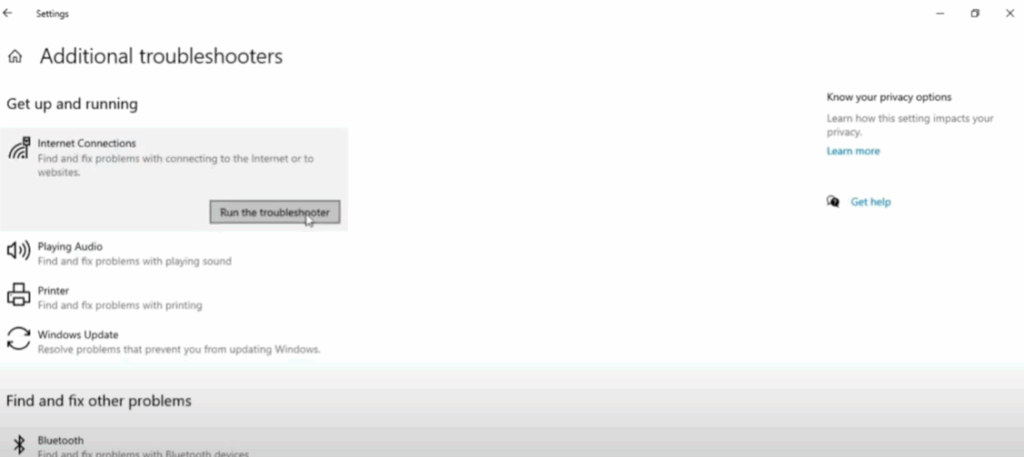
If no problems are shown, your Wi-Fi option should reappear.
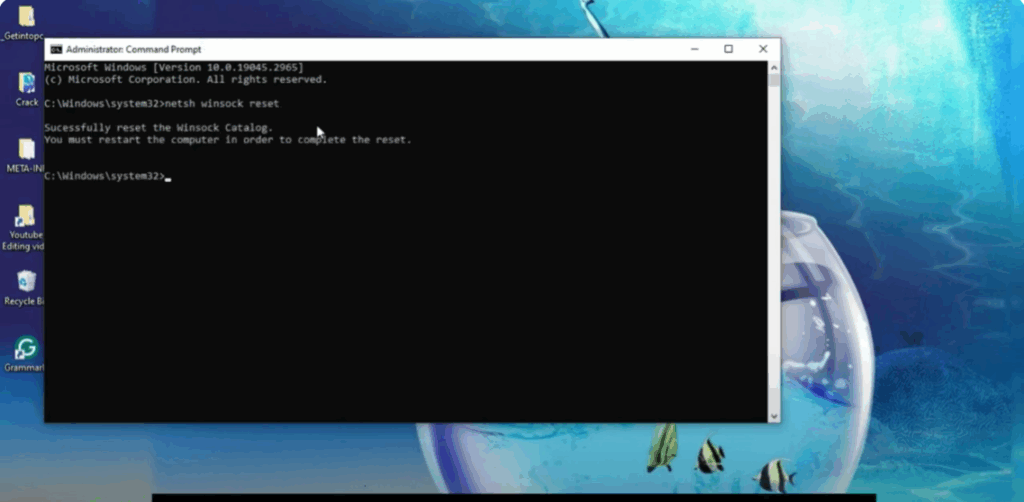
6. Fix Wi-Fi by Resetting and Refreshing Network Profiles
- Open CMD with Run as Administrator.
- Type the following commands one by one:
netsh winsock reset netsh int ip reset log.txt - Press Enter after each command.
- Restart your computer.
7. Fix Wi-Fi by System Configuration
- Press Windows + R and type
msconfig. - Click OK.
- Go to the Services tab.
- Select Disable All, then click Enable All.
- Click Apply → OK.
- Restart your computer.

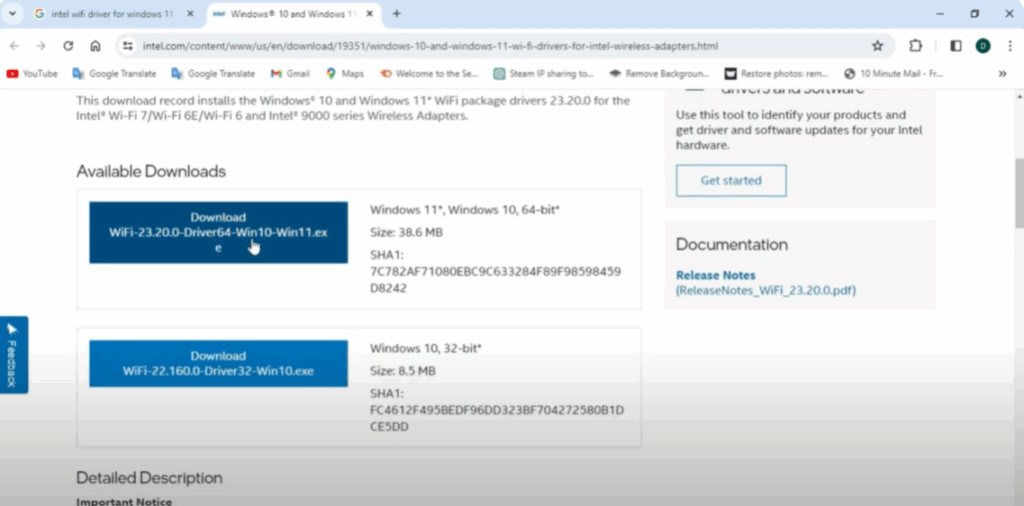
8. Download and Install Intel Wi-Fi Driver
- Go to the Search menu and open Device Manager.
- Click on Network Adapter.
- If you don’t see Wi-Fi option there:
- Open any browser.
- Search for Intel Wi-Fi Driver for Windows 10 or 11.
- Open the official Intel website.
- Download the driver according to your system version.
- Install it on your PC.
Final Words
By following these solutions, you can fix the Wi-Fi missing option in Windows 10 and restore connectivity.
If your problem is solved, don’t forget to like, share, and subscribe. Have a good day!


