
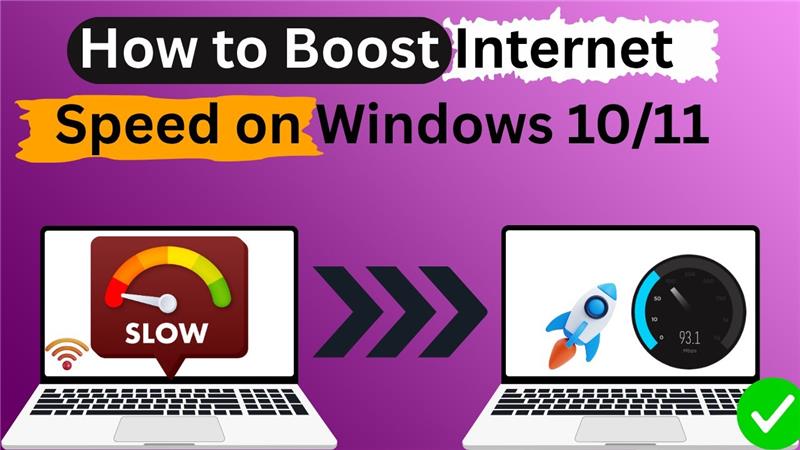
Hello friends, welcome back to my channel Tech Gitter Official. In today’s video, we’re going to talk about a very important topic: How to boost your internet speed on a Windows PC or laptop.
Step 1: Update Your Network Adapter Driver
First, go to the Start menu and type Device Manager in the search bar.
Click on the Device Manager app to open it.
Once you’re in Device Manager, look for the option called Network Adapters and click to expand the list.
Now locate your Intel R Ethernet connection I29 (or a similar name based on your PC’s hardware).
Right-click on the network adapter and choose Properties from the menu.
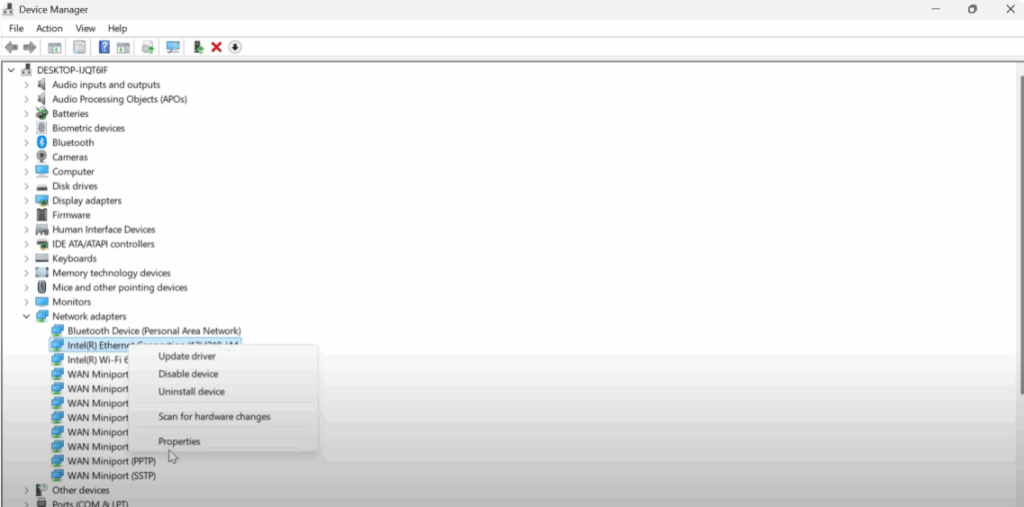
Then click on the Driver tab at the top and press the Update Driver button.
You will see two options here:
- First, click Search automatically for drivers. Windows will search online and install any available updates.
- If it shows no updates available, choose Browse my computer for drivers. Then click on Let me pick from a list of available drivers on my computer.

Select the most appropriate or latest driver from the list and click Next, then close.
This step ensures that your adapter is running with the best performance possible.
Step 2: Change DNS Settings
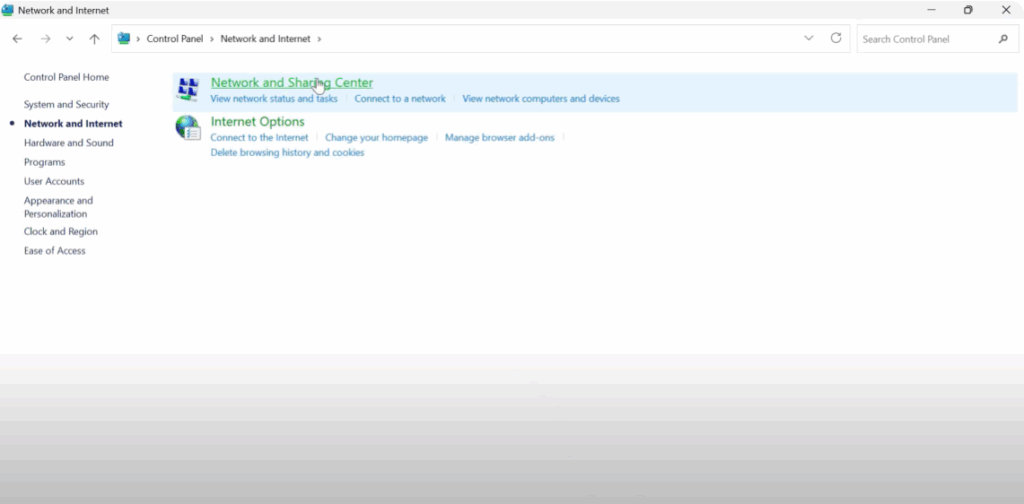
Go to your desktop. Click on the Start button, type Control Panel, and open it.
In the top right corner, make sure the View by option is set to Category.
Now click on Network and Internet. Then select Network and Sharing Center.
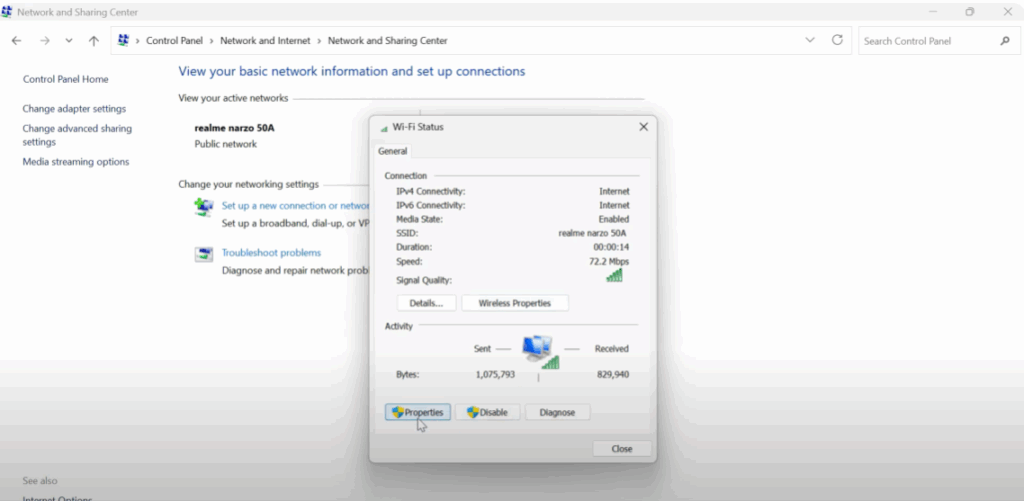
On the left side (or in the middle), you’ll see your current connection. Click on the name of your Wi-Fi or Ethernet connection.
In the new window, click on Properties → TCP/IPv4.
A new box will appear. Check the option that says Use the following DNS server addresses. Enter these values:
- Preferred DNS server: 8.8.8.8
- Alternate DNS server: 8.8.4.4
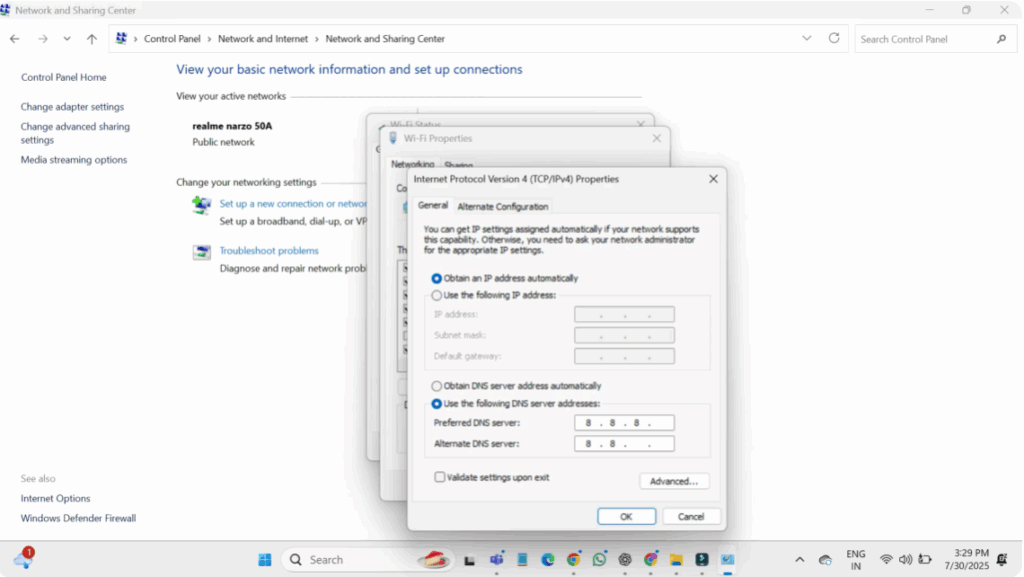
(These are Google’s DNS servers.)
Once you’ve entered the DNS, click OK, then again OK to close all settings.
This can instantly speed up the time it takes for websites to load.
Step 3: Run Network Reset Commands
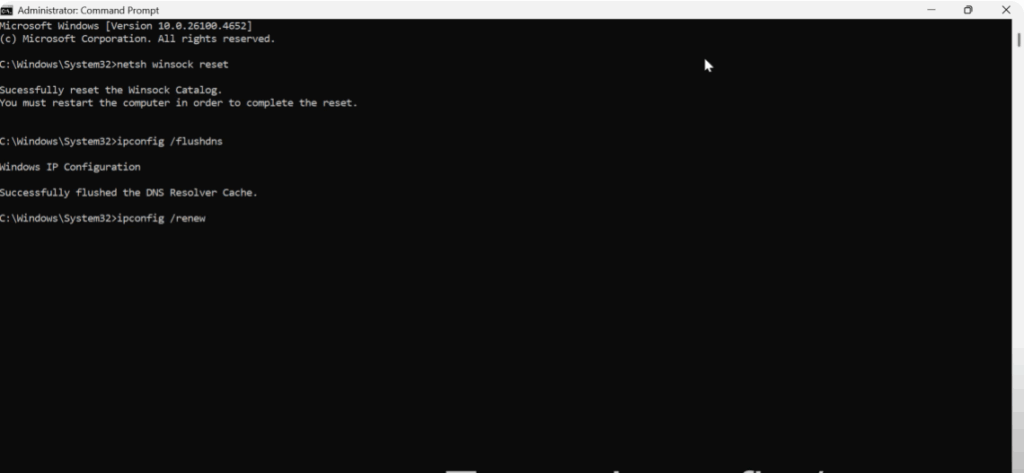
Now we’re going to run some powerful network reset commands using Command Prompt.
Go to the Start menu, type cmd, and when it appears in the results, right-click on it and choose Run as administrator.
This will give us the necessary permissions.
Now type the following commands one by one and press Enter after each:
netsh int ip resetnetsh winsock resetipconfig /flushdns→ Clears your DNS cache, helping resolve slow-loading websites.ipconfig /renew→ Renews your IP address from your internet provider.
Once you’ve completed all the steps, it’s important to restart your system to apply all the changes properly.
Step 4: Restart Your PC
Go to the Start menu, click the Power icon, and choose Restart.
After the system boots up, test your internet.
That’s it! You have successfully boosted your internet speed on Windows 10 or 11.
I hope this video helped you. Thanks for watching. Don’t forget to like, share, and subscribe to Tech Gitter Official.


