

Welcome back to my channel, Tech Gitter Official. In today’s video, I’ll show you an advanced fix if Google Chrome has become unresponsive or keeps freezing on your Windows 10 computer. This method is simple but very effective. So, let’s get started.

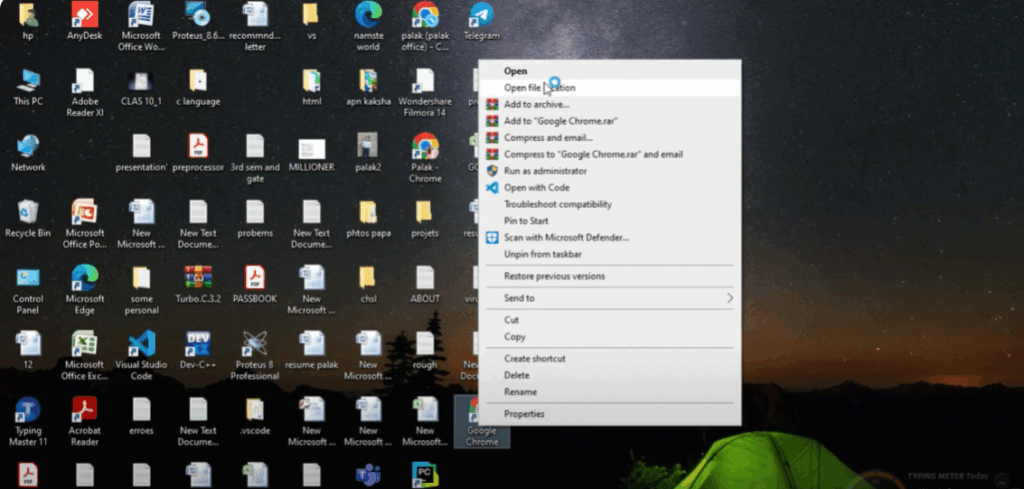
Step 1: Open File Location
First, go to your desktop and right click on the Chrome shortcut. From the menu, select Open file location. This will take you to the installation folder where the Chrome application file is stored.
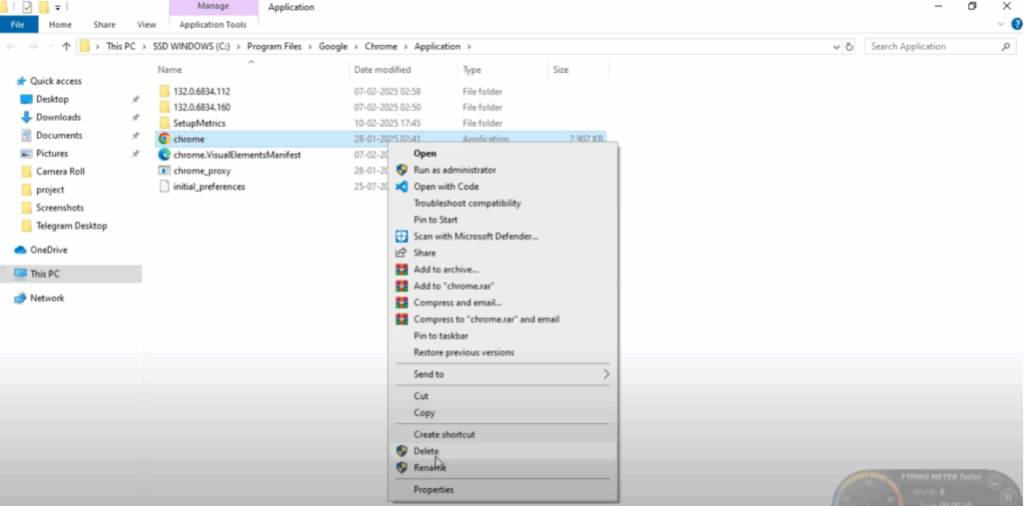
Step 2: Rename Chrome Application File
Once you’re here, right click on the Chrome application file and select Rename. At the end of the file name, add a small dash or any symbol, then press Enter. This step helps refresh Chrome’s system path and prevents Windows from pointing to any corrupted shortcut.
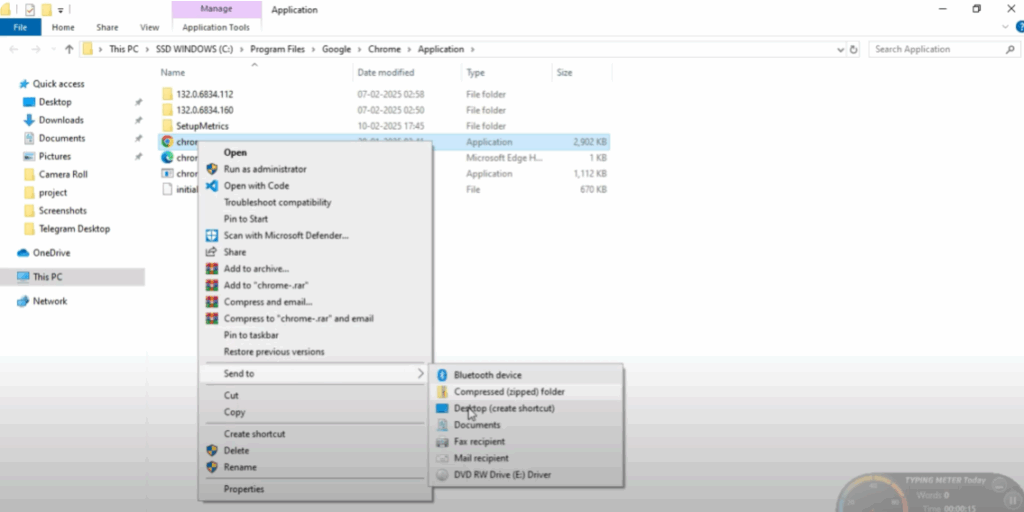
Step 3: Create a New Shortcut
Now, right click on the same Chrome file again and this time choose Send to > Desktop (create shortcut). Exit from this folder.
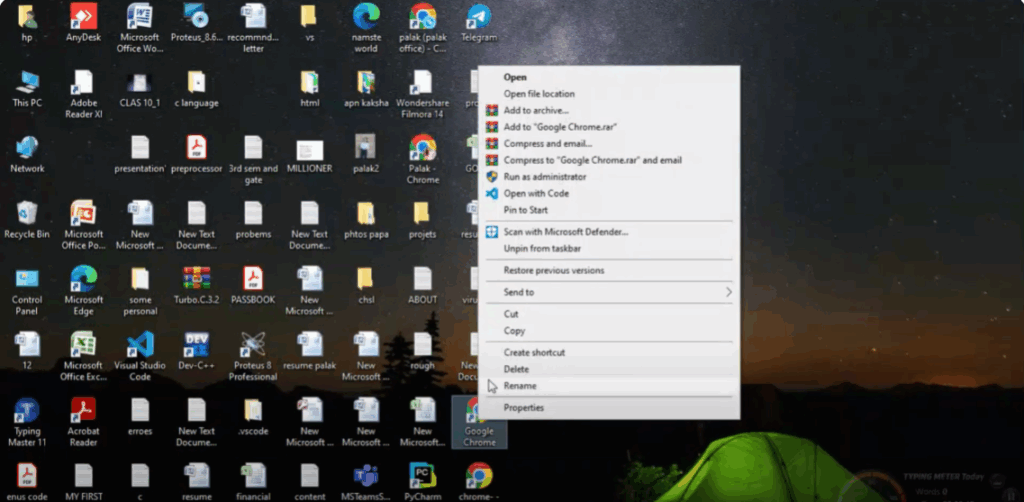
Step 4: Delete the Old Shortcut
You will now see a brand-new Chrome shortcut on your desktop. Go ahead and delete the old Chrome shortcut you had before.
Step 5: Launch Chrome
After doing this, try launching Chrome using the new shortcut. Usually, this advanced shortcut method works really well when Chrome won’t respond at all.
That’s it for today’s tutorial. Thank you for watching. If you found this tutorial useful, please like, comment, and subscribe for more helpful tech guides.


