
Welcome back to my channel Tech Gitter Official. In this video, we will learn how to stop and undo permanent Windows 10 updates. Many users face issues after updates like system lag, errors, or unwanted changes. If you’re one of them, this step-by-step guide will help you disable updates and prevent them from reinstalling automatically.

Step 1: Disable Windows Update Service
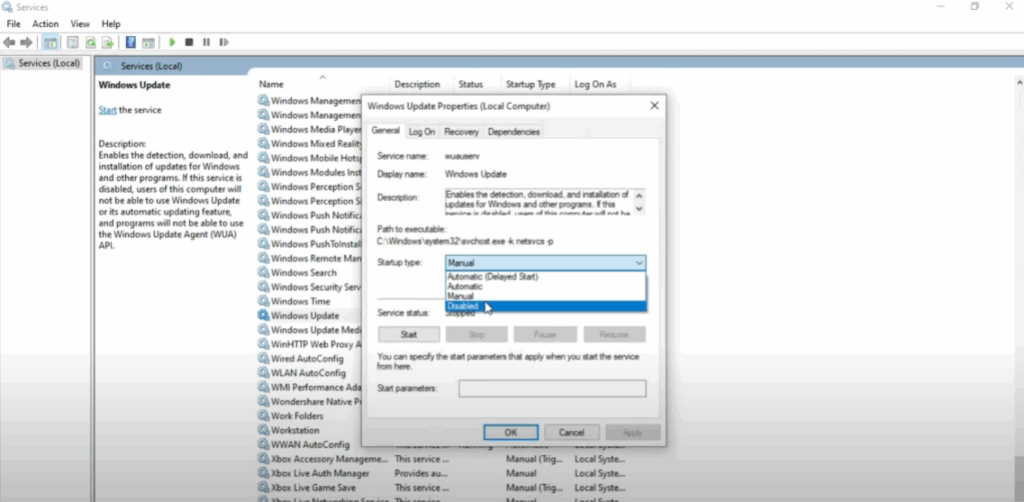
First, press Windows + R on your keyboard. Type services.msc and click on OK. A list of services will open. From here, scroll down and find Windows Update. Right click on it, then select Properties. In the properties window, change the Startup type from Manual to Disabled. After that, click on Apply and then OK. This step ensures that Windows will no longer try to start updates automatically in the background.
Step 2: Use Registry Editor for Permanent Block
But to make this change permanent, we need to go one step further. Again press Windows + R, type regedit, and click OK to open the Registry Editor.
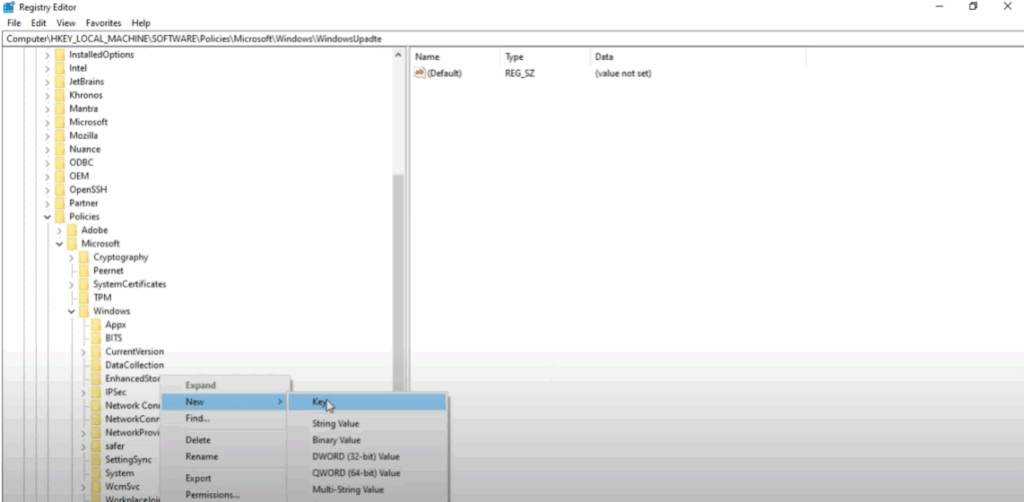
Once inside, carefully navigate to this path:
HKEY_LOCAL_MACHINE\SOFTWARE\Policies\Microsoft\Windows

Now, right click on the Windows folder, select New, then click on Key, and name it Windows Update. After that, right click on the new Windows Update key. Choose New, then Key again, and name this one AU.
Step 3: Add DWORD Value
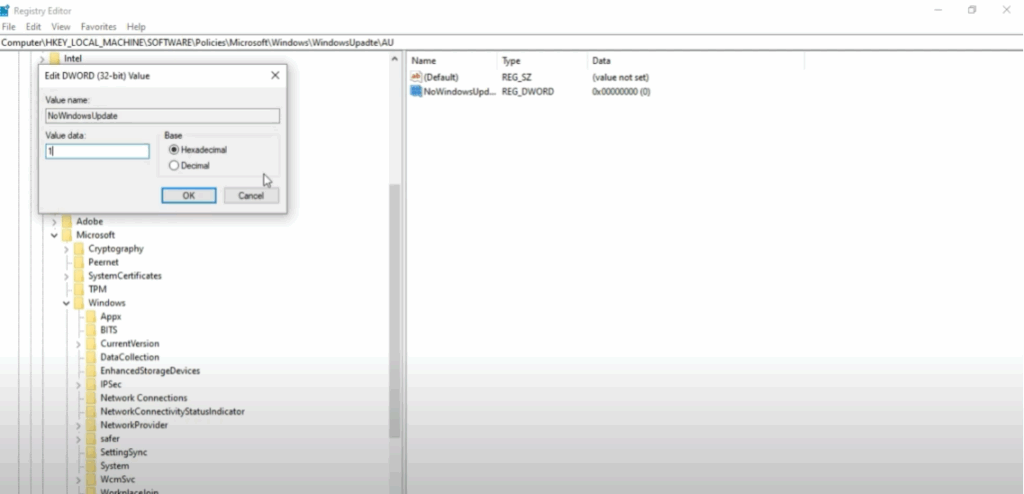
Once you have created the AU folder, look to the right-side panel. Right click and select New, then click on DWORD (32-bit) Value. Name this value NoWindowsUpdate.

After creating it, double click on NoWindowsUpdate and change its Value data from 0 to 1. Then click OK to save the change.
Final Step: Confirmation
By doing this, you’ve successfully blocked Windows 10 from forcing automatic updates permanently. This registry tweak works together with disabling the Windows Update service to ensure updates won’t return without your permission.
And that’s it. Thank you for watching. If you found this tutorial useful, please like, comment, and subscribe for more helpful tech guides.


