
Windows Media Player is one of the most common apps people use to play music and videos on their PC. But sometimes, it may stop working properly—it might not open, crash suddenly, or fail to play certain files. This can be frustrating, especially when you just want to enjoy your favorite songs or movies without any trouble. The good news is that most of these problems can be fixed with a few simple steps. In this guide, we’ll explain the common reasons why Windows Media Player doesn’t work and show you easy solutions to get it running smoothly again.
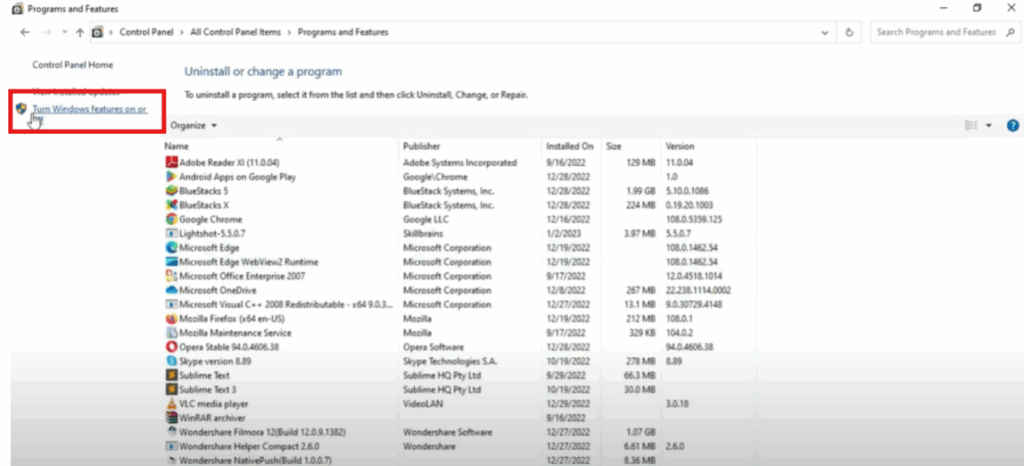
Step 1: Open the Control Panel
To begin, we’ll need to access the Control Panel. Click the search icon in the taskbar, usually next to the start menu, and type Control Panel. When it shows up in the results, click to open it.
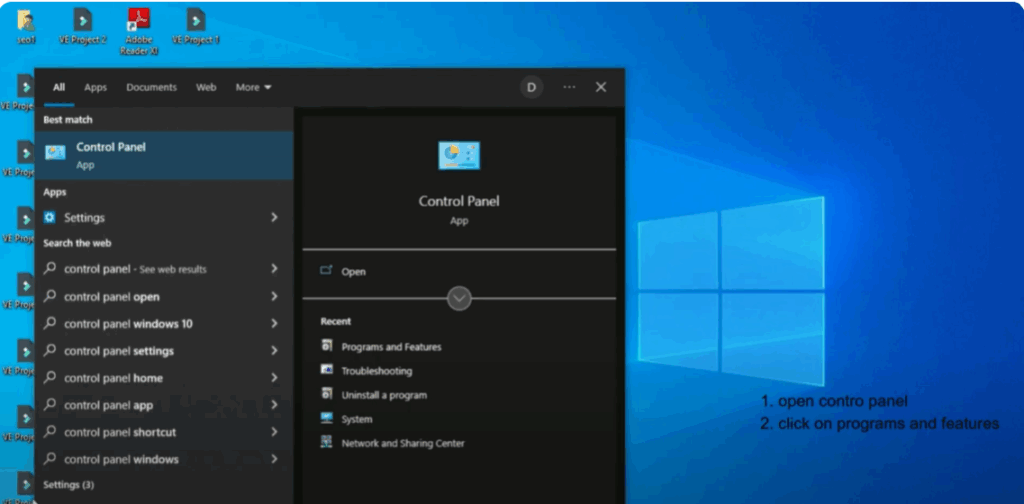
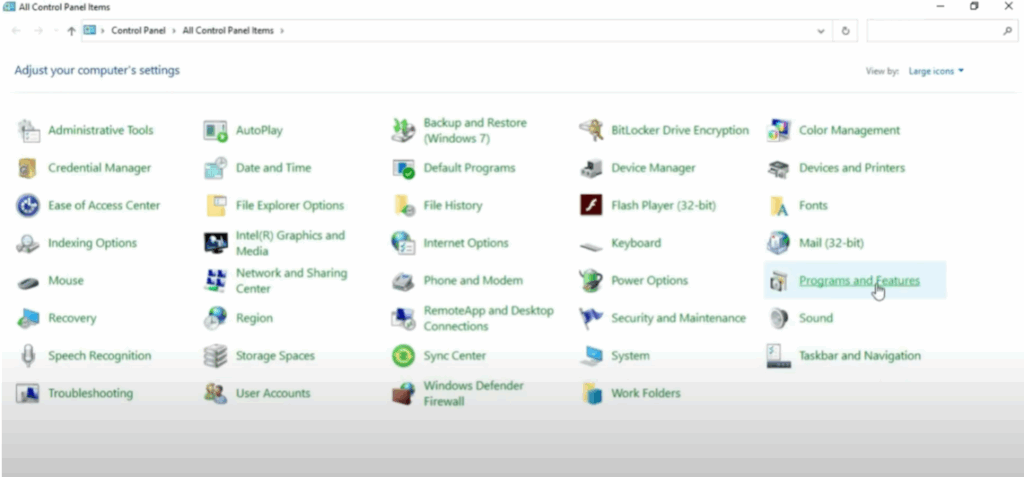
Step 2: Go to Programs and Features
Inside the Control Panel, look for an option called Programs and Features. This is where you can manage apps and system components on your PC.
Step 3: Access Windows Features
On the left-hand side of the Programs and Features window, click the link that says Turn Windows features on or off. This will open a new window with a list of optional Windows features that you can enable or disable.
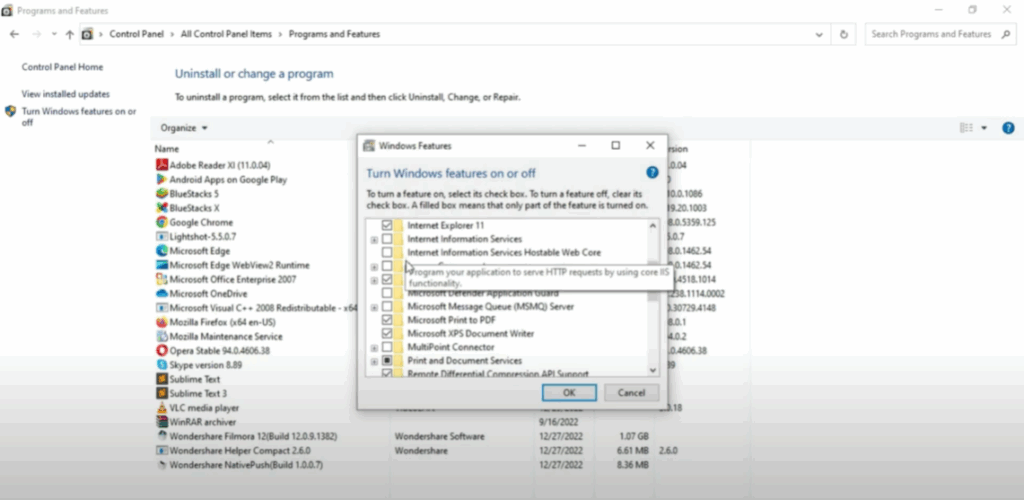
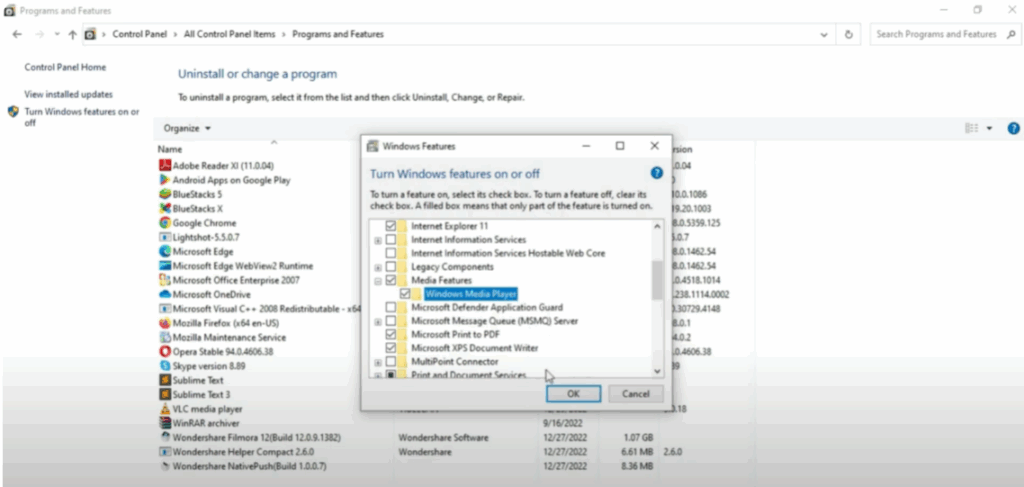
Step 4: Locate Windows Media Player
In the list that appears, scroll down until you find Media Features. Click the small plus sign or arrow next to it to expand the section. Now you should see Windows Media Player listed.
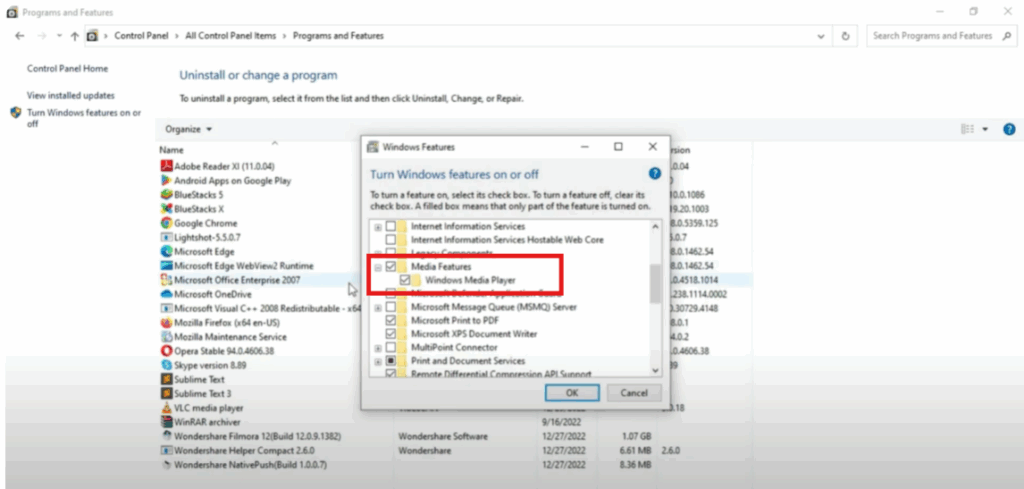
Step 5: Turn Off Windows Media Player
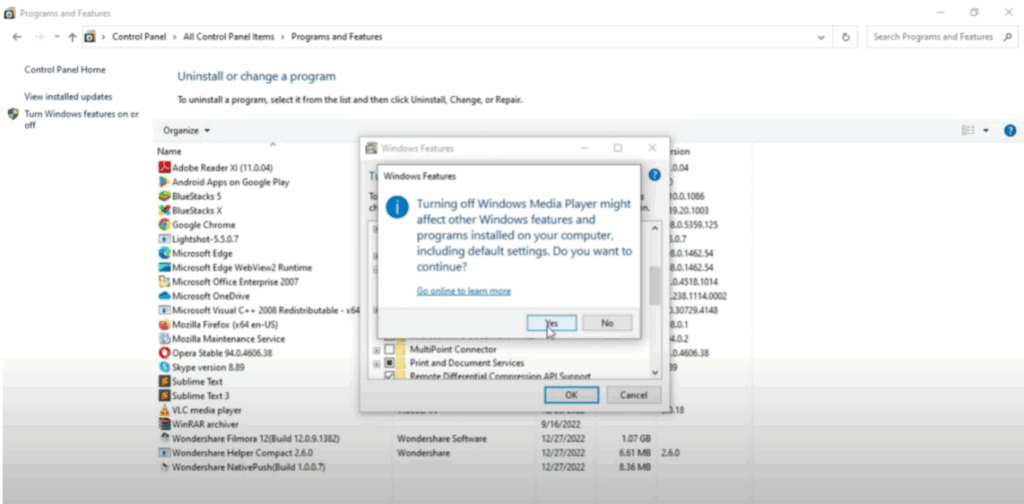
Uncheck the box next to Windows Media Player. This tells Windows you want to disable it. You’ll get a pop-up asking for confirmation. Click Yes, then press OK to proceed. This disables Windows Media Player completely and clears any corrupted files or settings tied to it.
Step 6: Restart Your Computer
Now it’s time to restart your PC so the changes can take effect. Once we’ve disabled Windows Media Player, the next step is to turn it back on. This effectively resets it to default.
Step 7: Open the Control Panel Again
After your computer has restarted, we’re going to turn Windows Media Player back on. To begin, click the search icon in your taskbar once again and type Control Panel just like before. Once it appears in the search results, go ahead and open it.
Step 8: Go Back to Programs and Features
Inside the Control Panel, find and click on Programs and Features. It should be near the bottom of the list. Once you’re there, take a look at the left-hand side of the window and click the option that says Turn Windows features on or off. This is the same window we used earlier to turn off Windows Media Player.
Step 9: Turn Windows Media Player Back On
Now, slowly scroll down until you see the section called Media Features. Click the little plus sign or arrow next to it to expand the list. You’ll see Windows Media Player appear underneath. Check the box and click OK at the bottom of the window.
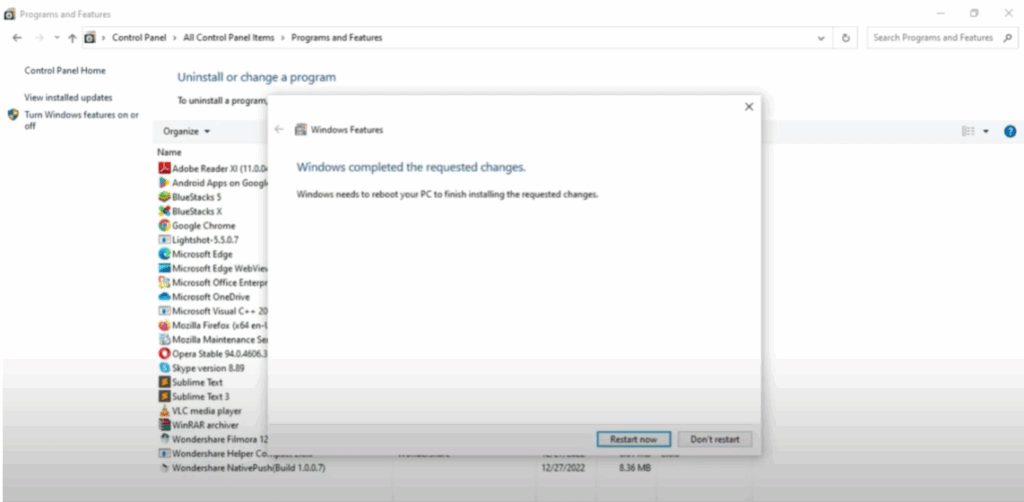
Now, Windows will begin re-enabling the Media Player feature. This may take a minute or two, so just be patient while it finishes. You might see a loading screen or a message saying Applying changes. That’s completely normal.
Step 10: Restart Your Computer One Final Time
Once Windows has finished applying the changes, it’s important to restart your computer one more time. So, go ahead and click Start, choose Restart, and wait for your computer to come back on.
After this final reboot, Windows Media Player should be working smoothly again, just like when it was first installed.


