
Creating a Google Form is one of the easiest ways to collect data online—whether it’s for surveys, quizzes, feedback, or event registrations. In 2025, Google Forms has become even more user-friendly, making it simple for anyone to build a form without needing technical skills. You can add questions, choose answer types, and even customize the look of your form in just a few clicks. Best of all, it’s free and works on any device. In this complete tutorial, we’ll guide you step by step on how to create a Google Form, share it with others, and view the responses—all in easy language so you can get started right away.

Step 1: Open Google Chrome and Access Google Apps
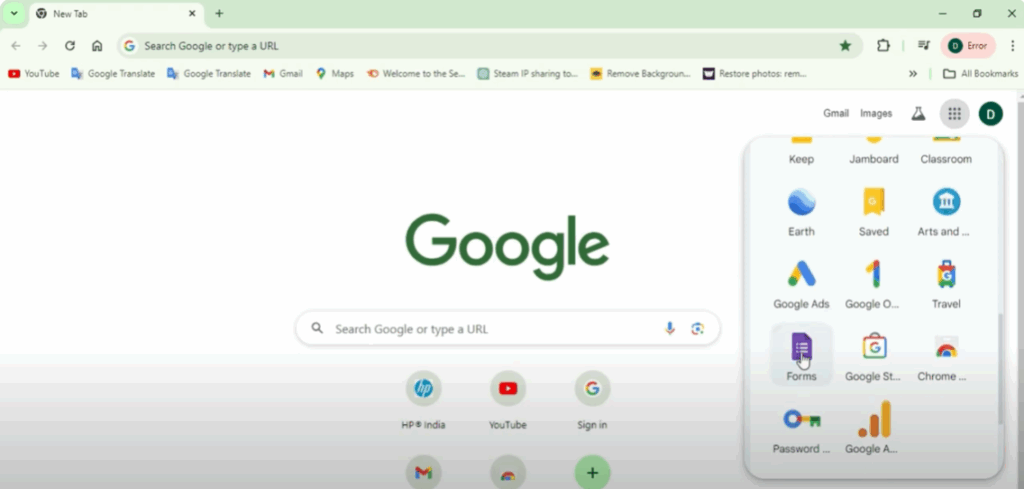
First of all, open your Google Chrome browser. Once you open Chrome, click on the points where we have Google Apps and then scroll down. Here you will find a purple form icon. Click on this.
Step 2: Choose a Template or a Blank Form
Once you do that, you will see a window like this where you will have the Blank Form and other templates.
In the Template Gallery, you’ll find options such as:
- Party Invitation
- T-shirt Signup
- Contact Information
- Event Registration
- Event Feedback
- Order Form
- Job Application, and many more.

You can choose any of these and then edit it. However, in this tutorial, we will go with the Blank Form because it is easy and very convenient to do so.
Step 3: Customize the Form
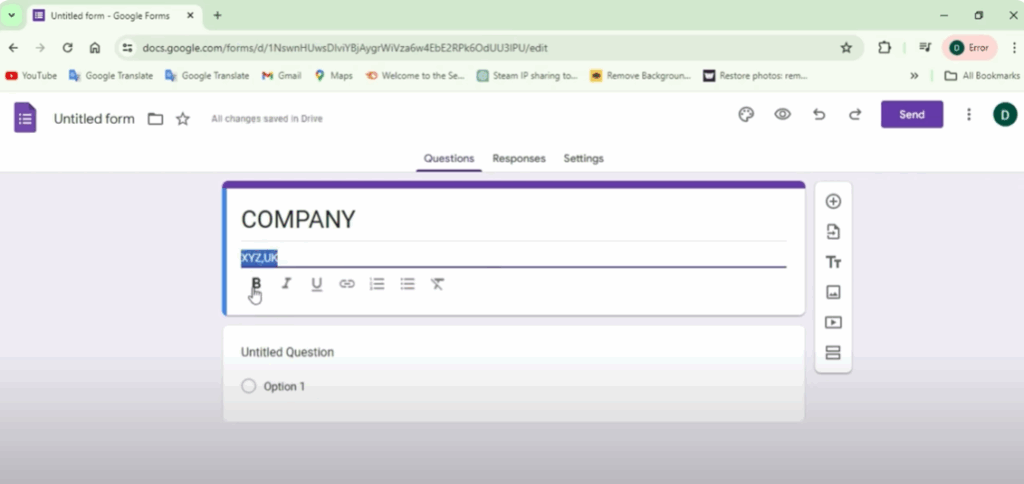
Here we have the Untitled Form.
- In the Title Section, you can mention the company name, school name, or anything else.
- In the Description Section, you can write additional details. You can use bold or italic text to customize it.
Now let’s add questions:
- For Name, since it’s a short text, it should not have multiple choice. You can also make it a required field so the form cannot be submitted without filling it.
- Click on the plus (+) sign to add more fields. For example, you can add Email and set it as a short answer, and make it required if you want.
- Add City as another short answer field.
For questions like Gender, you can add multiple choice options such as:
- Male
- Female
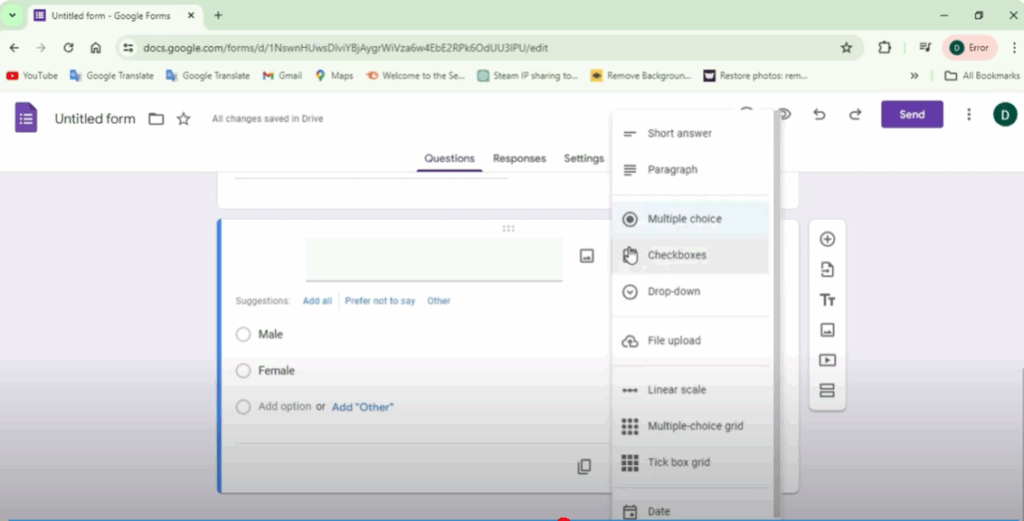
You can also add more options, make them required, or change the question type to checkbox or dropdown list.
Step 4: Settings and Response Options
On the top right corner, you will see the Responses Tab. Here you can enable or disable the option to accept responses.
Go to Settings:
- You can make the form a Quiz.
- Under Presentation, you can customize how the form appears.

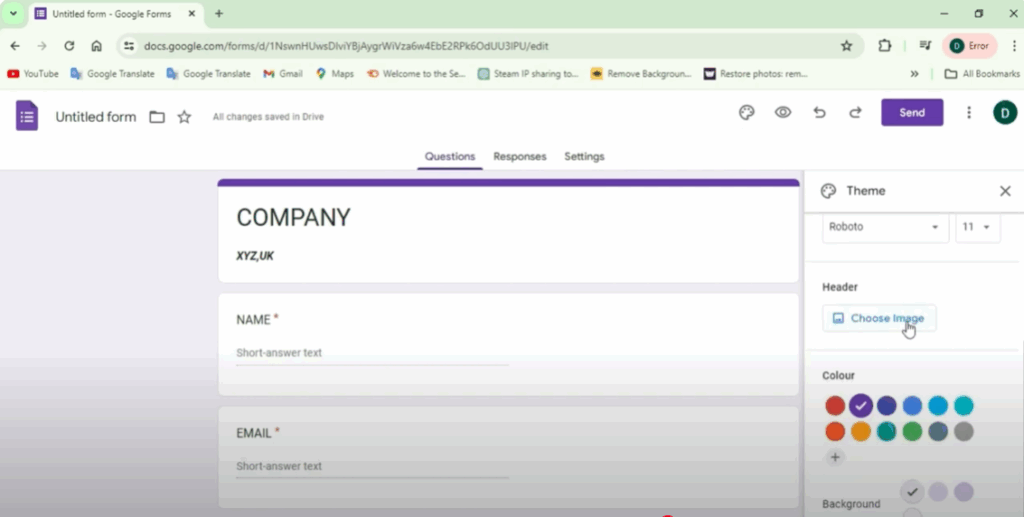
At the top, you can customize the form design:
- Change the header image (choose from themed images like Paint, etc.).
- Adjust the color scheme of the form.
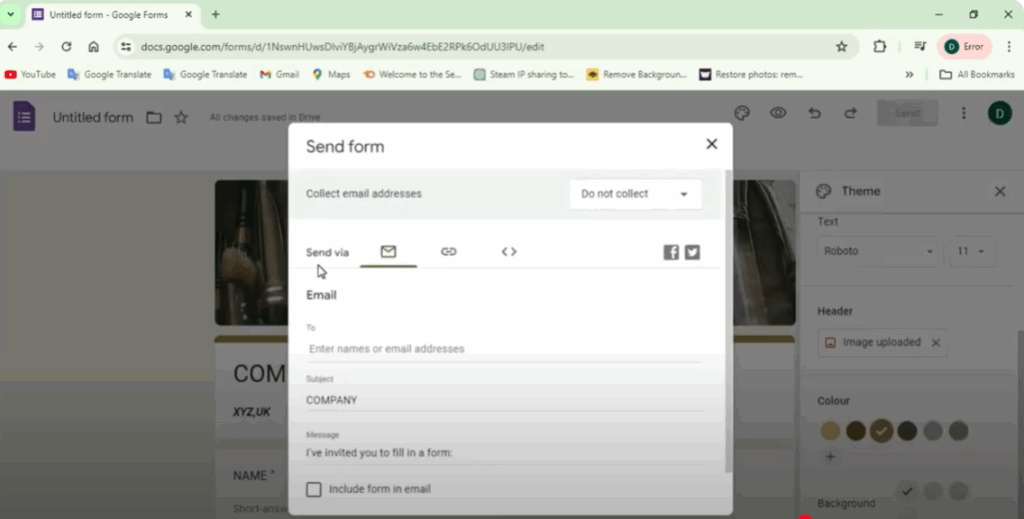
Step 5: Share the Google Form
Once your form is ready:
- Click Send.
- You can send it via email, or generate a shareable link.
- You also have the option to shorten the URL before sharing.
- Additionally, you can make a copy, print it, or embed it.
Final Words
Creating a Google Form is one of the easiest and most effective ways to collect data in 2025. Whether you’re gathering feedback, conducting surveys, or organizing events, Google Forms offers a free and user-friendly solution. With just a few clicks, you can build, share, and analyze responses—all in one place. Now that you know the steps, you’re ready to create forms like a pro and make data collection simple and stress-free.


