

If you want to take a break from Facebook without permanently deleting your account, deactivating it is a quick and simple option. Deactivating your Facebook account temporarily hides your profile, photos, and most of your activity from other users, but allows you to return and reactivate your account whenever you’re ready. This guide will walk you through each step of the Facebook account deactivation process, so you can confidently pause your social media activity while keeping all your data safe for when you want to come back.
Step 1: Open Facebook
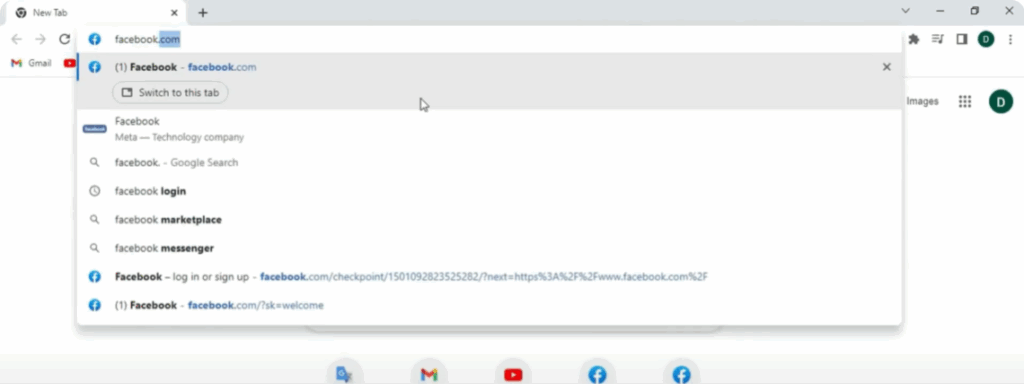
First of all, open Google Chrome or any other browser you use.
In the search bar, type Facebook.com and hit Enter.
Once the page loads, log into your Facebook account by entering your email or phone number and password.
Step 2: Open the Account Menu
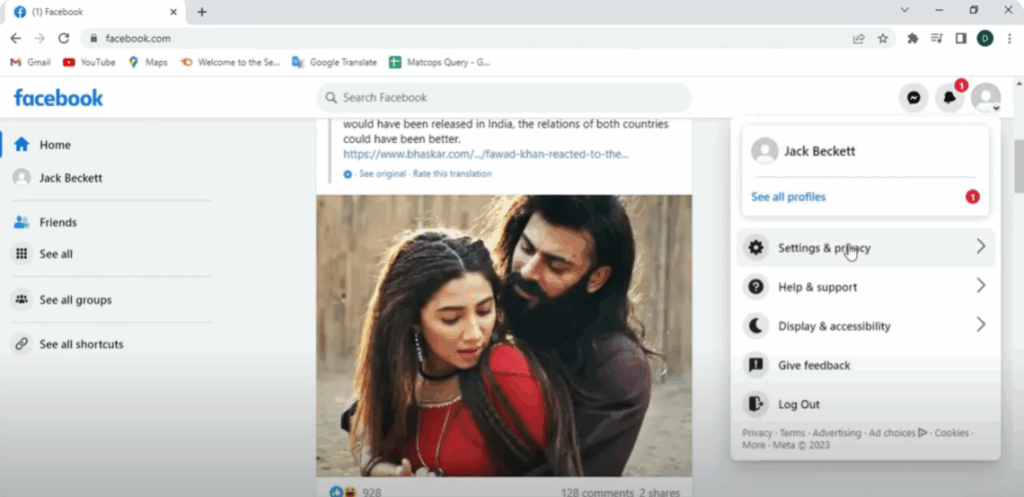
After you’re logged in, look at the top right corner of your Facebook homepage.
You’ll see your profile picture or a small down arrow icon — click on that.
This opens the account menu. From the menu that appears, click on Settings & Privacy.
Step 3: Open Facebook Settings
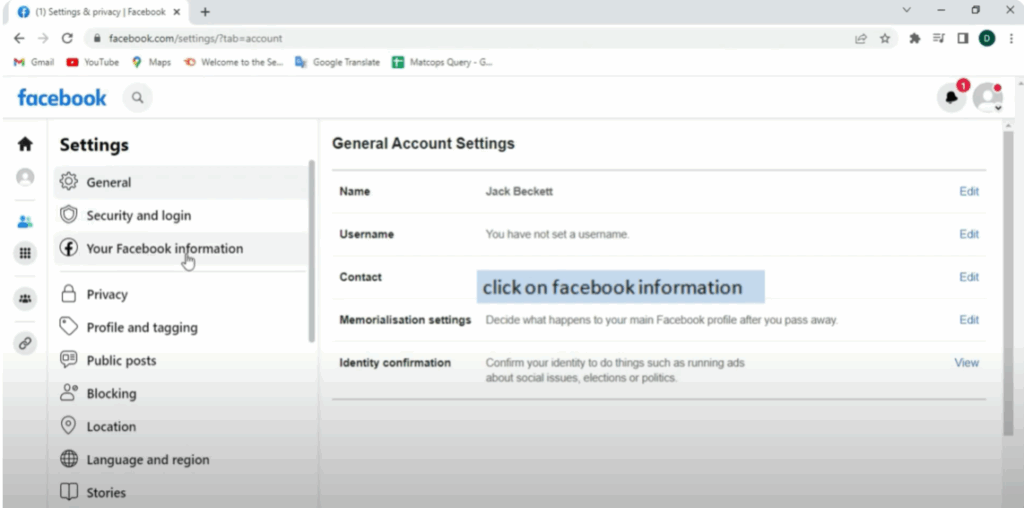
Once you click Settings & Privacy, more options will appear.
From those, select Settings.
Now you’ll be inside the settings page. On the left-hand side of your screen, there’s a list of different settings.
Look for and click on Your Facebook Information.
This is where you’ll find options related to managing your account and data.
Step 4: Go to Deactivation and Deletion
After clicking on Your Facebook Information, scroll down a little.
You’ll see an option that says Deactivation and Deletion.
Click on it.
Here, you will see two choices:
- Deactivate Account – This is temporary.
- Delete Account – This is permanent.
For now, we’ll choose Deactivate Account, which means you can come back anytime and reactivate your account.
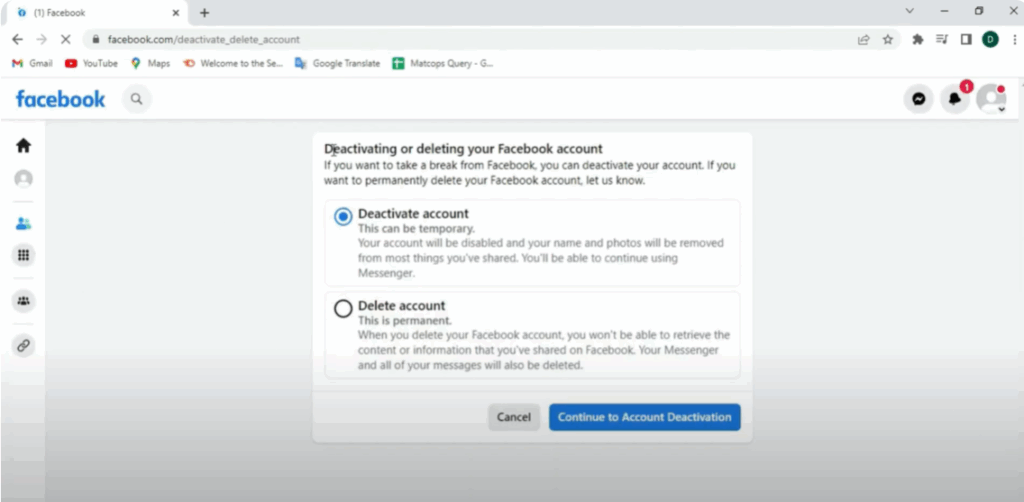
Step 5: Continue to Account Deactivation
Now, click on Continue to Account Deactivation.
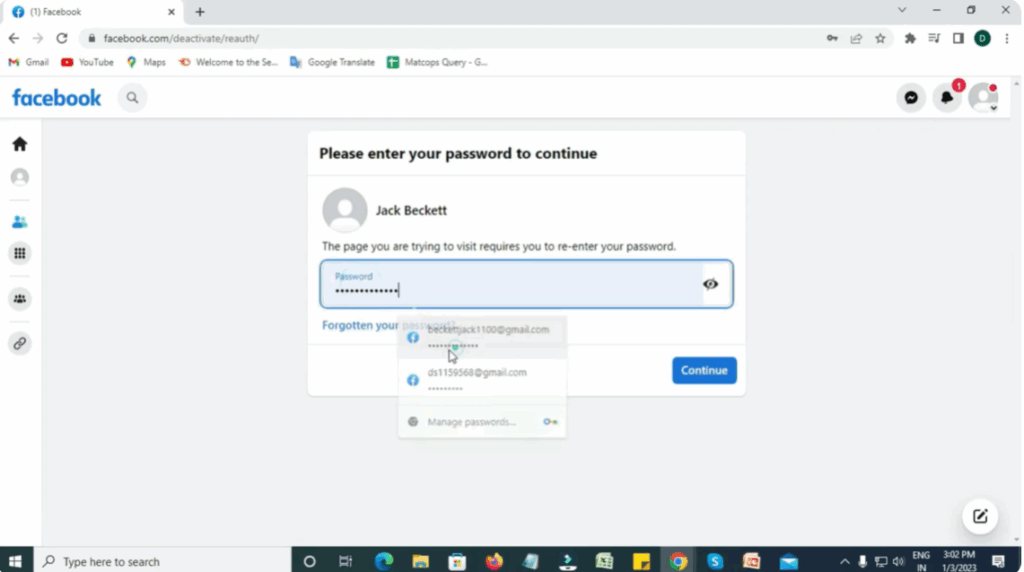
For security, Facebook will ask you to re-enter your password.
Just type your password again and click Continue.
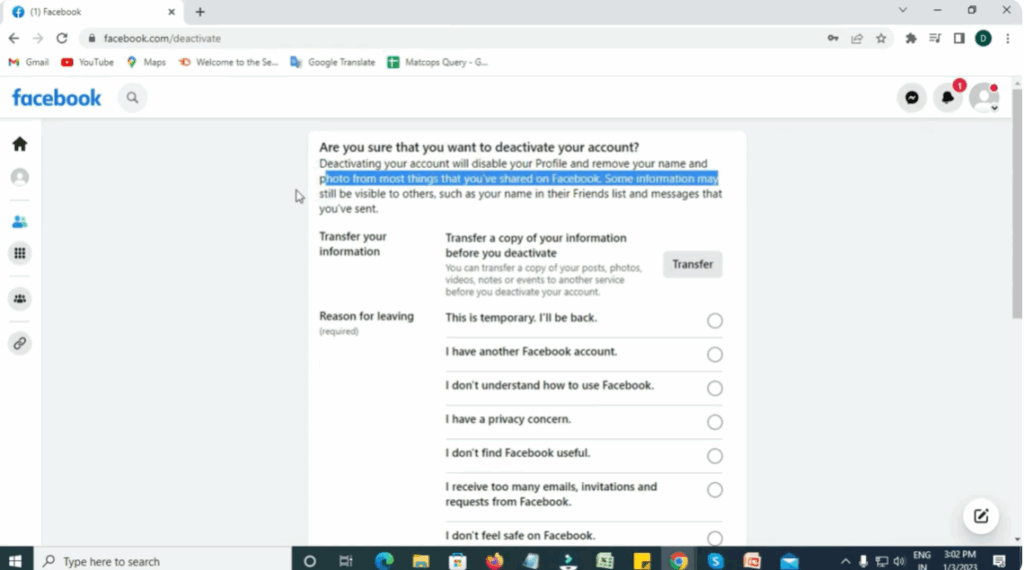
Step 6: Confirm Deactivation
After entering your password, Facebook will ask:
“Are you sure you want to deactivate your account?”
Deactivating your account will disable your profile and remove your name and photo from most things you’ve shared on Facebook.
Some information, like your name in friends’ lists or messages, may still be visible.
Choose a reason for leaving.
If you’re just taking a break, select “This is temporary. I’ll be back.”
You can also write your own reason in the text box provided.
Step 7: Manage Notifications & Messenger
Below that, there’s an option called Email Opt Out.
If you don’t want Facebook to send you emails while your account is inactive, check this box.
You’ll also see a Messenger option.
If you want to stop using Messenger too, select Deactivate Messenger.
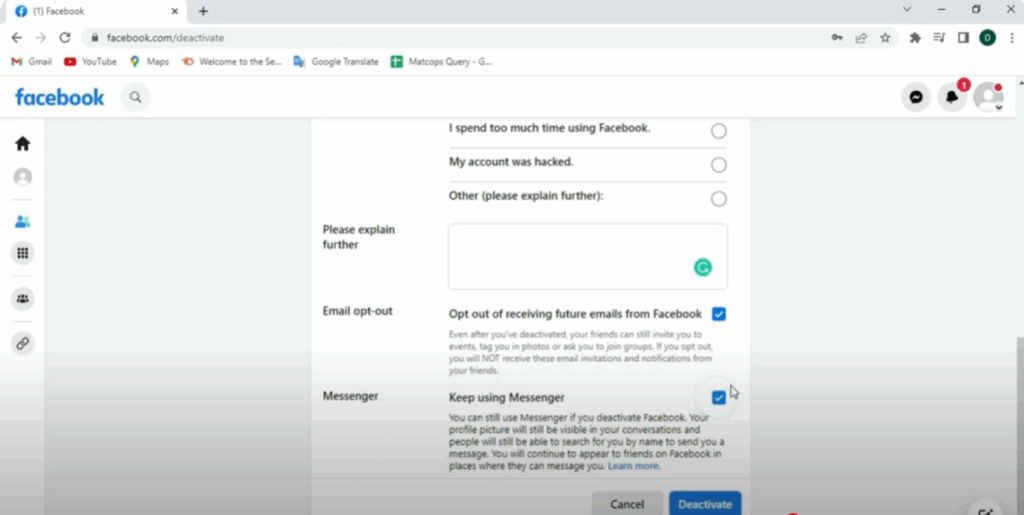
Step 8: Deactivate Your Account
Finally, click the Deactivate button.
That’s it — your Facebook account is now deactivated! 🎉
What Happens After Deactivation
Now that your account is deactivated:
- Your profile won’t be visible to others.
- Your posts and photos remain saved.
- You can always reactivate your account by logging back in anytime.


