
Need to find your device’s Hardware ID on Windows 10 or 11? It’s easier than you think! A Hardware ID helps your computer recognize devices like printers, USB drives, or graphics cards, and it’s useful when installing drivers or troubleshooting problems. You don’t need any special tools—just a few clicks in Device Manager and you’ll have the info you need. In this blog, we’ll show you how to get the Hardware ID step by step, using simple instructions anyone can follow. Let’s dive in and make tech feel easy!

✅ Step-by-Step: How to Get the Hardware ID from Device Manager
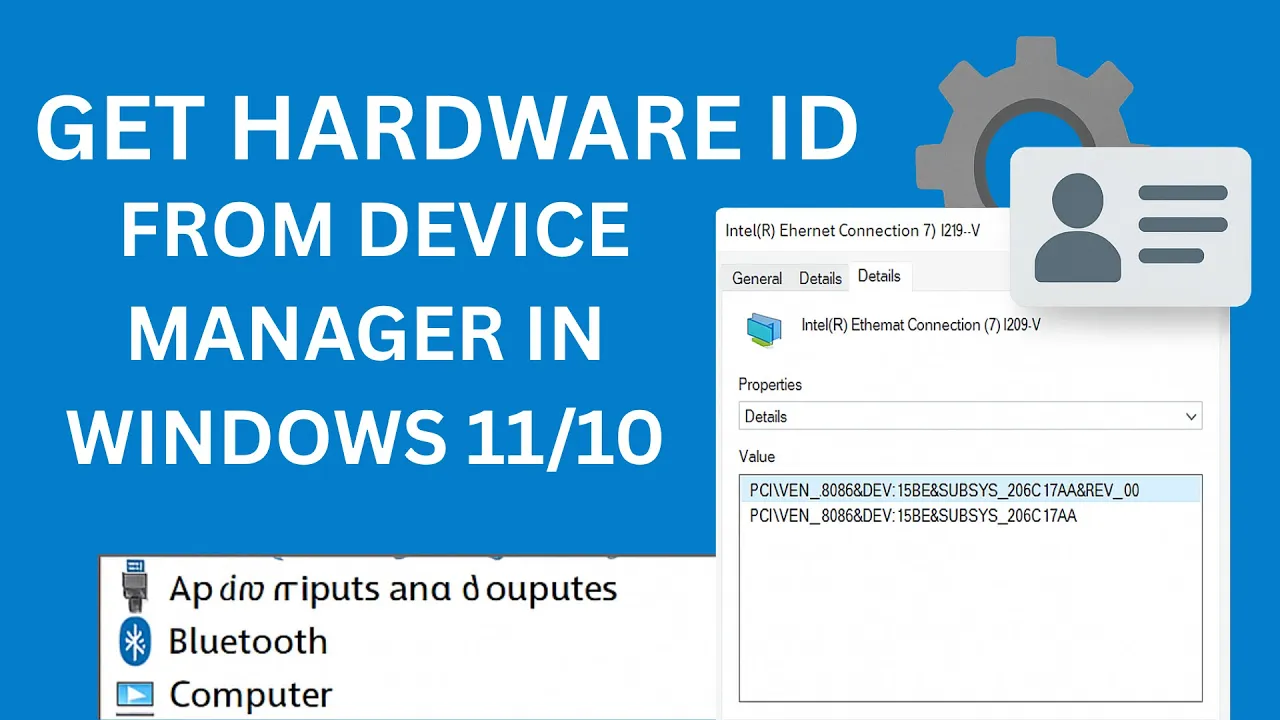
Here’s how you can find the Hardware ID for any device on your Windows 10 or 11 machine:
1. Open Device Manager
- Right-click the Start button (or press Windows + X)
- Select Device Manager
- Alternatively, press Windows + R, type
devmgmt.msc, and hit Enter
2. Locate the Device
- In Device Manager, browse the hardware categories (e.g. “Network adapters”, “Display adapters”, “Universal Serial Bus controllers”, etc.)
- Expand the category and right-click the device you want
- Select Properties
3. Go to the Details Tab
- In the Properties window, click on the Details tab
- Under Property dropdown, scroll and select Hardware Ids
- You will see one or more strings listed under “Value” — the topmost is usually the most specific ID
These strings often look like:
PCI\VEN_XXXX&DEV_YYYY&SUBSYS_...
USB\VID_XXXX&PID_YYYY&REV_ZZ
Where VEN_ is Vendor ID, DEV_ is Device ID.
4. (Optional) Use the ID to Find Drivers
- Copy one of the hardware IDs
- Search it in the manufacturer’s website or driver support sites
- Many driver download pages let you enter VID / DEV (hardware ID) to find compatible drivers


