

Tired of typing data into Excel one cell at a time? There’s a faster and easier way—use a data entry form! With Excel, you can create simple forms that make entering information quick and organized. Whether you’re managing contacts, tracking inventory, or collecting survey responses, a form helps you avoid mistakes and saves time. In this blog, we’ll show you how to create easy data entry forms in Excel, step by step. No advanced skills needed—just a few clicks and you’ll be ready to work smarter!

Step 1: Open Excel
Open your Excel and open a new workbook.
Resize your column according to your data.
Step 2: Create the Form Layout
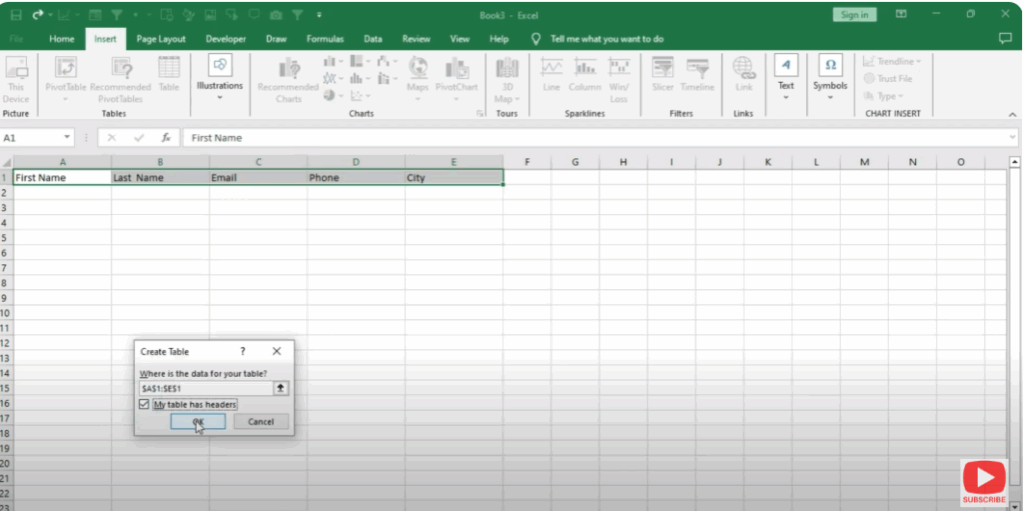
Enter the following data:
- Name
- First Name
- Last Name
- Phone
- City
Select and insert the table here.
Check “My table has headers.”
Step 3: Add the Form Button to Ribbon
Go to Insert, right-click, and click on Customize Ribbon.
Select All Commands.
Find Form and click on it.
Click on the New Tab and rename it Data Form.
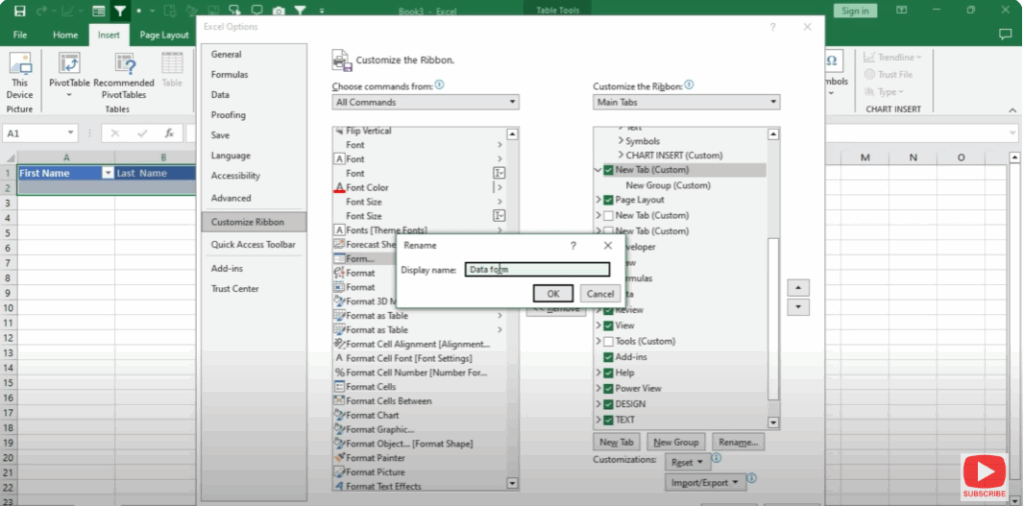
Add this form to the Ribbon.
Step 4: Use the Excel Form
Now click on Data Form and then click on Form.
Enter your data here.
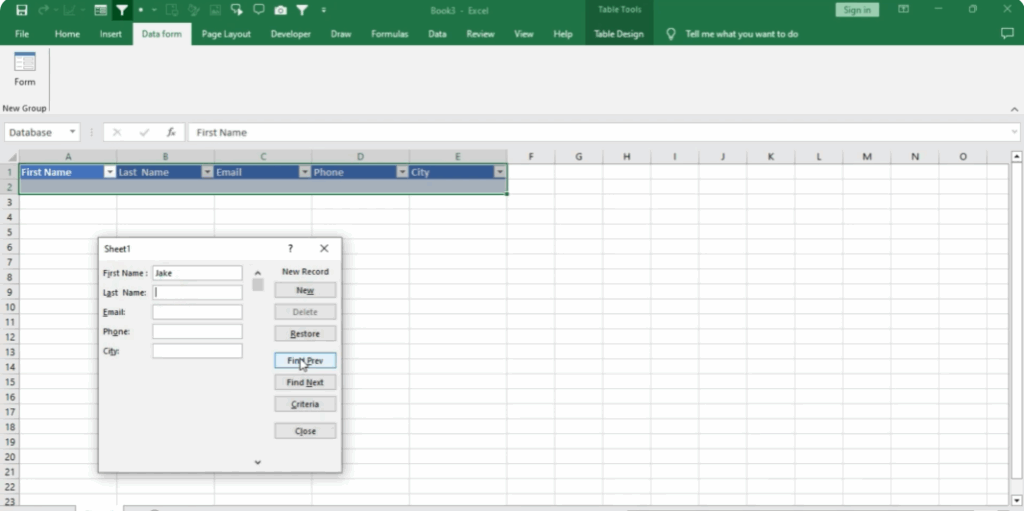
You can enter data simultaneously from here.
Whatever amount of data you have, you can enter it easily.
Doing this makes your work easier.
Click on New.


