
Want to check how well your Windows 11 PC is performing? Running a benchmark test is a great way to measure your computer’s speed, memory, and overall performance. And guess what—you can do it easily using PowerShell, without installing any extra software! Whether you’re troubleshooting issues or just curious about your system’s capabilities, this blog will guide you through how to run a performance benchmark test using PowerShell, step by step. Let’s dive in and see what your PC is really capable of!
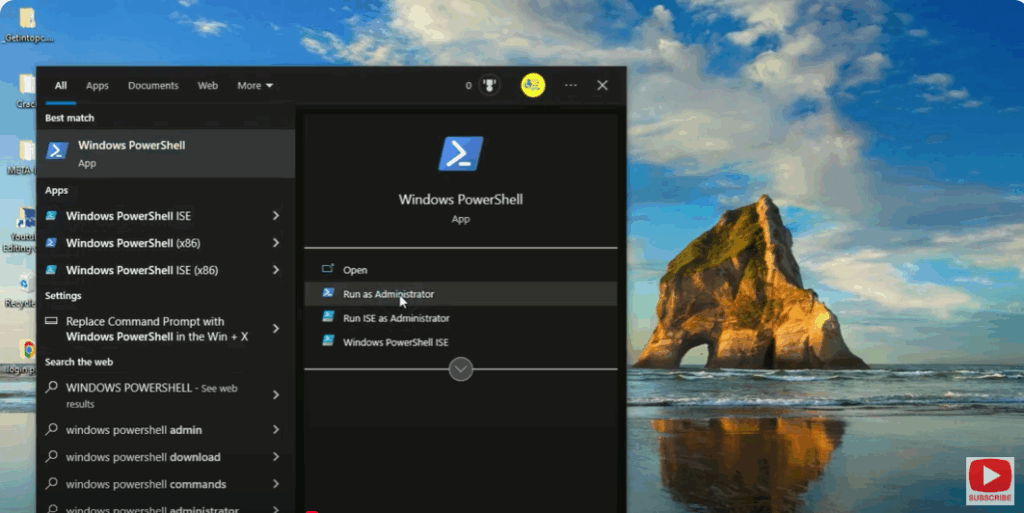
Step 1: Open Windows PowerShell as Administrator
- Click on the Search icon on your taskbar.
- Type PowerShell.
- Right-click on Windows PowerShell and choose Run as administrator.
- Click Yes when prompted by the User Account Control (UAC).
Step 2: Run the Performance Test Command
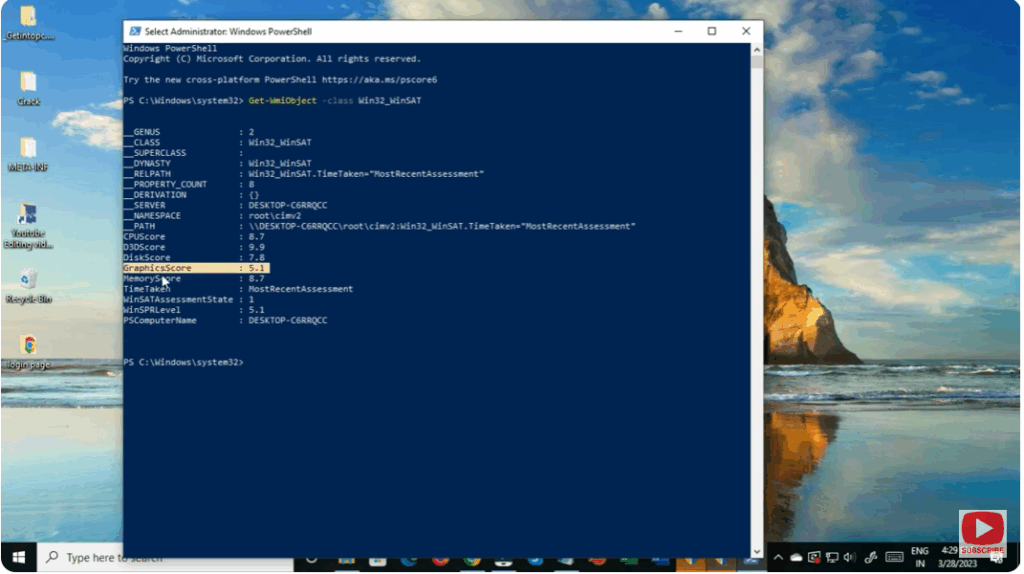
Once the PowerShell window opens, type the following command and press Enter:
winsat formal
This command starts a Windows System Assessment Tool (WinSAT) test.
It checks different hardware components — like CPU, memory, disk, graphics, and system performance.
Step 3: Wait for the Test to Complete
The system will now begin running multiple performance tests.
You’ll see various progress messages such as:
- Running CPU Assessment
- Running Memory Assessment
- Running Disk Assessment
This process may take several minutes, depending on your system speed.
Step 4: View Benchmark Results
Once the test is complete, you’ll see a summary in the PowerShell window.
You can also view detailed results by navigating to:
C:\Windows\Performance\WinSAT\DataStore
Open the latest XML file in that folder using a web browser or text editor to see complete benchmark data for your system.
Step 5: Analyze the Results
You’ll find performance scores for various components.
- CPU Score – measures processing power.
- Memory Score – shows RAM performance.
- Disk Score – tests read/write speed.
- Graphics Score – checks video performance.
These results can help you identify if any component is underperforming or needs an upgrade.
✅ Conclusion
Using PowerShell to run a Windows 11 performance benchmark test is a simple yet powerful method to evaluate your computer’s capabilities. The winsat formal command gives detailed insights into CPU, memory, and disk efficiency, allowing you to troubleshoot issues or compare system performance after hardware changes.


