
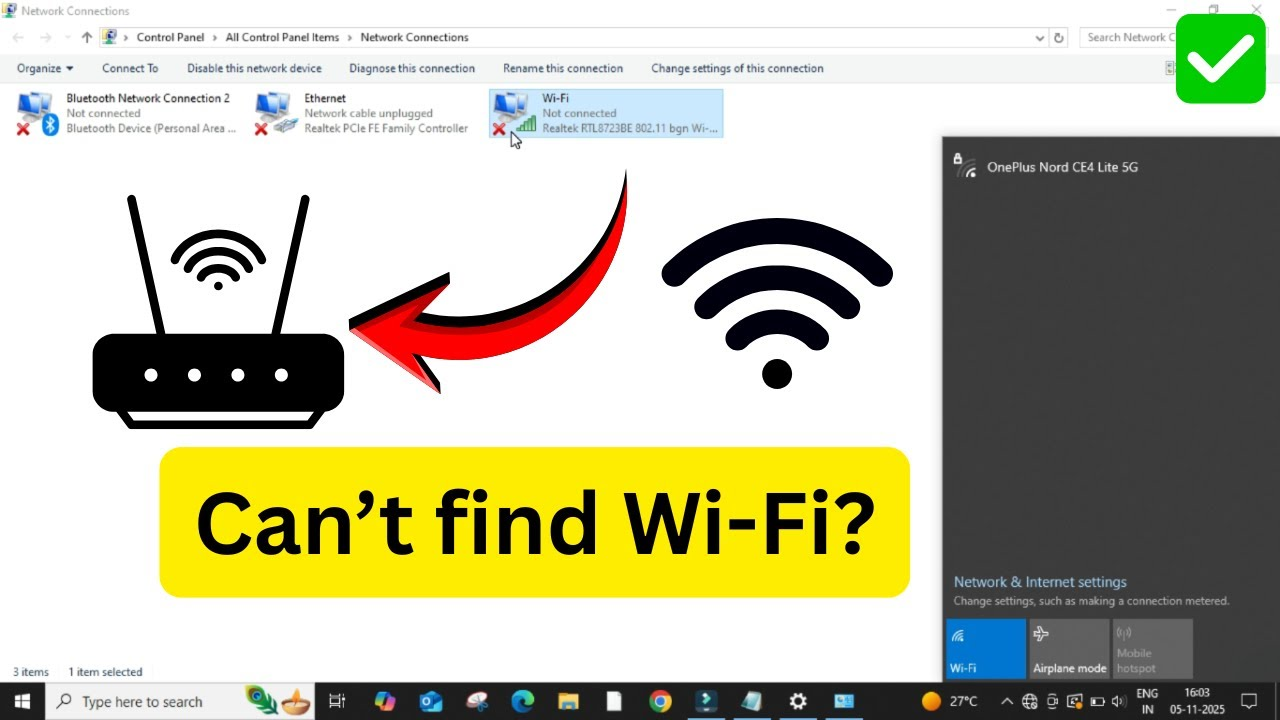
Struggling to connect your laptop or PC to Wi-Fi on Windows 10 or 11? Sometimes you might see the message “No networks found”, even though your router is working fine. This can be really annoying when you need the internet for work, study, or entertainment. The good news is, these problems are usually caused by simple settings or driver issues—and they can be fixed quickly. In this blog, we’ll guide you through easy steps to solve Wi-Fi connection problems so you can get back online without hassle.

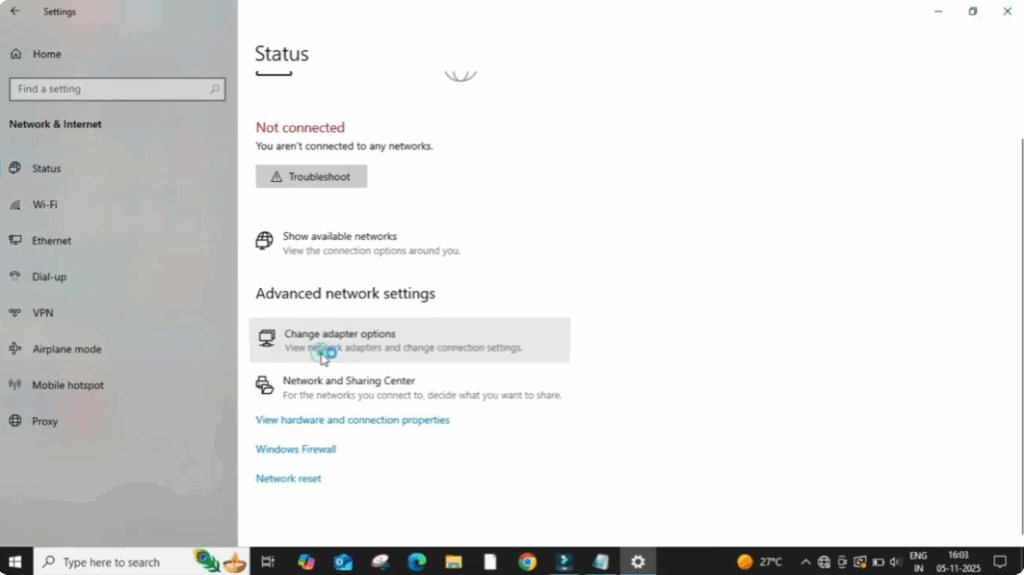
First, click on the Start menu, then select Settings.
Next, click on Network and Internet and then select Change Adapter Options.
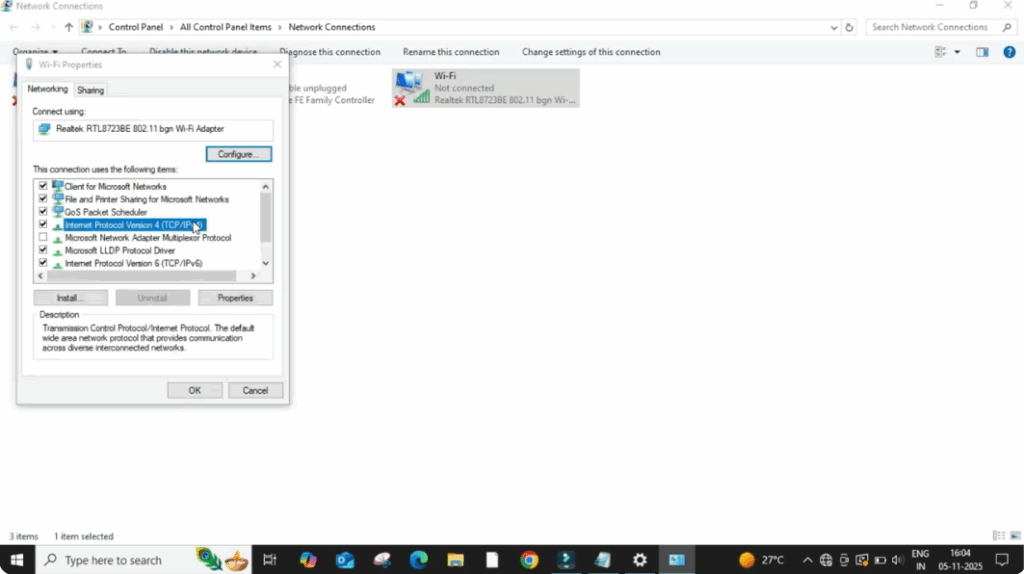
Here, right-click on your Wi-Fi connection and select Properties.
Now, double-click on Internet Protocol Version 4 (TCP/IPv4).
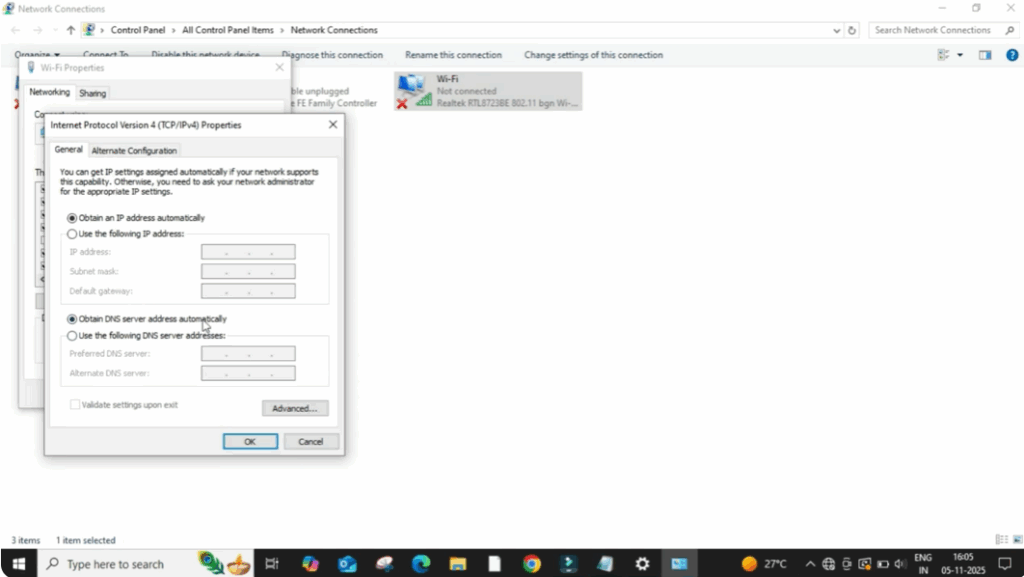
Make sure the options Obtain an IP address automatically and Obtain DNS server address automatically are both selected.
Click OK and close all windows. Try reconnecting to your Wi-Fi.
If it doesn’t work, move to the next step.
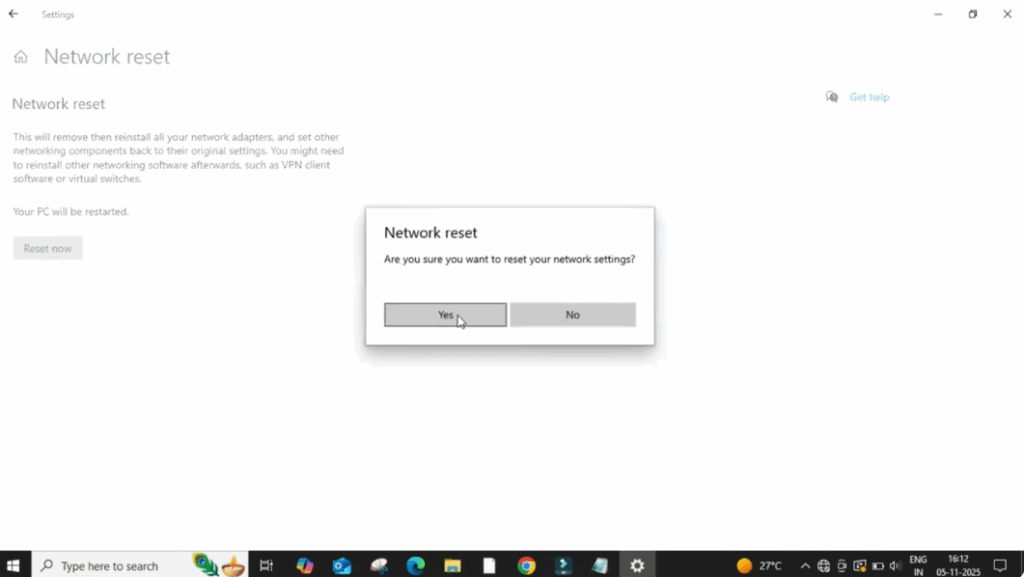
Scroll down and click on Network Reset.
Now click Reset Now and confirm by clicking Yes.
Your system will restart and all network settings will be restored. After restarting, try connecting to Wi-Fi again.
If the issue remains, continue to the next fix.
Click on the Search bar, type CMD, then right-click and select Run as Administrator.
Now type the following commands one by one and press Enter after each:
netsh winsock reset
netsh int ip reset resetlog.txt
ipconfig /flushdns
After this, restart your computer and check if Wi-Fi works.
If not working, then try the next method.
Press Windows + R and type devmgmt.msc, then hit Enter.
This will open Device Manager.
Click on Network Adapters. Then right-click on your Wi-Fi adapter.
Select Update Driver. Then click Search Automatically for Drivers.
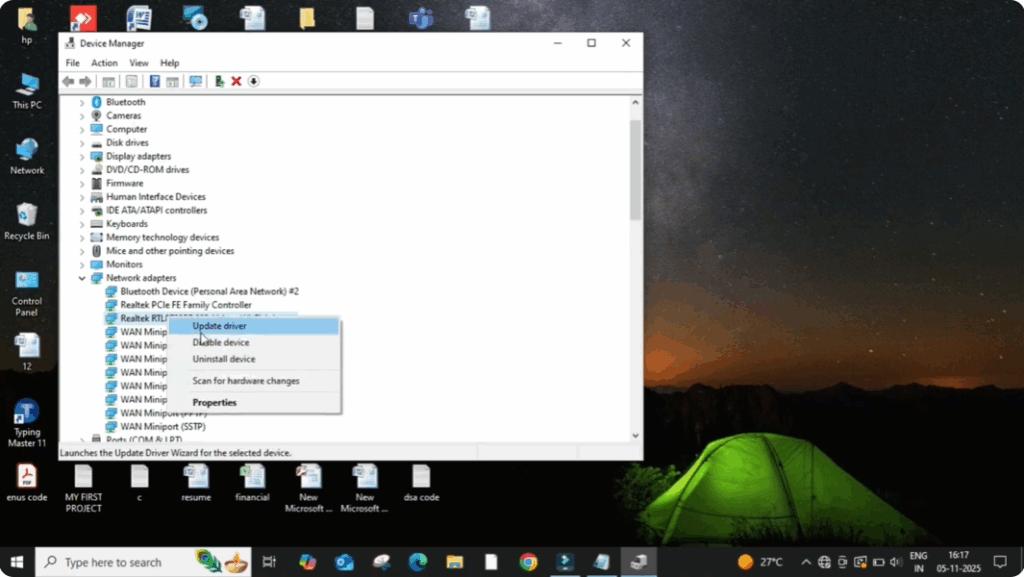
Wait for the process. If it says Best drivers already installed, close it.
Now try connecting to Wi-Fi again. Your Wi-Fi should start working properly.


