

In Windows, you might have noticed that some menus show certain letters underlined—these are called access keys, and they let you quickly open options using your keyboard instead of the mouse. By default, Windows may hide these underlines until you press the Alt key, which can be confusing if you’re not used to it. The good news is, you can easily change a setting to always show access key underlines in menus. In this blog, we’ll explain how to enable or underline access keys in Windows menus step by step, so navigating becomes faster and easier.
🛠 Step-by-Step: Enable Always Underline Access Keys
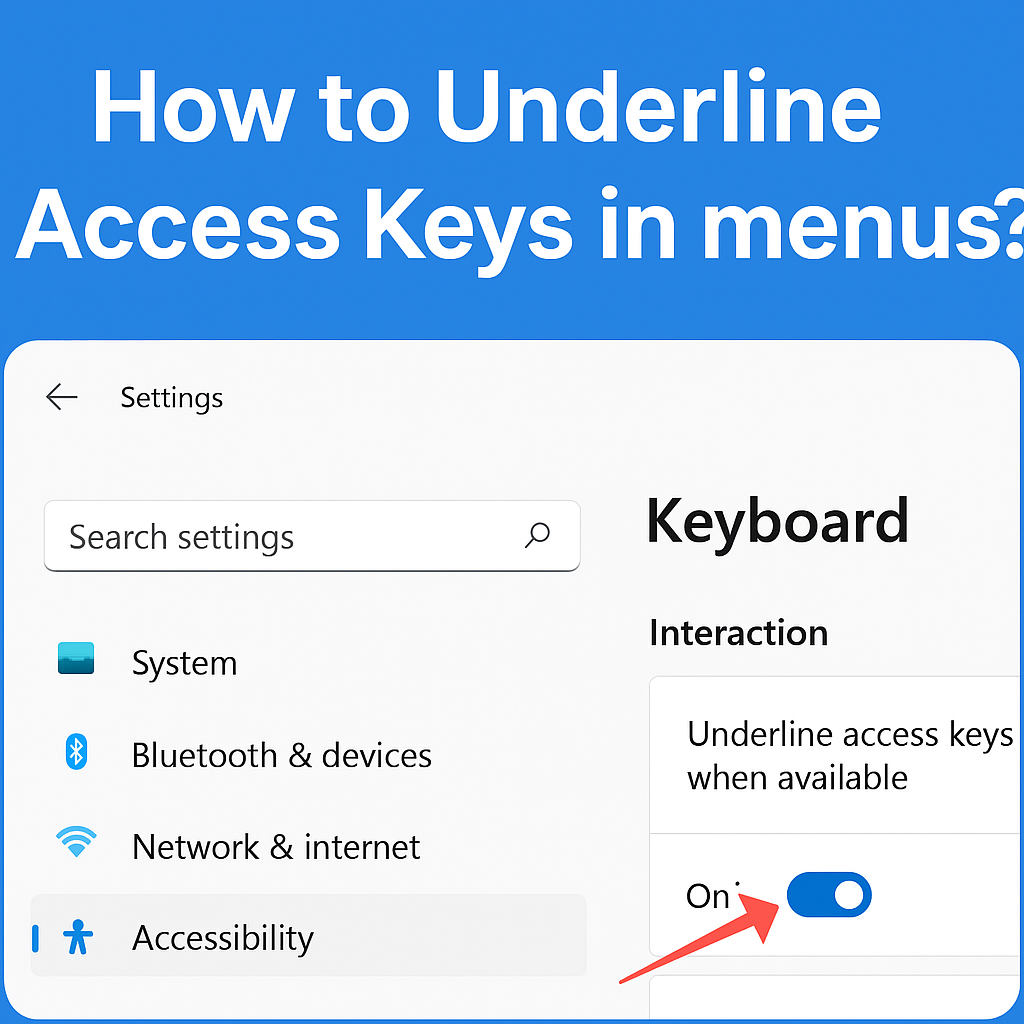
Step 1: Open Settings (Windows 11)
- Press Windows key + I to open Settings.
- In the search bar, type “Keyboard accessibility” or “Underline access keys”.
Step 2: Navigate to Access Key Settings
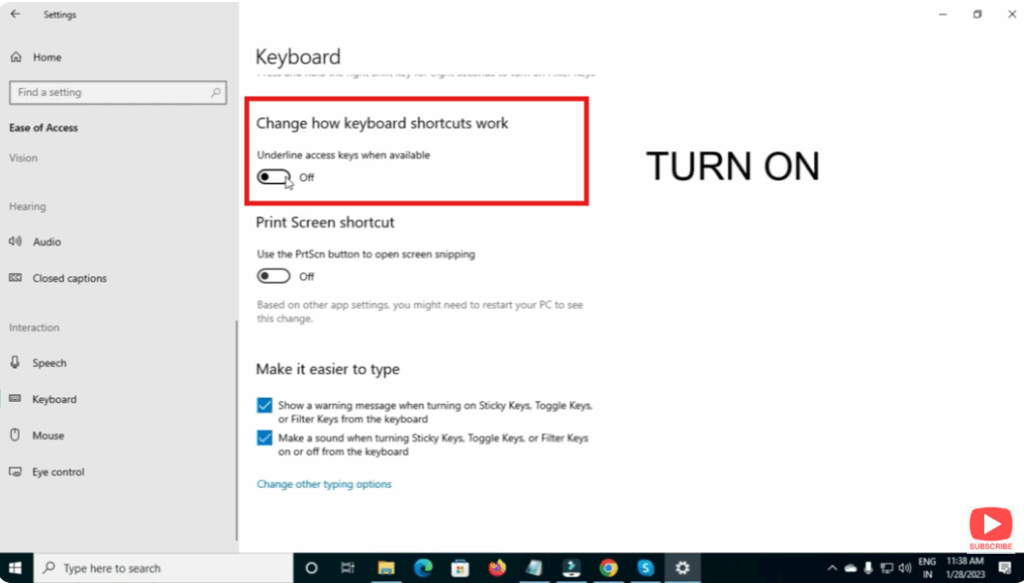
- In Settings, go to:
Accessibility → Keyboard (or “Interaction → Keyboard” depending on your version). - Scroll down to find “Underline access keys when available” (or similar wording).
- Toggle this switch to On.
✅ Summary
Underlining access keys in menus in Windows makes keyboard navigation faster and more accessible. Whether you enable the feature via Settings → Accessibility → Keyboard on Windows 11 or the Ease of Access Center on Windows 10, the steps are straightforward. Once enabled, you’ll see underlined letters for menu commands and can execute them with Alt + key combinations quickly.


