
If your internal microphone is missing in Windows 11 or 10, it can be frustrating when you need it for calls, meetings, or recording. This problem often happens because the mic is disabled, hidden, or there’s a driver issue. Luckily, with simple steps like running the Windows troubleshooter, checking device settings, and enabling hidden devices, you can get your microphone working again without much hassle. In this blog, you’ll learn easy ways to fix a missing internal microphone and restore your PC’s audio features.
🛠 Step-by-Step Solutions
1. Check Microphone Privacy & Access Settings
- Open Settings → Privacy & security → Microphone.
- Make sure Microphone access is turned On.
- Ensure Let apps access your microphone is On, and optionally Let desktop apps access your microphone.
- Also check Settings → System → Sound → Input and verify that an input device is selected.
If the mic still doesn’t appear, move to the next step.
2. Show Hidden or Disabled Devices in Device Manager
- Press Windows + X → Device Manager.
- Expand Audio inputs & outputs and Sound, video and game controllers.
- Right-click empty space → choose Show hidden devices.
- If you see your internal mic device grayed out or with a downward arrow, right-click → Enable device.
- If you see a yellow exclamation icon, the driver may be faulty – go to next step.
3. Update or Reinstall Audio & Microphone Drivers
- In Device Manager, locate your audio device (e.g., “Microphone Array”, “Intel Smart Sound Technology Audio Controller”) and right-click → Update driver. Choose “Search automatically”.
- If update fails, choose Uninstall device (check “Delete the driver software for this device” if offered). Then restart your PC—Windows should reinstall the driver automatically.
- After reinstalling, check if mic returns under Settings → System → Sound → Input.
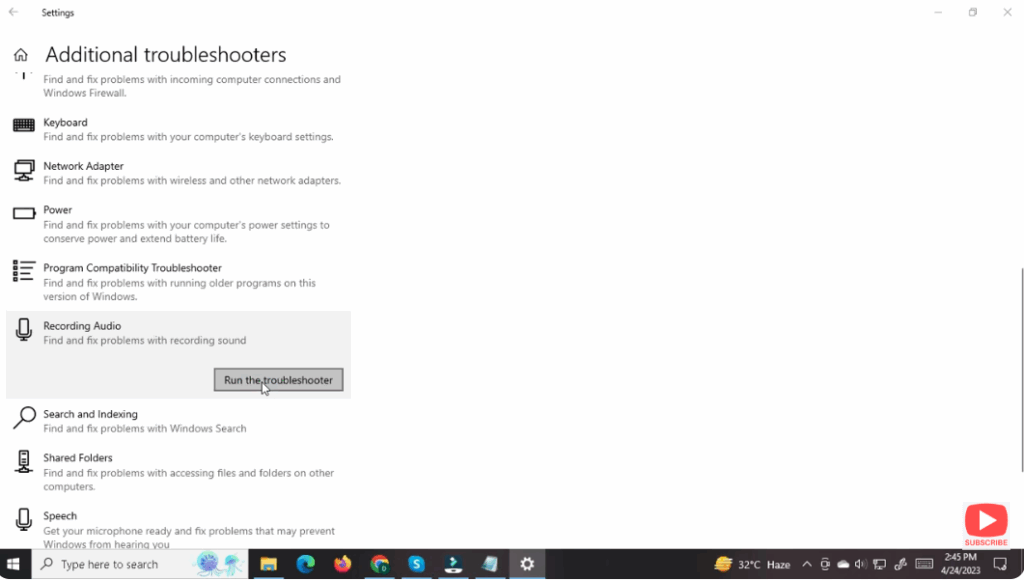
4. Run the Recording Audio Troubleshooter
Windows has a built-in troubleshooter for mic issues.
- Go to Settings → System → Troubleshoot → Other troubleshooters.
- Find Recording Audio, click Run. Follow the prompts.
- Restart your PC and test the mic again.
5. Verify Manufacturer-Specific Audio Controller & Firmware
Some laptops use specialized audio controllers (like Intel Smart Sound). If they’re missing, the mic may disappear.
- Open Device Manager and confirm such devices exist under “System devices” or “Audio inputs & outputs”.
- Visit your laptop manufacturer’s support website, look up your model and ensure all audio drivers and firmware are installed.
- After installing, reboot and check the mic.
6. Set the Internal Microphone as Default and Verify Input Levels
- Open Settings → System → Sound → Input.
- Under “Choose a device for speaking or recording”, ensure your internal mic is selected.
- Click Device properties, go to Levels and ensure volume is not muted or set to zero.
- Speak into the mic and check if the “Test your microphone” blue bar moves.
7. Roll Back Recent Windows or Driver Updates
If the mic issue appeared after a Windows update:
- Open Settings → Windows Update → Update history → Uninstall updates.
- Or in Device Manager, right-click the audio driver → Properties → Driver tab → Roll Back Driver.
Then restart and test the mic.
📝 Final Thoughts
An internal microphone missing in Windows 11 or Windows 10 is often caused by driver issues, disabled devices, or privacy settings. By systematically checking access permissions, device visibility, drivers, and default settings, you can resolve the vast majority of such problems.
If the mic still doesn’t appear after trying all of the above, it could indicate a hardware fault (especially in older laptops). In that case, contact your device manufacturer for service.
Once your mic is back, remember to test it and ensure your audio settings are correct for the apps you use.


