
The internet works by using DNS (Domain Name System) to turn website names into addresses your computer understands. But normally, these DNS requests aren’t private—they can be seen by others on the network. To solve this, Windows 11 includes a feature called DNS over HTTPS (DoH), which makes your browsing more secure by encrypting those requests. The good news is, turning it on is simple and helps protect your privacy online. In this blog, we’ll explain in easy steps how to use the DNS over HTTPS feature in Windows 11, so you can browse the web with extra safety.
🛠 How to Turn On DoH in Windows 11
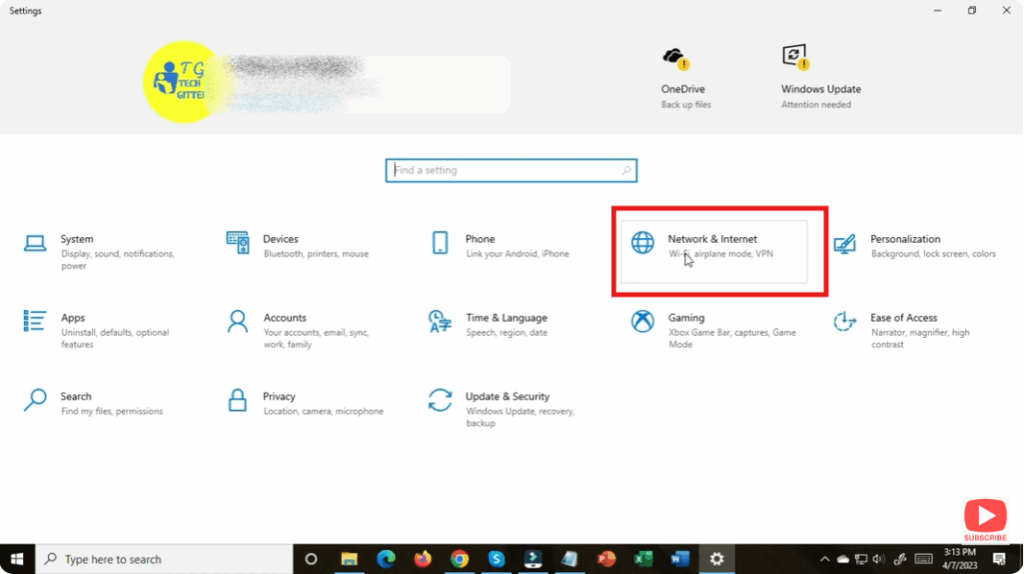
Here’s how to enable DNS Over HTTPS on Windows 11 using the built-in system settings:
- Open Windows Settings
- Press
Win + Ito open Settings. - Navigate to Network & Internet → then click on your active connection (e.g. Wi-Fi or Ethernet).
- Press
- Go to Hardware Properties
- In your network connection’s settings, click Hardware Properties.
- Edit DNS Settings
- Under “DNS Server Assignment,” click Edit.
- Change from Automatic to Manual to allow custom DNS configuration.
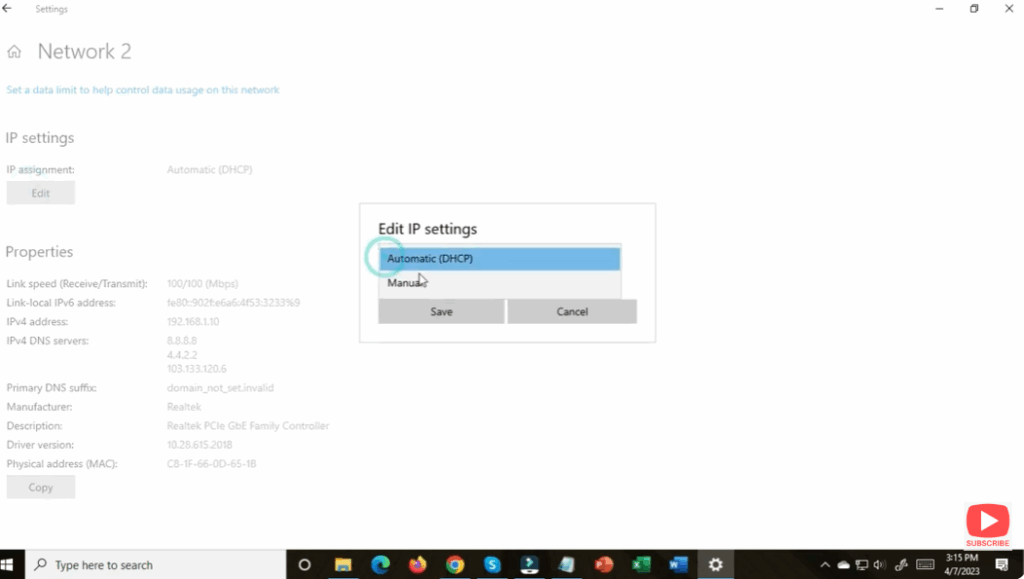
- Enter DNS Server Addresses
- Enable IPv4 and/or IPv6 depending on your setup.
- Input the DNS addresses for a DoH-capable provider. For example:
- Cloudflare: 1.1.1.1 / 1.0.0.1
- Google: 8.8.8.8 / 8.8.4.4
- Quad9: 9.9.9.9 / 149.112.112.112
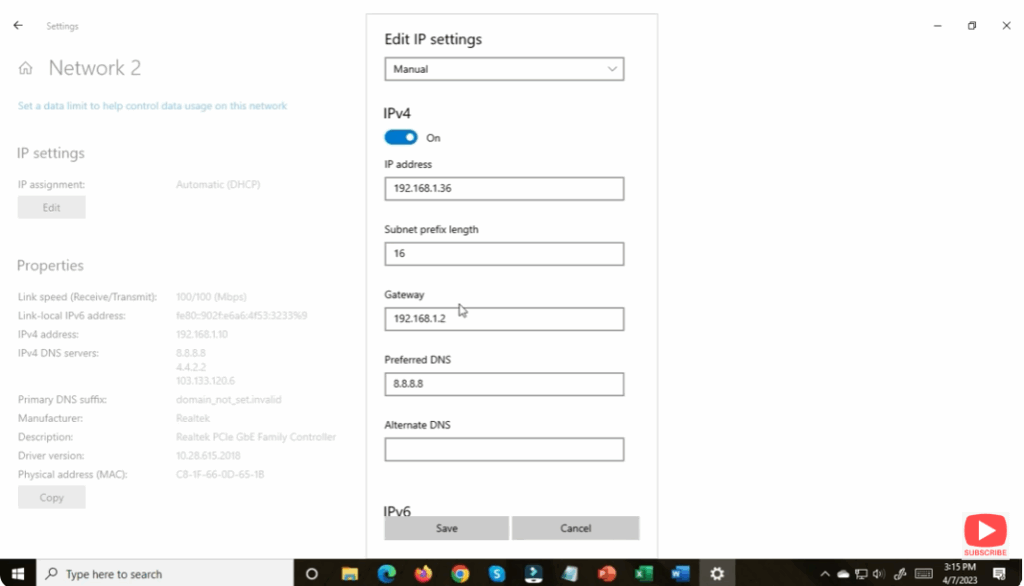
- Enable DNS Over HTTPs Toggle
- In the same DNS settings, look for the option DNS over HTTPS (DoH) and toggle it to On.
- Save Your Changes
- Click Save to apply your new DNS settings.
- After applying, you should see “(Encrypted)” next to your DNS server entries — this means DoH is active.
✅ Final Thoughts
Enabling DNS over HTTPS in Windows 11 is a quick and effective way to boost your privacy and protect your DNS queries from eavesdropping or tampering. With just a few clicks in Settings, you can switch to a secure DNS provider that supports encryption — giving you stronger privacy without needing third-party tools.
Once enabled, your computer’s DNS lookups happen over an encrypted HTTPS channel, helping you browse with greater security and peace of mind.


