

Creating a QR code in Excel is easier than you might think! A QR code is a small square image that stores information like links, text, or numbers, and when scanned with a phone, it quickly shows that data. Instead of using separate apps or websites, you can generate QR codes directly inside Excel with the help of formulas or add-ins. This is super useful for sharing links, product details, or tracking information right from your spreadsheet. In this beginner-friendly blog, we’ll explain in simple language how to create a QR code in Excel step by step, so you can make your data more interactive.

✅ Simple Way to Create QR Codes in Excel
🔌 Method 1: Use a Free Add-in — e.g. QR4Office
If you don’t want formulas or want easier manual control, you can install a QR-code add-in:
Steps:
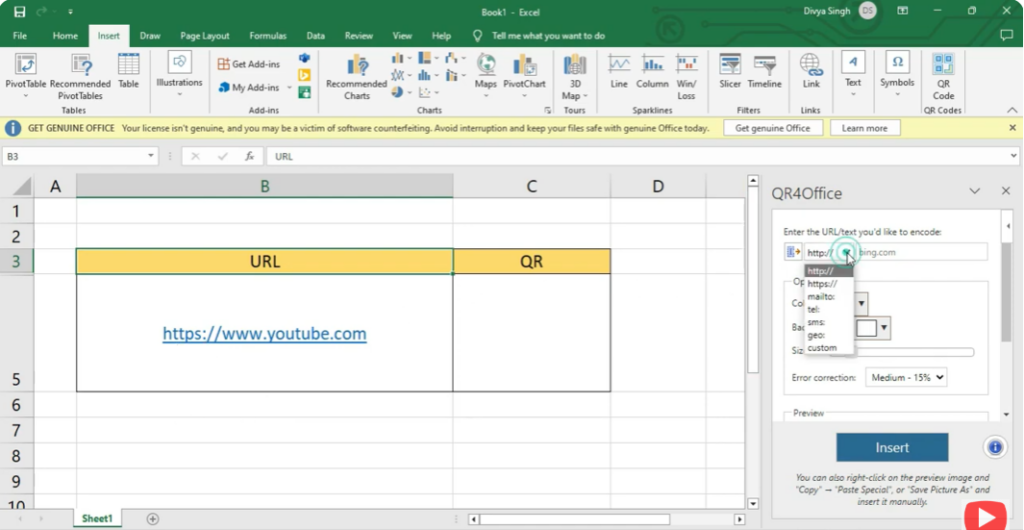
- In Excel, go to Insert → Get Add-ins.
- Search for “QR4Office” → Add it to Excel.

- Once added, a pane appears (often on the right side). Use it to input the data you want encoded (URL, text, contact info, etc.).
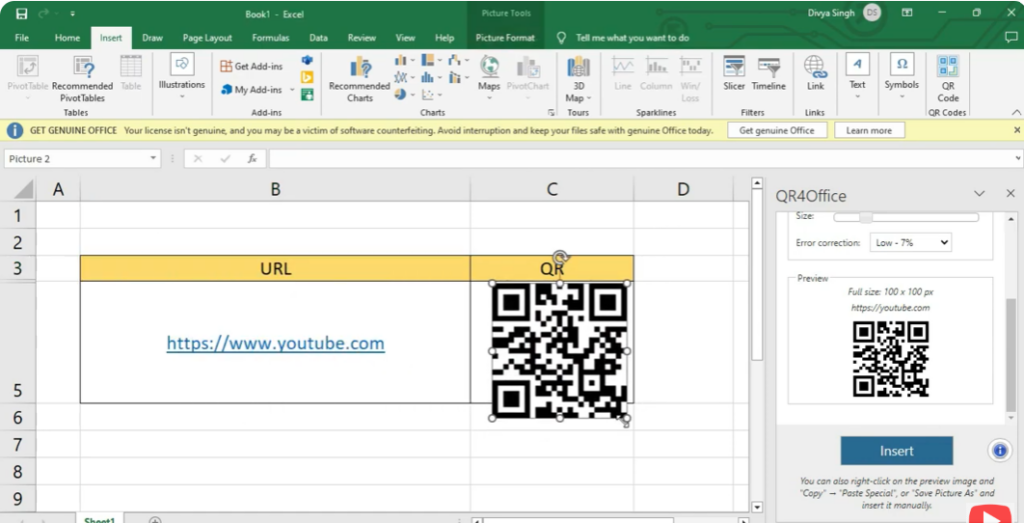
- Generate the QR — the add-in will insert the QR code image into your spreadsheet; you can resize or move it as needed.
Pros: Easy interface, no need to remember formulas, good for manual or occasional QR generation.
Cons: Requires installation; may depend on Excel version; may need internet depending on add-in specifics.
✅ Final Thoughts
Creating QR codes in Excel is easier than many expect — with either a simple formula + free API, a handy add-in, or external generators. It opens up lots of possibilities: from sharing URLs directly, embedding contact or product info, to building printable labels or digital data-sharing workflows.


