
Adding a timer to a PowerPoint slide is a smart way to keep track of time during presentations. It helps you stay on schedule, whether you’re giving a lecture, running a quiz, or managing a meeting. A timer can also make your slides more interactive and engaging by showing the audience how much time is left. The good news is, PowerPoint makes it easy to add a timer with just a few simple steps. In this beginner-friendly blog, we’ll explain in easy language how to add a timer to a PowerPoint slide step by step, so you can present with confidence.
1. Use a Timer Add-In
- In PowerPoint, go to the Insert tab → Get Add-ins (or “My Add-ins”).
- Search for a “timer” or “countdown timer” add-in — for example, many users use add-ins like Breaktime.
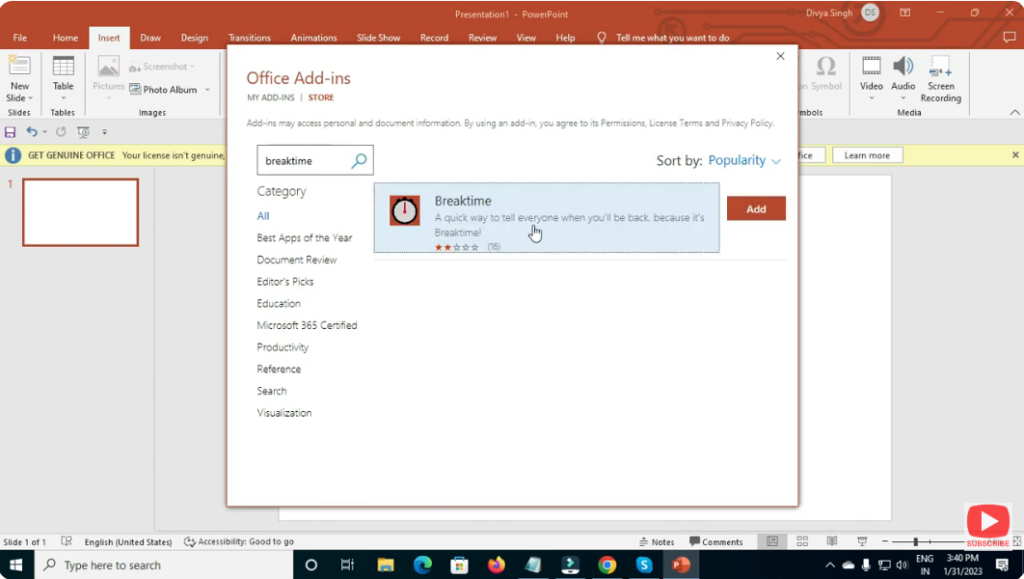
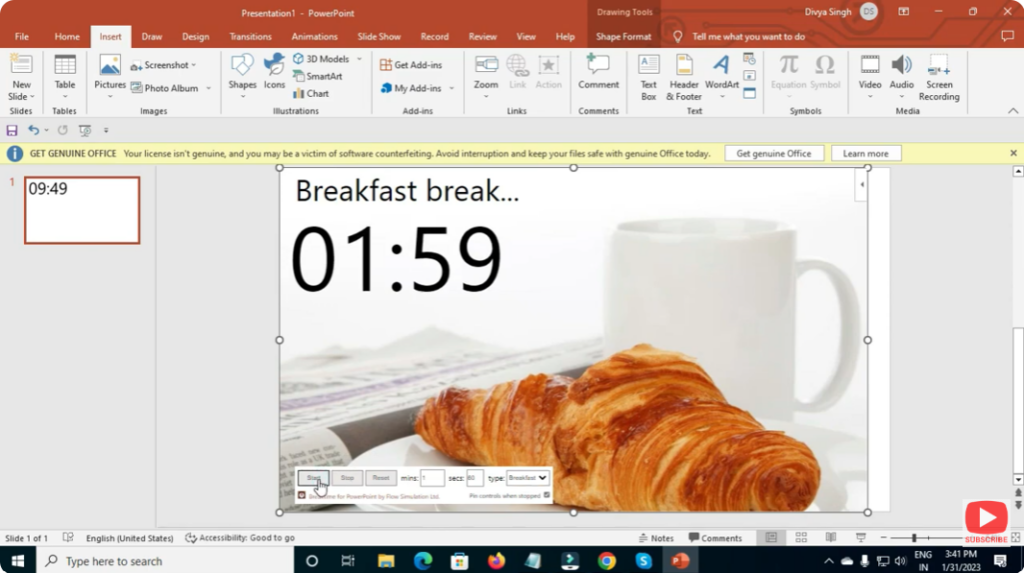
- Install the add-in. Then configure the timer: set the duration (minutes/seconds), choose style (digital display, radial, etc.), position on slide, and font/color options.
- When you start your slideshow, the timer will run automatically (or when you trigger it), visible to your audience.
✅ Final Thoughts
Adding a timer to a PowerPoint slide — whether for countdowns, classroom quizzes, timed tasks, or just managing presentation time — is definitely possible, though not built-in by default.
With a bit of creativity — using add-ins, video timers, animations, or slide timings — you can make your presentation both time-aware and interactive.


