

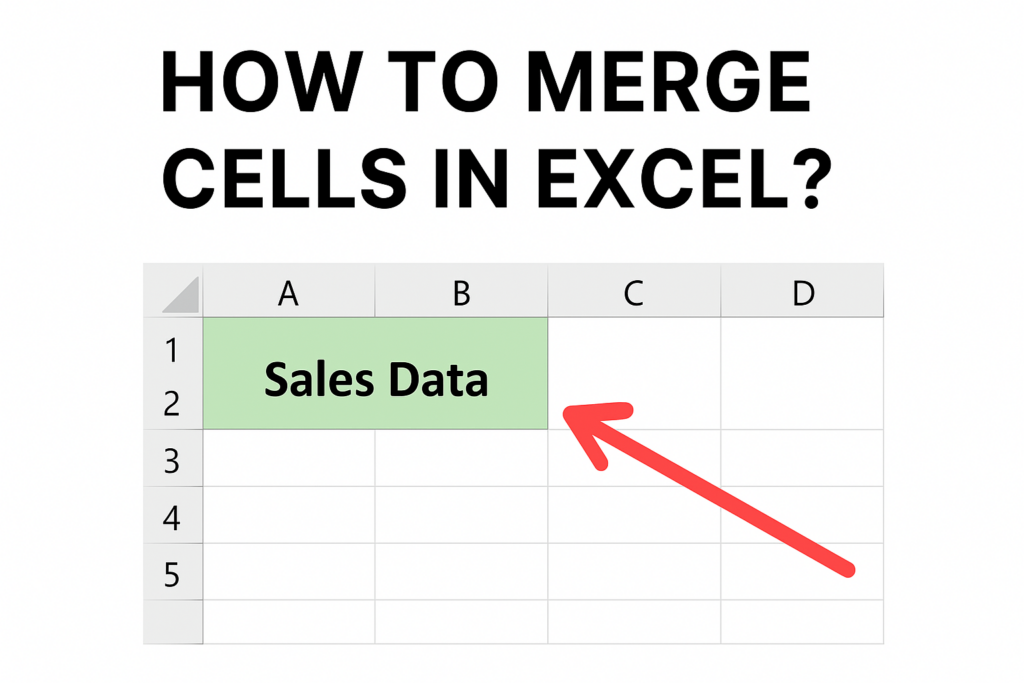
Merging cells in Excel helps you combine two or more cells into one, making your tables and reports look neat and organized. It’s useful for creating headings or formatting sections clearly. In this blog, you’ll learn easy steps on different ways to merge cells in Excel, including using the Merge & Center feature, merging without centering, and unmerging cells to keep your worksheet tidy and professional.
✅ Step-by-Step: How to Merge Cells in Excel
Here’s how to merge cells the standard way using Excel’s built-in tools.
- Select the cells you want to combine
- Click and drag to highlight a range of adjacent cells (horizontal, vertical, or both).
- Go to the Home tab → Alignment → Merge & Center
- On the Excel ribbon, under the Home tab, locate the Alignment group.
- Click the small arrow next to Merge & Center — this opens a menu with multiple merge options.
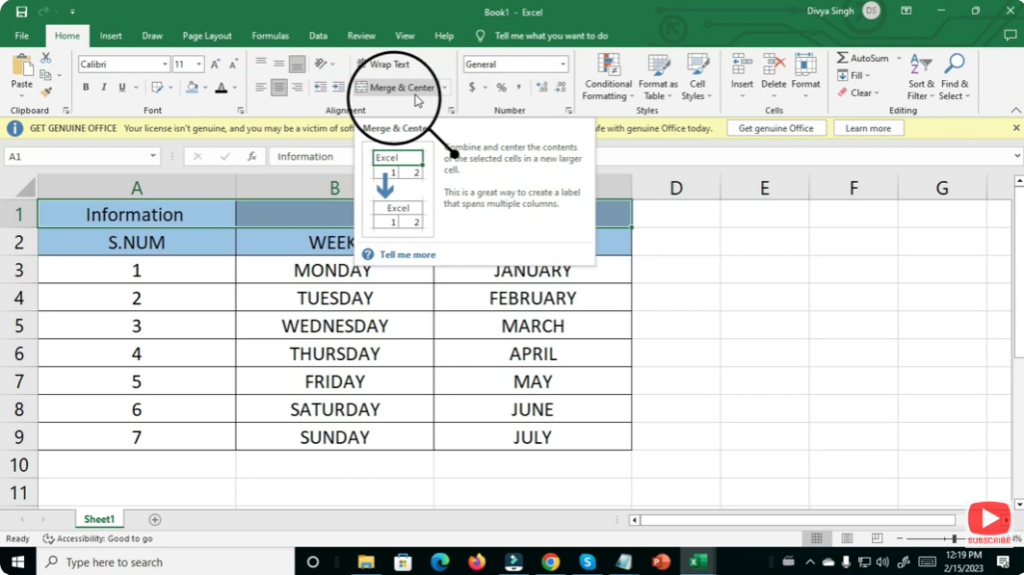
- Choose a merge option depending on your needs Option What it does
- Merge & Center: Merges the cells and centers the contents in the new merged cell. Typically used for headings/titles.
- Merge Cells: Merges the selected cells without centering the text — useful when you prefer left- or right-aligned content.
- Merge Across: Merges cells across each row individually (useful when multiple rows are selected).
- Confirm — Excel will merge the cells
- The cells are replaced by one larger cell. Note: only the content of the upper-left most cell is retained — data in other cells is discarded. Excel warns you about this if other cells contain data.
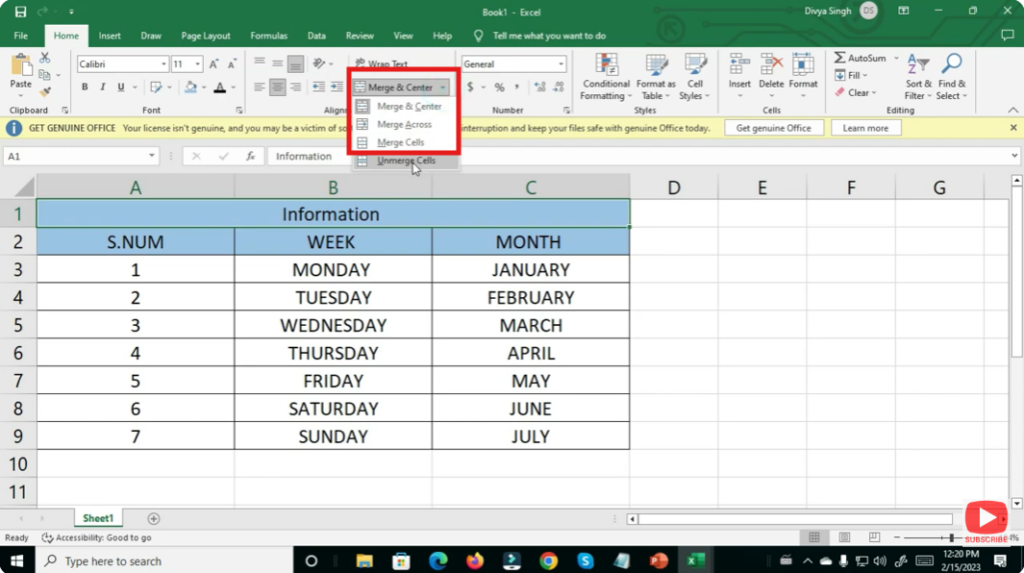
- To unmerge, select the merged cell and click Merge & Center → Unmerge
- This reverses the merge, restoring separate cells.
✅ Final Thoughts
Merging cells in Excel is a handy formatting tool — but you need to use it carefully. It’s ideal for layout, headings, and presentation formatting. If your sheet will be used for data entry, analysis, or manipulation, better use formula-based concatenation or keep cells separate.


