
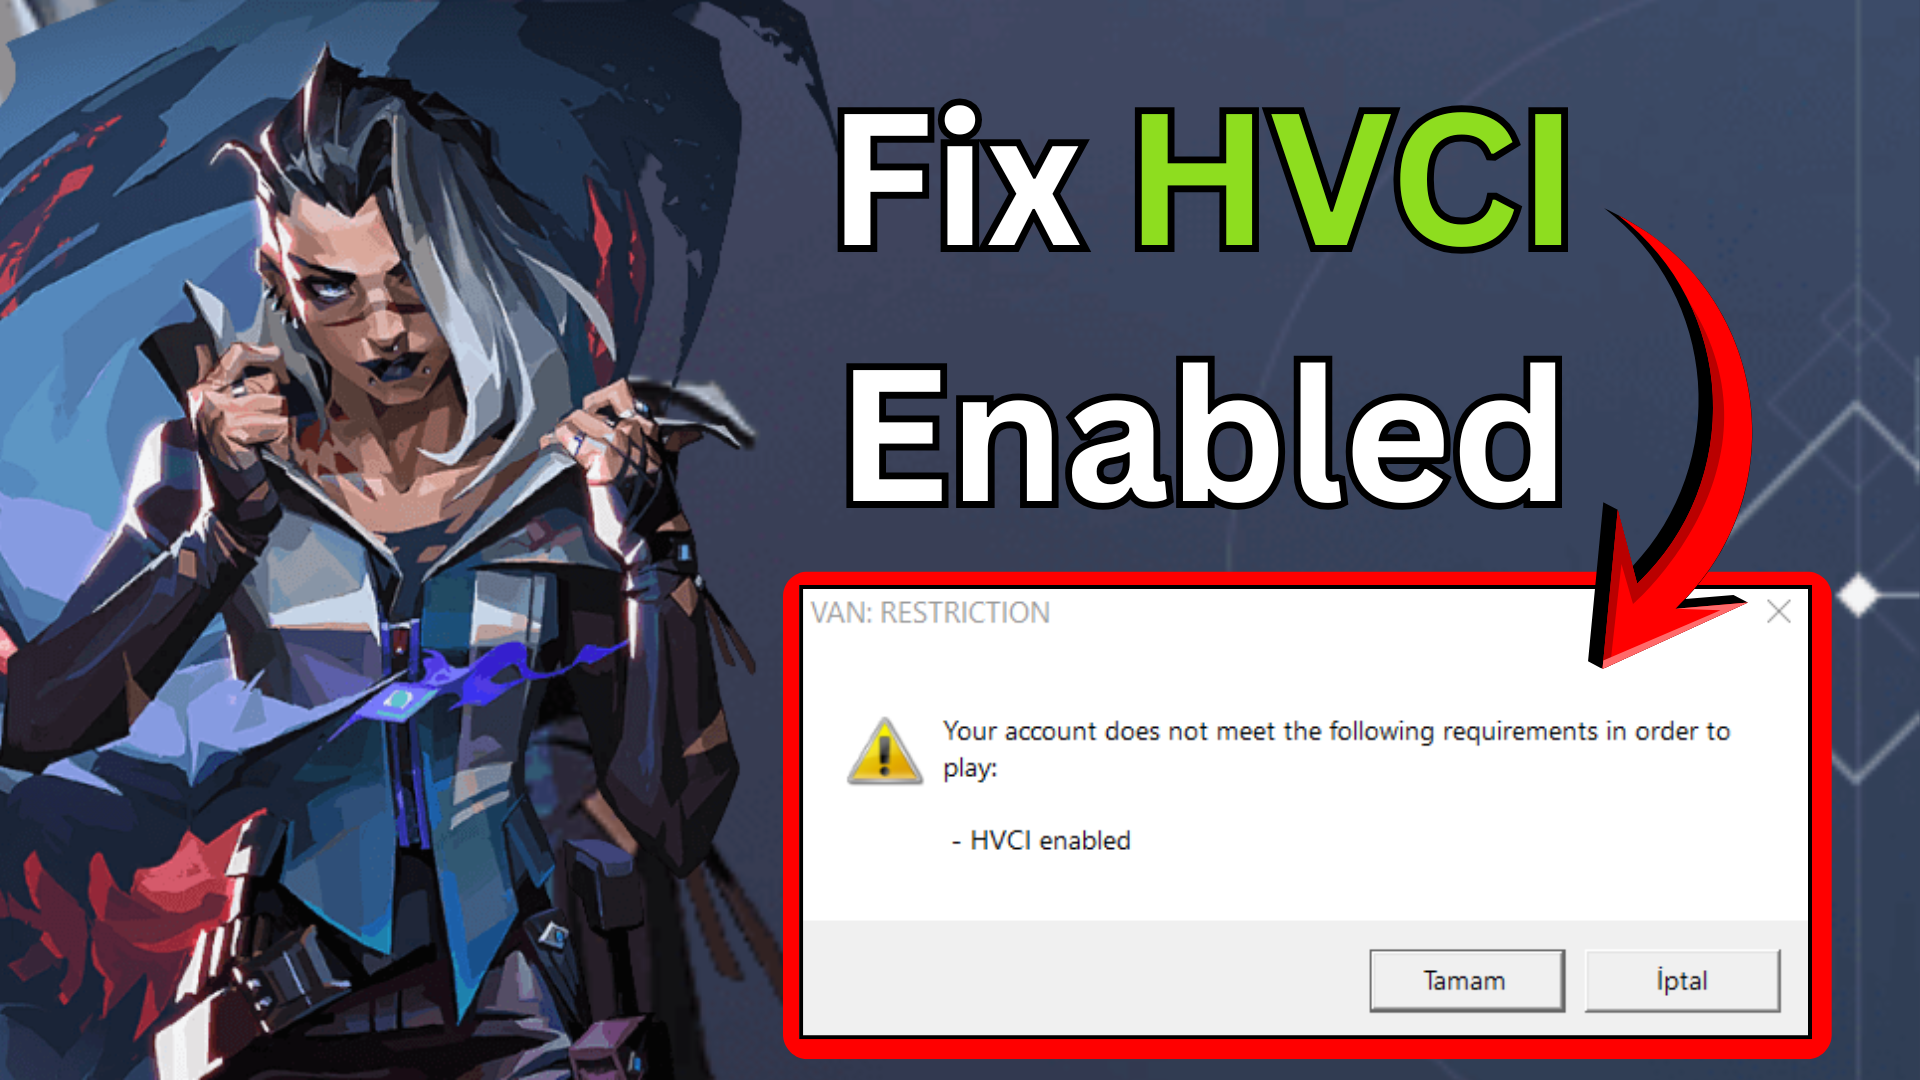
Valorant players on Windows 11 often face launch errors when Hypervisor-protected Code Integrity (HVCI) is enabled, as Vanguard anti-cheat conflicts with this security feature. HVCI blocks certain low-level operations needed for the game’s protection system to work properly. In this blog, you’ll learn safe fixes like disabling Memory Integrity in Core Isolation, updating BIOS/TPM settings, or using Riot’s repair tool to resolve HVCI conflicts and get back to playing Valorant smoothly.
First, open the Start menu and click on Settings. Now, on the left side, select Privacy and Security. Then, click on Windows Security. Scroll down and select Device Security. Here you’ll see an option called Core Isolation. Click on Core Isolation details. Now make sure that Memory Integrity is turned off. If it’s currently enabled, switch it off.
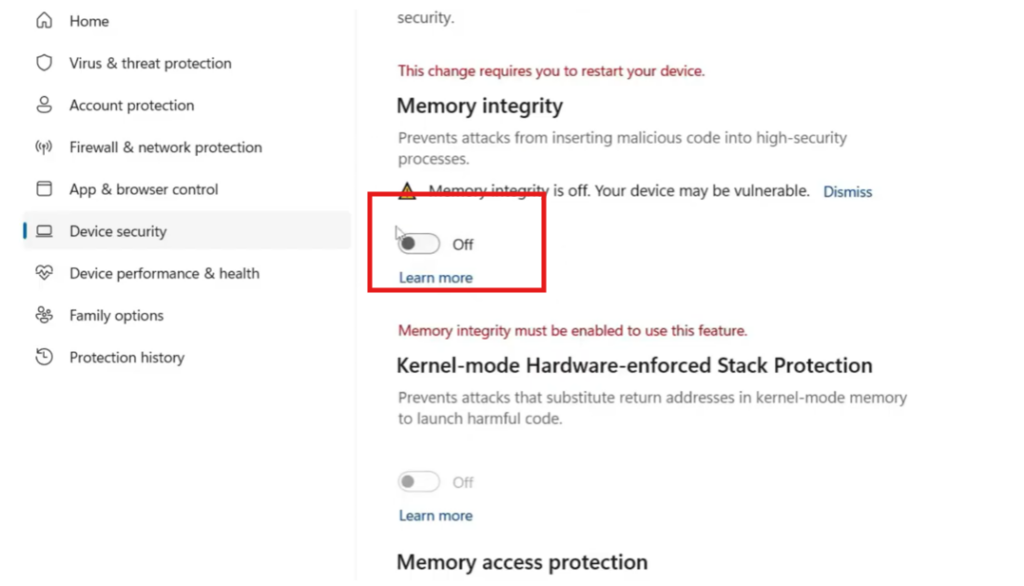
After that, restart your computer so the changes can apply. Once your PC restarts, try launching Valerant again and check if the problem is fixed.
If the error still appears, then the next step is to enable virtualization technology (VT) in your system BIOS. This step may look different depending on your motherboard or laptop brand, but generally you need to enter the BIOS, find Virtualization Support, SVM Mode, or Virtualization Technology, and make sure it is enabled.
Once you apply the change and restart your PC, Valerant should now run without the HVCI error.


