
Experiencing slow download speeds on Windows 11 can be frustrating, especially when you’re trying to grab important files, updates, or games. Instead of enjoying fast internet, your PC may crawl through downloads due to background apps, misconfigured settings, or network issues. The good news is, there are simple fixes that can help you boost speed and get things running smoothly again. In this beginner-friendly blog, we’ll explain step by step how to fix slow download speed on Windows 11, so you can enjoy faster, more reliable performance.
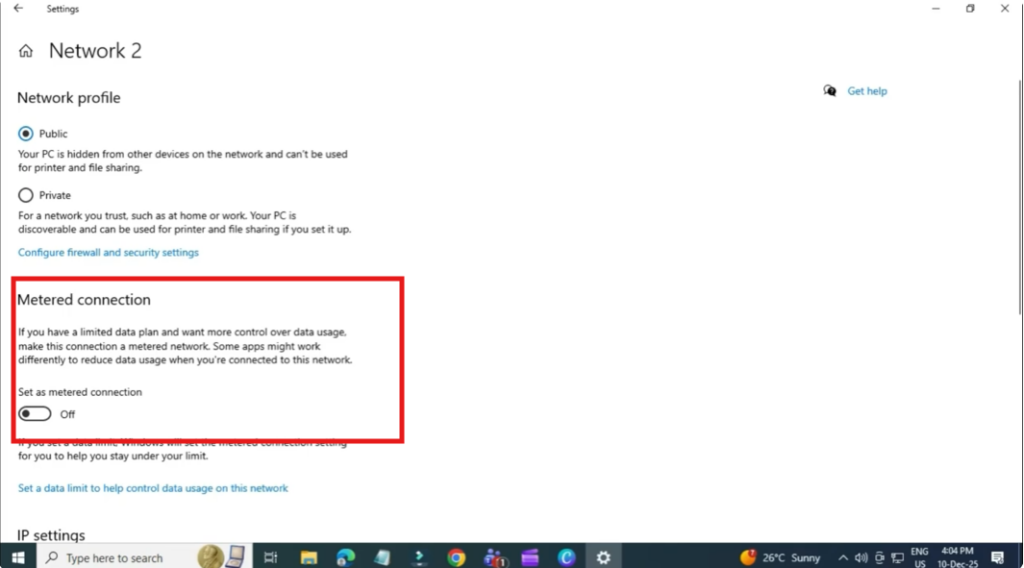
Method 1: Turn Off Metered Connection
Start by opening the Start menu, search for Settings, and open it. Go to Network and Internet, click on Ethernet, and then select your connected network. Scroll down to find the Metered connection option. To achieve the fastest download speeds, make sure this option is turned off.
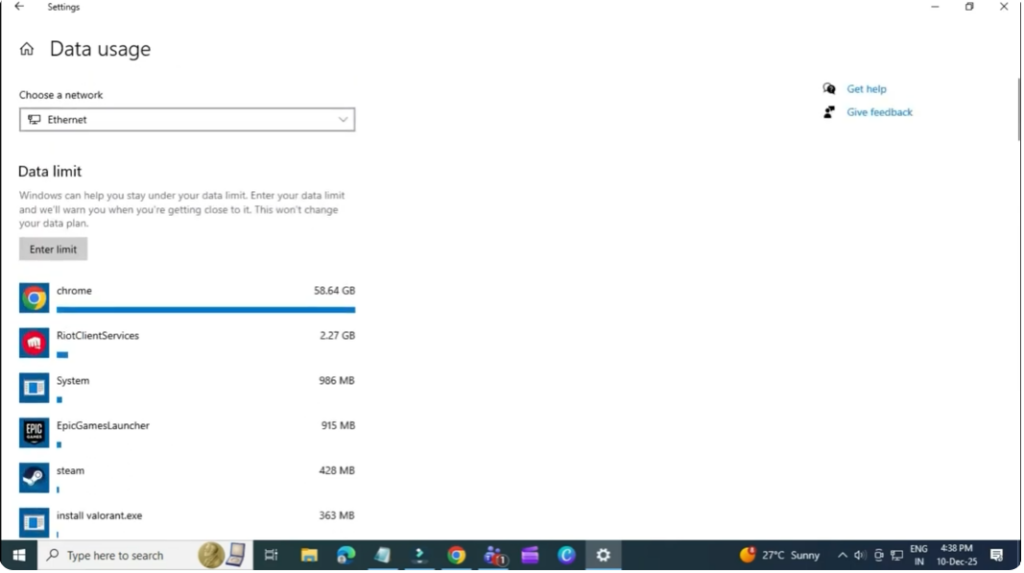
Method 2: Check App Data Usage
Close Settings and open the Start menu. Search for Data usage and select Data usage overview, then click on Data usage again. You’ll see a list of apps consuming your network resources. Review this list carefully and uninstall any apps you no longer need, especially those running in the background. These apps can consume bandwidth and slow down downloads. After removing unnecessary apps, check if your download speed improves.
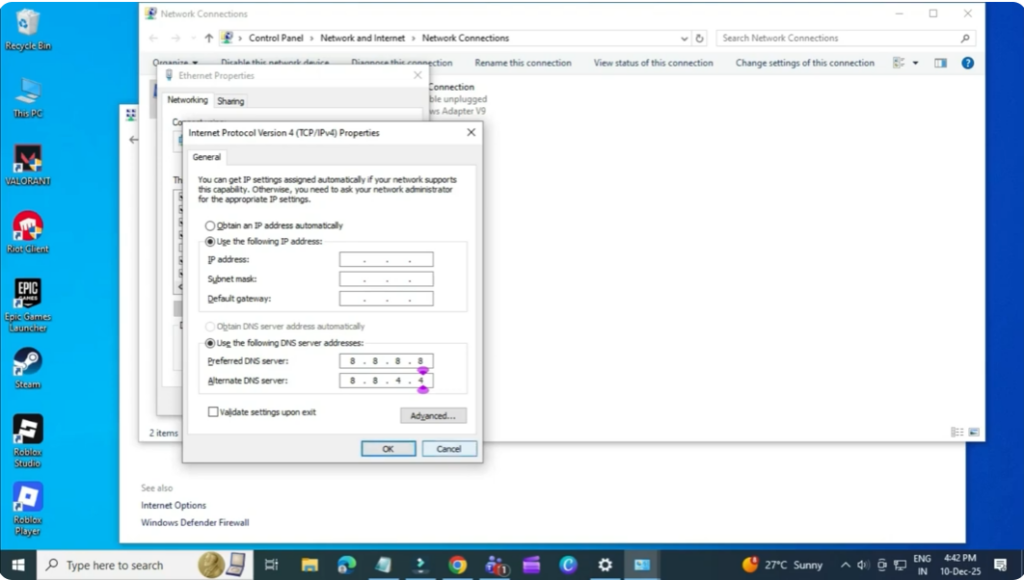
Method 3: Change DNS for Faster Speeds
If the issue continues, open the Start menu, search for Control Panel, and open it. Change View by to Large icons, then click Network and Sharing Center. Select Change adapter settings from the left panel. Right-click your Wi-Fi or Ethernet connection and choose Properties. Scroll down and select Internet Protocol Version 4 (TCP/IPv4), then click Properties. Under DNS settings, choose Use the following DNS server addresses and enter Preferred DNS: 8.8.8.8 and Alternate DNS: 8.8.4.4. Click OK and close all windows.
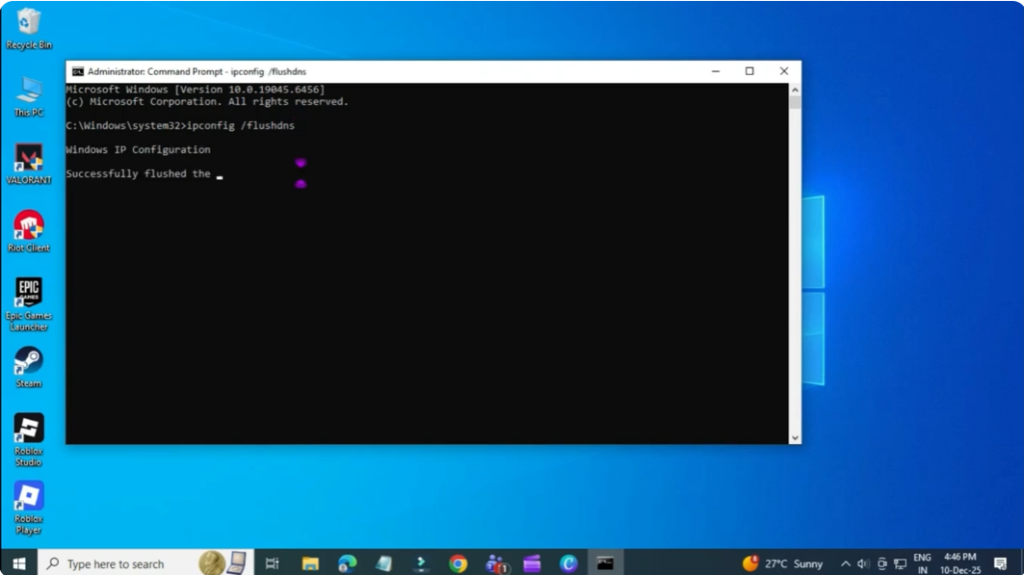
Method 4: Flush DNS Cache
Open the Start menu, search for CMD, right-click it, and select Run as administrator. Type the command IP protocol configuration/flushdns and press Enter. Once the process completes, check your download speeds again.
Method 5: Disconnect Any VPN
If you’re using a VPN, disconnect it temporarily. VPNs can significantly reduce download speeds depending on server load and location.
That’s it. By following these methods, you should be able to fix slow download speeds on Windows 11.


