
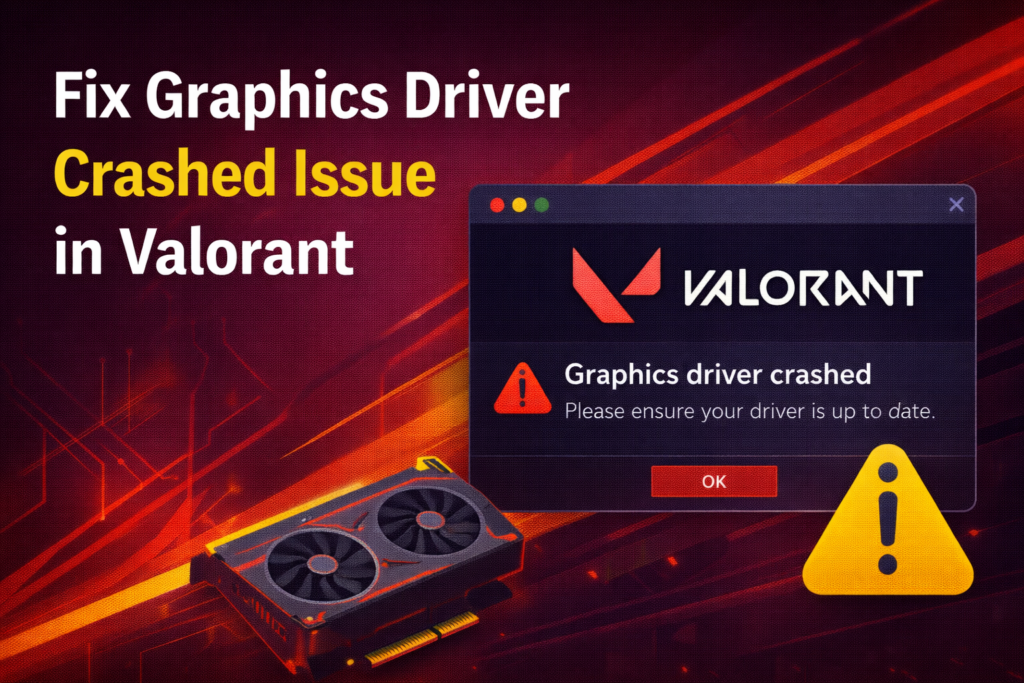
Valorant players sometimes hit graphics driver crashes that abruptly end a match or ruin a run-and-gun session. These crashes are often caused by outdated or corrupted drivers, conflicting game settings, or background processes hogging GPU resources. In this blog, you’ll learn easy, step-by-step fixes to stabilise graphics performance in Valorant, including updating or reinstalling drivers, adjusting in-game settings, and ensuring your system has the latest Windows updates for smoother, crash-free play.
Update Graphics Driver Using Device Manager
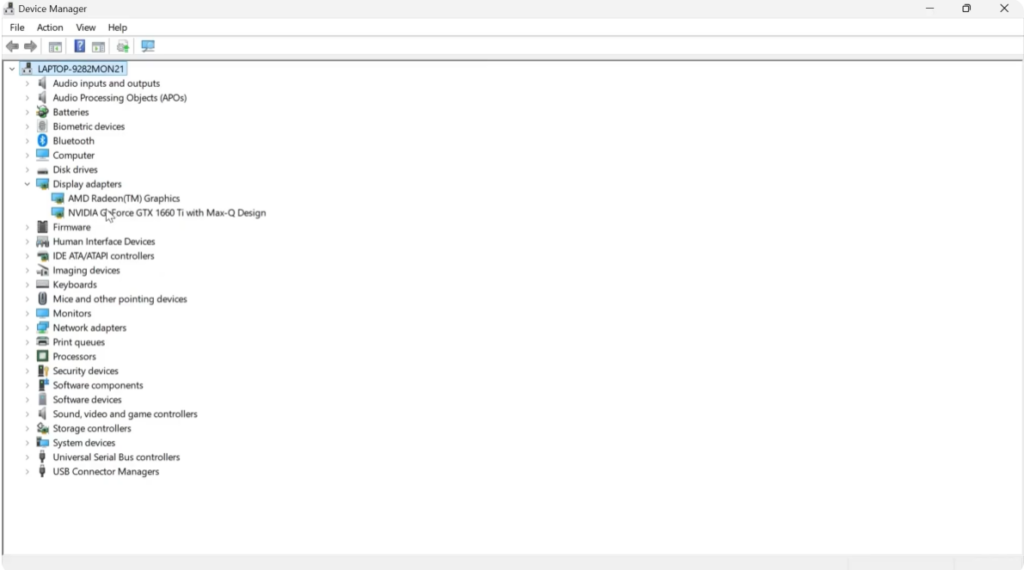
First, press the Windows key on your keyboard to open the Start menu. Search for Device Manager and open it. Now, scroll down and expand Display adapters. Here, you’ll see your graphics card. In my case, it’s an Nvidia graphics card.
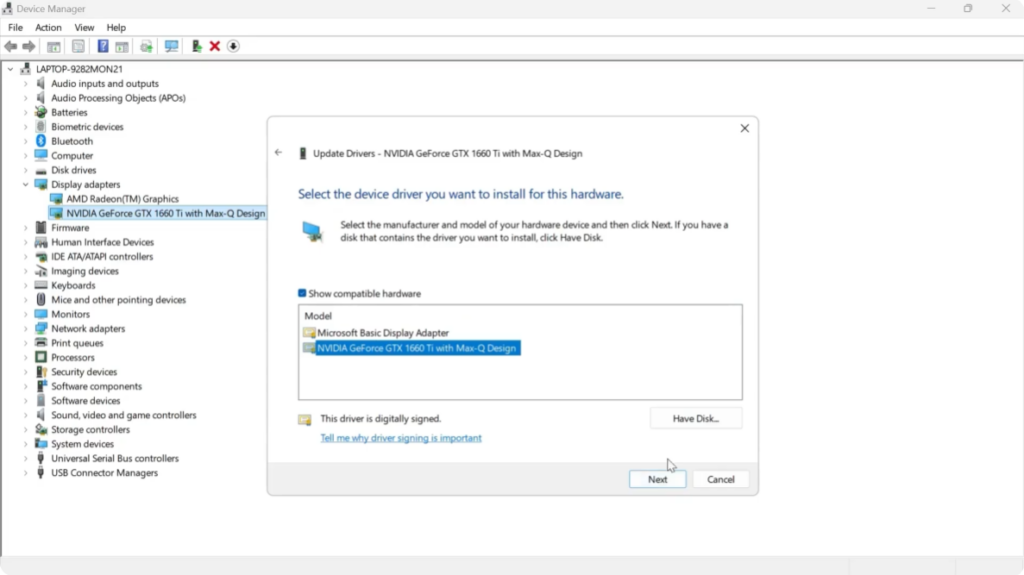
Right click on it and select Update driver. Next, click on Browse my computer for drivers. Then, select Let me pick from a list of available drivers on my computer. Choose your graphics card from the list and click Next. Wait for the driver to update and once it’s done, close all the windows.
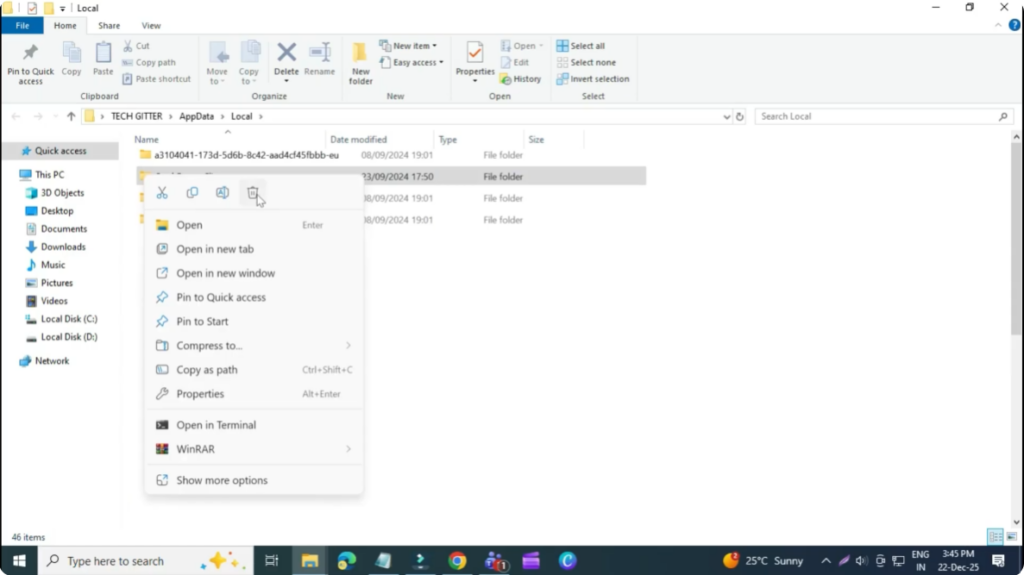
Delete Valorant Crash and Cache Files
Now, open the Start menu again and search for Run. Click on it. Then, type %localappdata% and press Enter. Scroll down until you find the Valorant folder and open it. Go to Saved, then Config, and here you’ll find a folder called Crash Reporter Client. Right click on this folder and delete it.
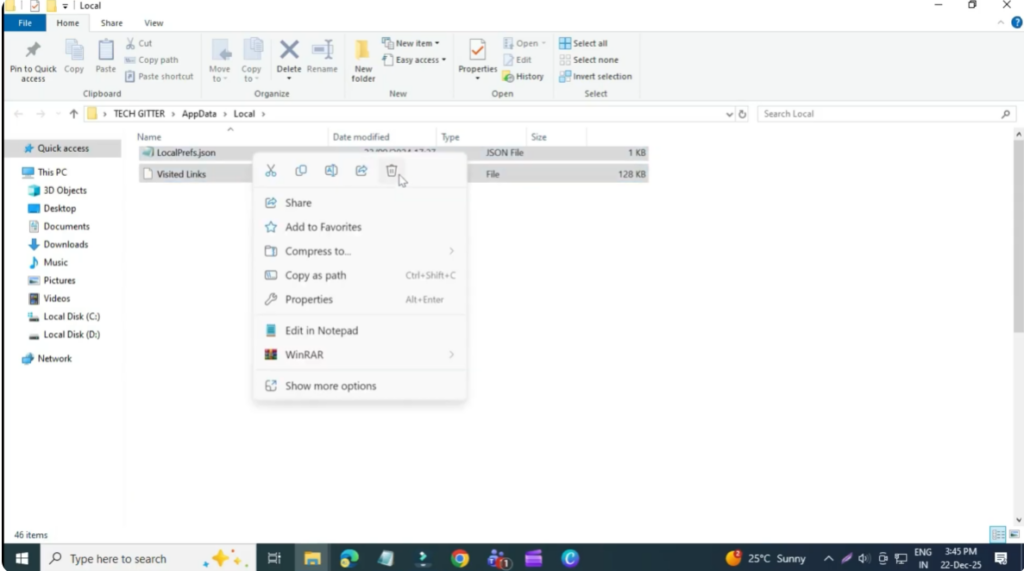
After that, go back and open the Web Cache folder. Select everything inside this folder, right click, and delete all the contents. Once done, close this window.
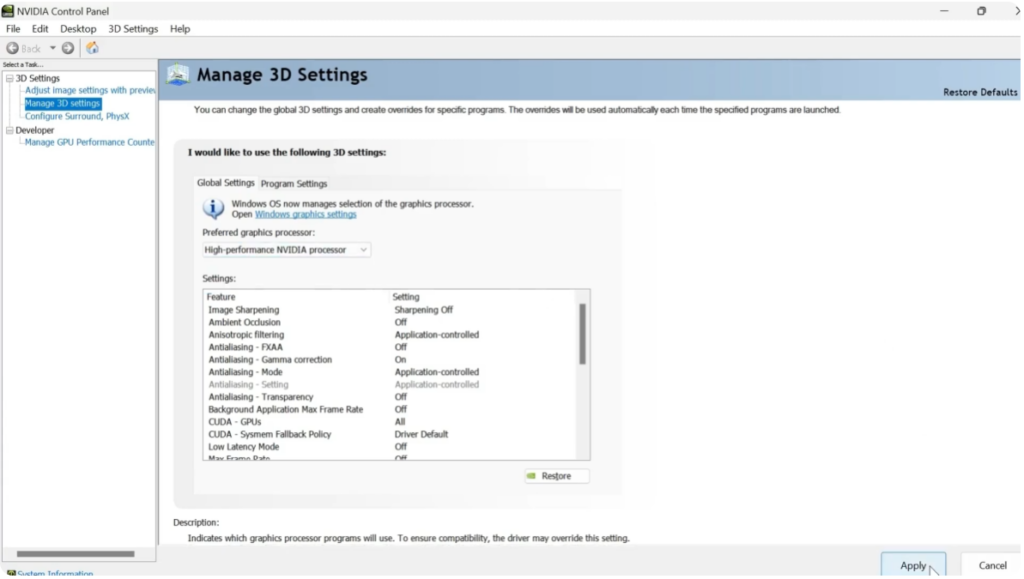
Change NVIDIA Control Panel Settings
Next, go to your desktop, right click anywhere, and select Show more options. Open the Nvidia Control Panel. From the left hand side, make sure Manage 3D settings is selected.
Under Global Settings, find Preferred graphics processor and change it from Auto select to High performance Nvidia processor. Then click Apply.
Set Valorant to Use High Performance GPU
Now switch to the Program Settings tab. Select the program you want to customize and look for Valorant. If you don’t see it in the list, click Add, then Browse, and locate the Valerant.exe file. You’ll find it in C drive > Riot Games > Valorant > Live. Double click on Valorant.exe and add it.
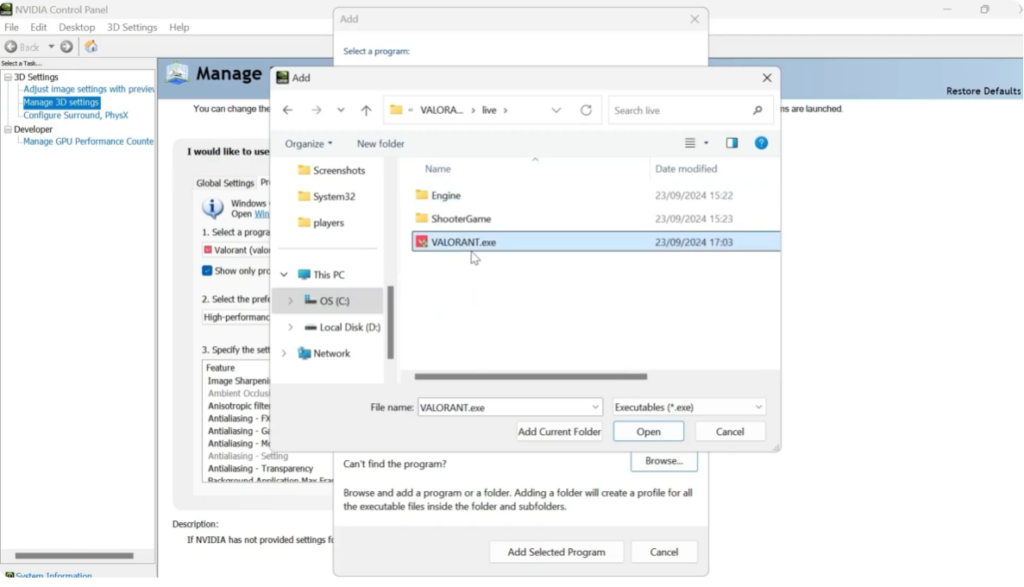
Once Valerant is added, again set the Preferred graphics processor to High performance Nvidia processor and click Apply.
Configure PhysX Settings
After that, from the left-hand menu go to Configure Surround, PhysX. Under PhysX settings, change the processor from Auto select to your Nvidia processor and click Apply one last time.
Restart and Test Valorant
Now restart your computer. After the restart, launch Valorant and the graphics driver crashed error should be fixed.


