
Managing notifications can be a constant distraction, especially when Chrome pushes alerts on your PC. Disabling these notifications gives you a calmer, uninterrupted computing experience while still letting you browse, read, and work efficiently. In this blog, you’ll learn a quick and easy guide to turn off Chrome notifications on Windows or Mac, with simple steps for blocking all sites, only certain sites, or muting desktop prompts for good.
Step 1: Open Google Chrome
Firstly, open the Google Chrome browser on your computer.
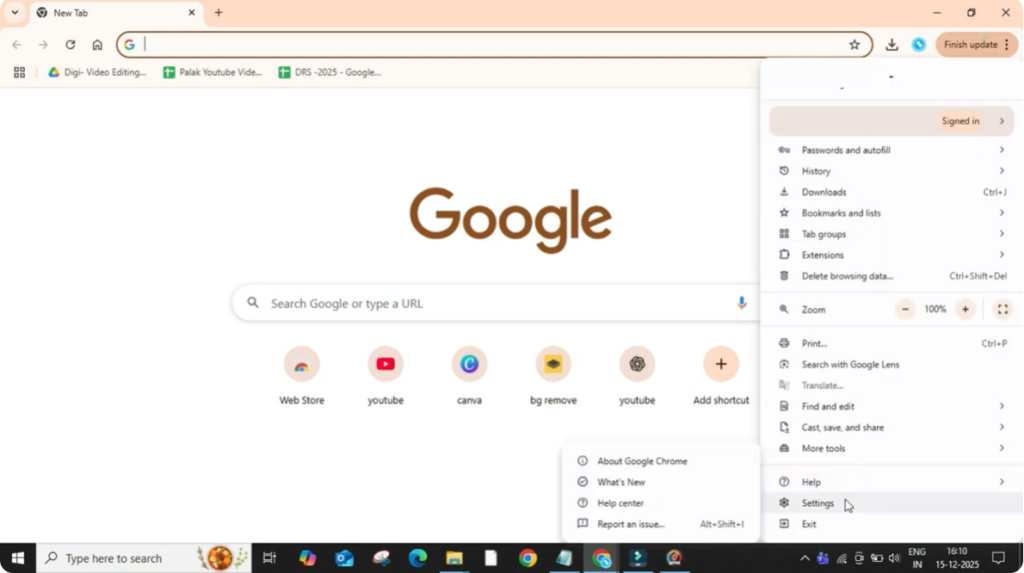
Step 2: Access Chrome Settings
After that, click on the three dots placed at the top right corner of the browser window. This menu gives access to all browser settings. Now, scroll down and click on Settings to open the Chrome settings page.
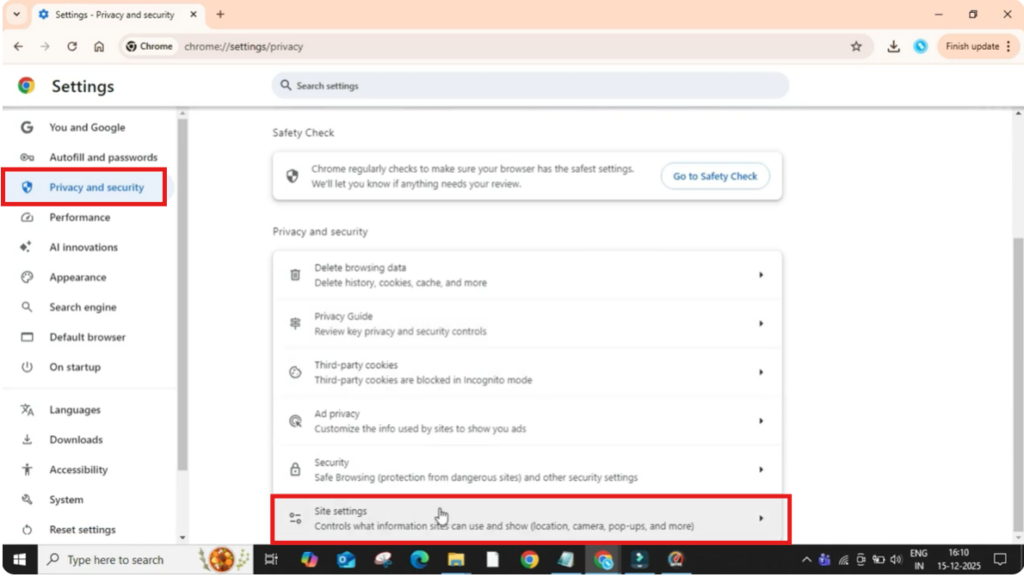
Step 3: Go to Privacy and Security
In the left panel, click on Privacy and Security. This section controls permissions and safety-related features.
Step 4: Open Site Settings
Now scroll down a bit and click on Site Settings, where Chrome manages permissions for different websites.
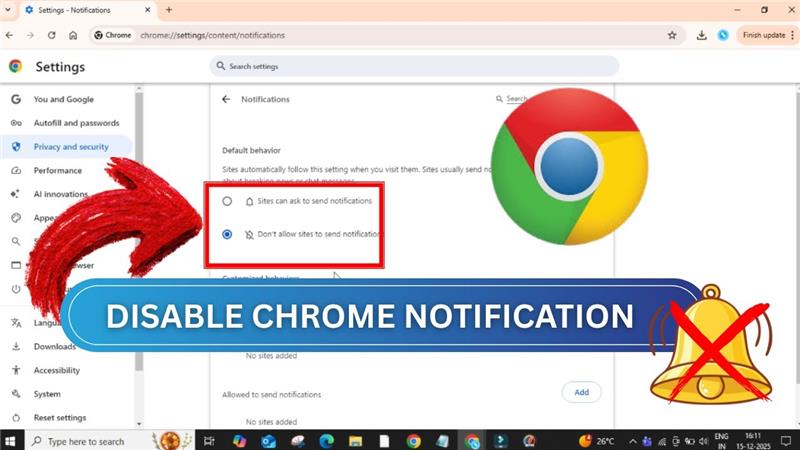
Step 5: Open Notification Settings
After that, under the Permissions section, click on Notifications. Here you will see different notification options available.
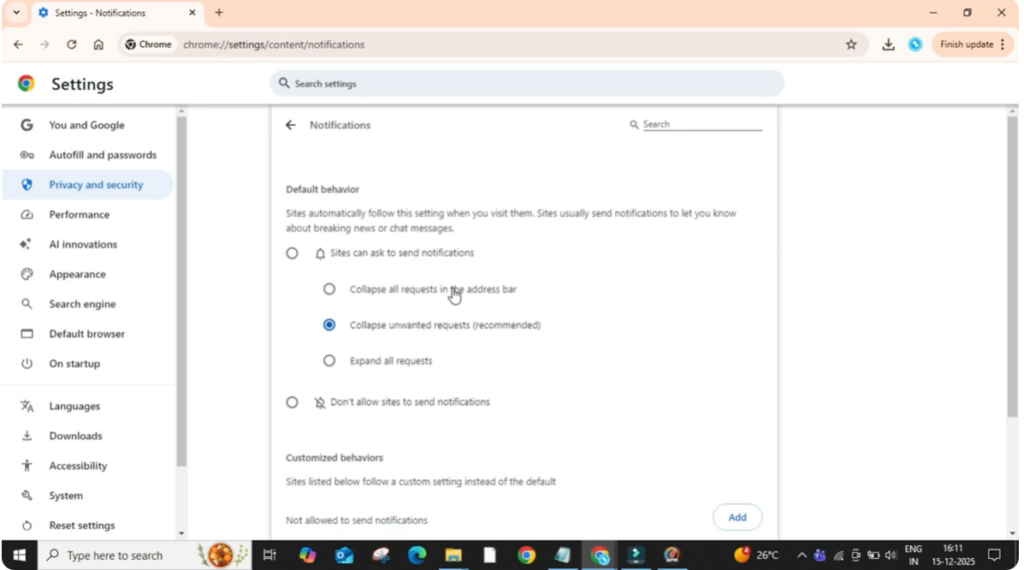
Step 6: Choose How Notifications Behave
If you want to allow notifications, you can select the top option. Inside this, you will also see sub-options to control how notification requests appear in the address bar.
- If you want notification requests to stay hidden and not disturb you, you can select the option to collapse all notification requests in the address bar. This is useful if you don’t want pop-ups while browsing.
- If you want Chrome to collapse only unwanted requests, you can select that option.
- And if you want to see all notification requests clearly, you can choose to expand all requests.
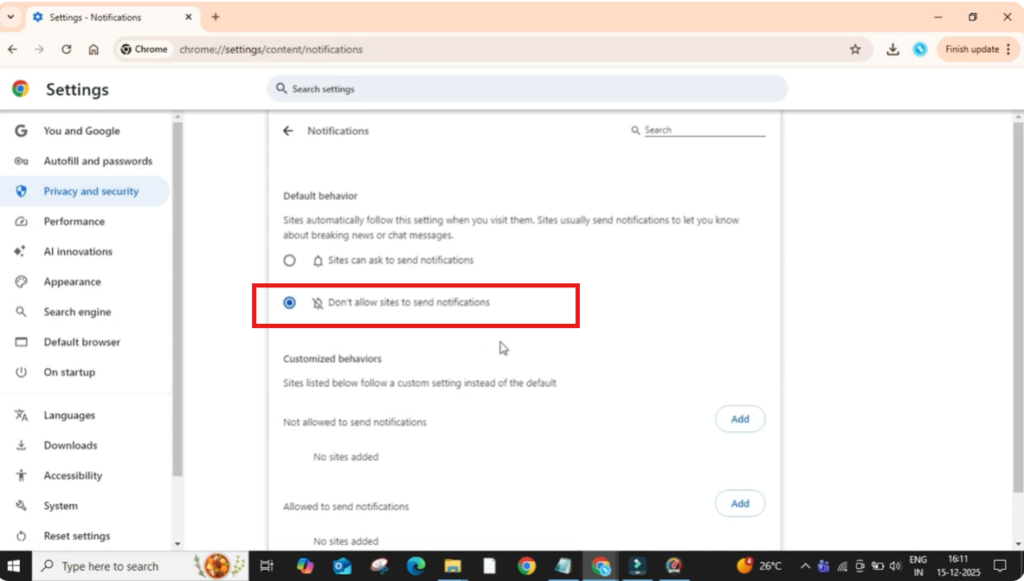
Step 7: Completely Disable Notifications
If you do not want notifications at all, simply select don’t allow sites to send notifications. This will completely stop websites from sending notification alerts in Chrome.
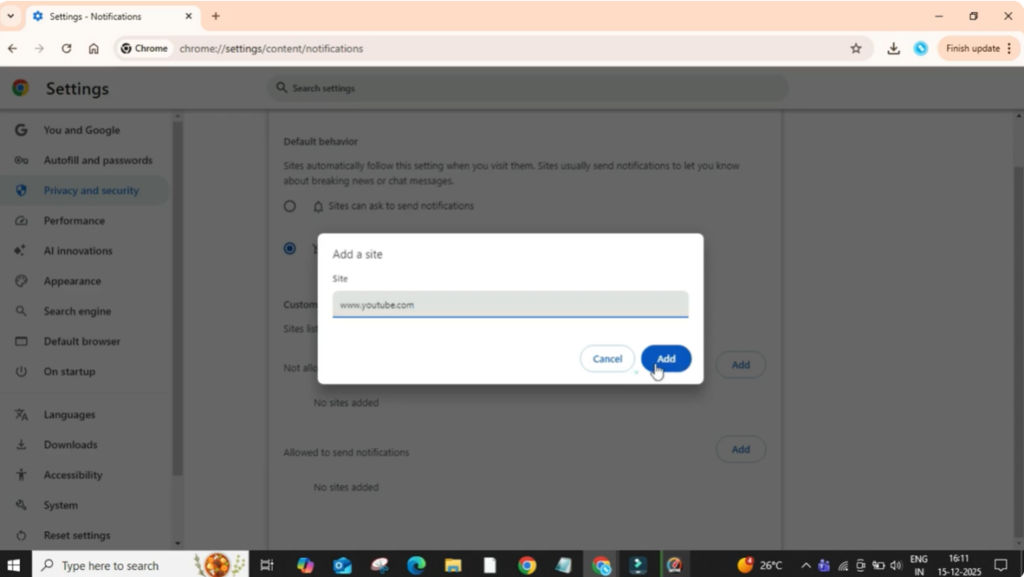
Step 8: Block Notifications from Specific Websites
When you scroll down, you will also find an option to manage notifications for particular websites. If you want notifications from a specific site to be blocked, click on Add under the Not Allowed section. Then type the website address, for example, www.youtube.com, and click on Add. The site will be added to the blocked list and will no longer send notifications.
Conclusion
That’s it. You have successfully learned how to disable notifications in the Chrome browser. Thanks for reading.


