
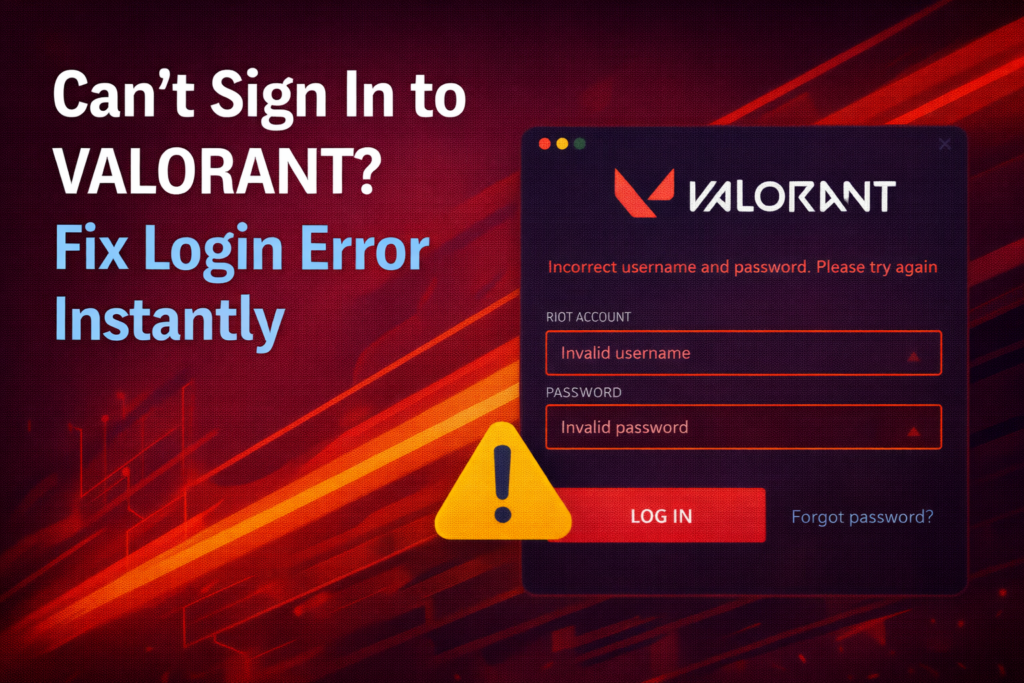
Running into a login error while trying to sign in to VALORANT can be incredibly frustrating, especially when you’re eager to jump into a match. Instead of loading smoothly, the game blocks you with an error message that prevents access—often caused by issues with Riot’s servers, outdated client files, or simple network glitches. The good news is, these problems usually have quick fixes that can get you back in the game right away. In this beginner-friendly blog, we’ll walk you through how to fix VALORANT login errors instantly, so you can sign in and start playing without interruptions.
Fix 1: Change DNS Settings
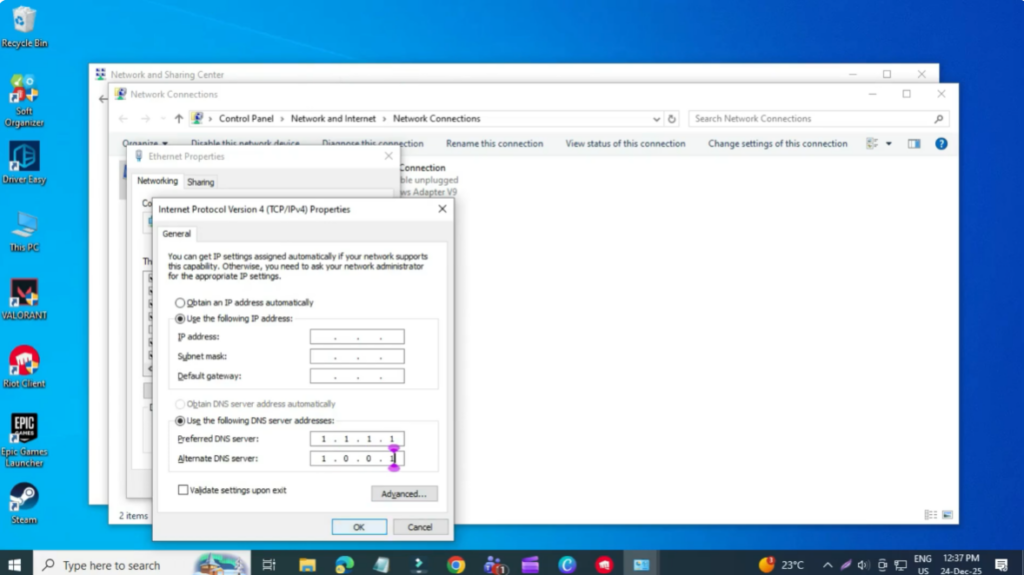
First, press the Windows key, search for Control Panel, and open it. Make sure View by is set to Category. Now go to Network and Internet and then Network and Sharing Center. From the left side, click Change adapter settings. Right click on the internet connection you’re currently using, Wi-Fi or Ethernet, and select Properties. From the list, double click on Internet Protocol Version 4 (IPv4). Select Use the following DNS server addresses and enter Preferred DNS: 1.1.1.1 and Alternate DNS: 1.0.0.1. Click OK to save the changes.
Fix 2: Delete Valorant Cache Files
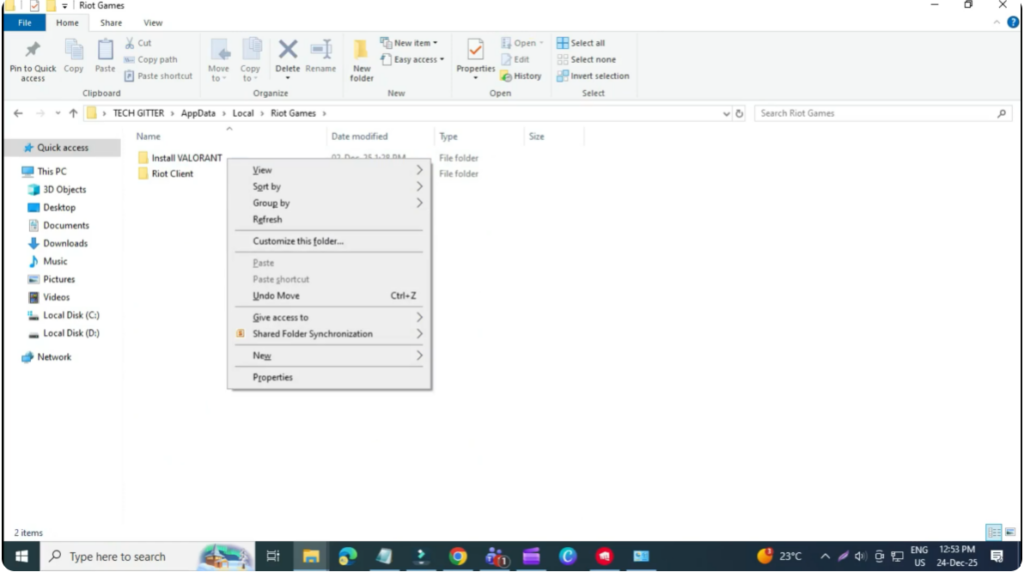
If the issue still continues, press Windows + R, type %localappdata%, and hit Enter. Scroll down, find the Valorant folder, right click on it, and delete it. Next, find the Riot Games folder, open it, right click on Valorant, and delete it as well. Now restart your PC and try signing in again.
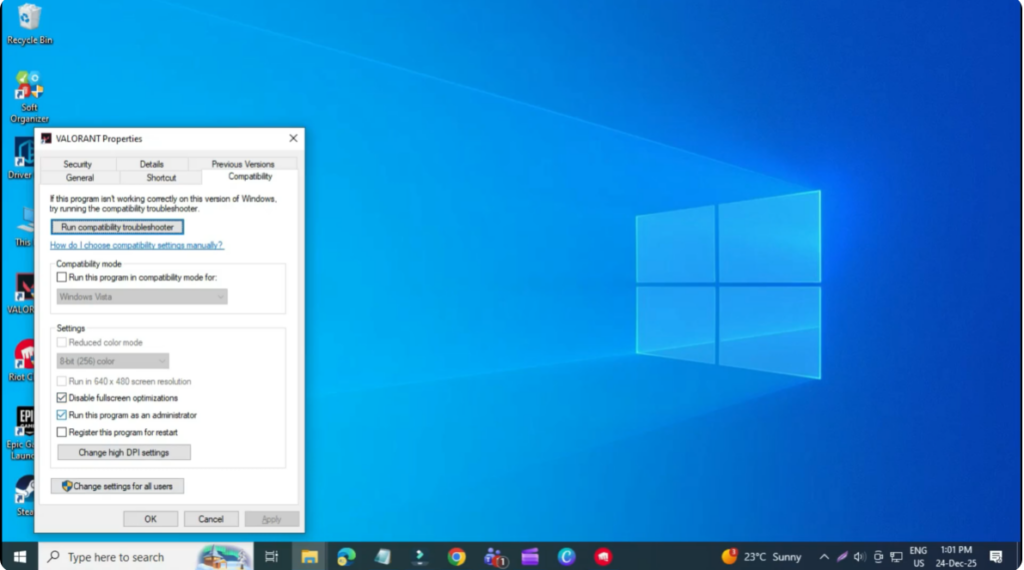
Fix 3: Run Valorant as Administrator
Right click on the Valorant shortcut and click Properties. Go to the Compatibility tab and make sure Disable fullscreen optimizations is checked. Also make sure Run this program as an administrator is checked. Click Apply and then OK.
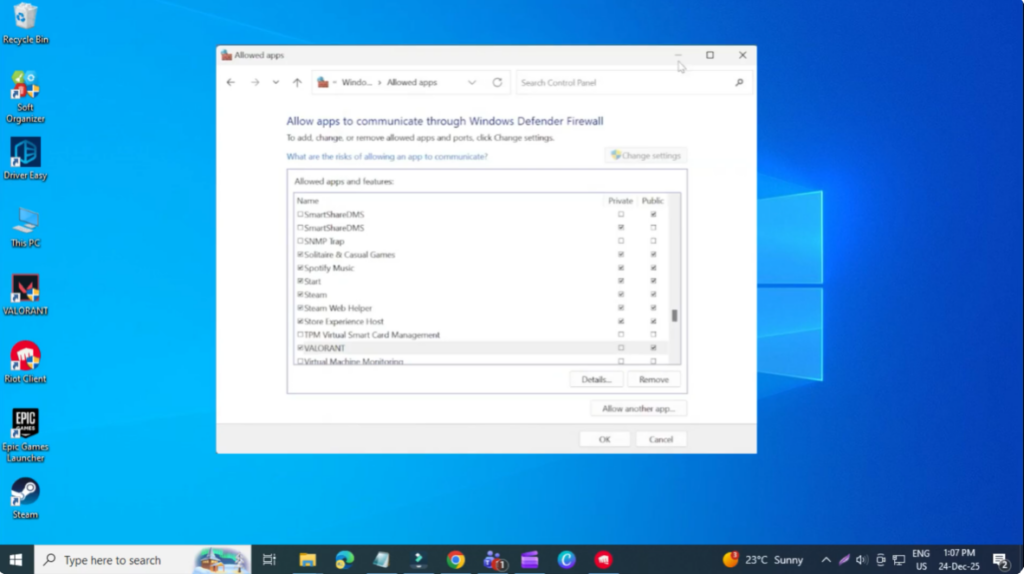
Fix 4: Allow Valorant Through Windows Firewall
Open the Start menu, search for Windows Defender Firewall, and open it. Click Allow an app or feature through Windows Defender Firewall and then click Change settings. If Riot Client or Valorant is already listed, remove them first. Now click Allow another app, select Browse, and go to C:\Riot Games\VALORANT\live. Select the Valorant application and add it. Then click Browse again, go to ShooterGame\Binaries\Win64, select Valorant-Win64-Shipping.exe, and add it. Finally, add RiotClientServices.exe from the Riot Games folder. Make sure both Private and Public boxes are checked for all Valorant and Riot entries, then click OK.
Fix 5: Reset Network Using CMD
If nothing has worked so far, this final method has helped many users. Search for CMD, right click on Command Prompt, and select Run as administrator. Type the following commands one by one, pressing Enter after each:ipconfig /releaseipconfig /renewipconfig /flushdnsipconfig /registerdns
Once done, restart your system and try signing into Valorant again.


