
Sometimes you may want to keep track of all the documents you have printed on your Windows computer. By default, Windows does not save a history of printed documents, but you can easily enable this feature to record and view your print history. This is useful to check what has been printed or to monitor printer usage. In this blog, you will learn simple steps to enable and view printed document history on Windows 10 and 11 using built-in tools like the Settings app and Event Viewer.
🛠 How to Enable Short-Term Print History (Print Queue)
These steps let you keep printed documents visible in the print queue until you manually clear them.
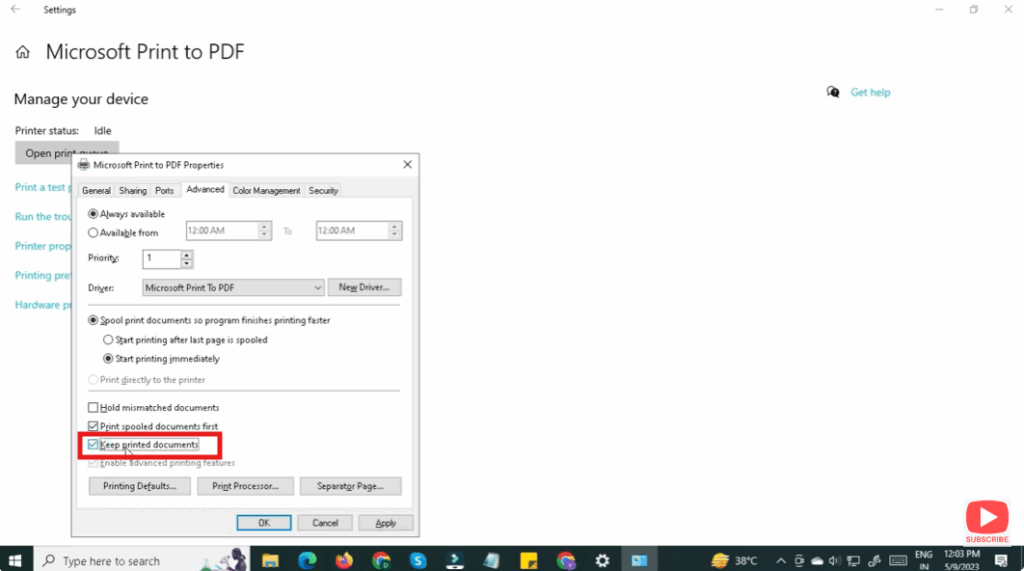
- Open Settings → Devices → Printers & Scanners.
- Click your printer in the list, then select Manage → Open queue or click Printer properties.

- In the properties window, go to Advanced tab.
- Check the option “Keep printed documents” (or similar) and click OK.
- From now on, printed jobs will remain in the queue after printing, visible for a short time.
Note: This method only keeps short-term visibility of print jobs. For full long-term log you’ll need Event Viewer.
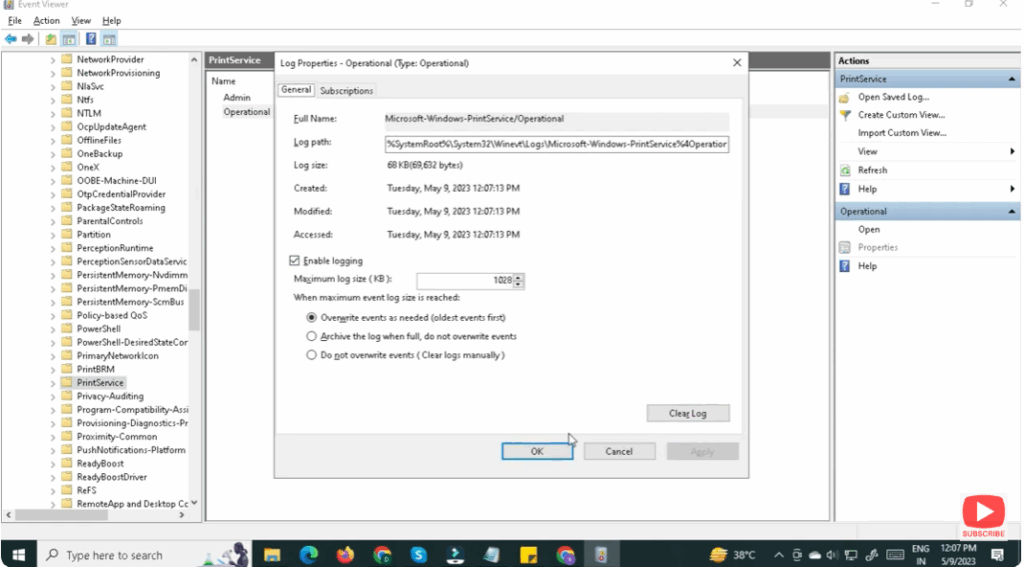
📜 How to Enable Long-Term Print History via Event Viewer
To log all print events and view them in Windows Event Viewer:
- Press Win + R, type
eventvwr.msc, press Enter to open Event Viewer. - In the left pane navigate: Applications and Services Logs → Microsoft → Windows → PrintService → Operational.
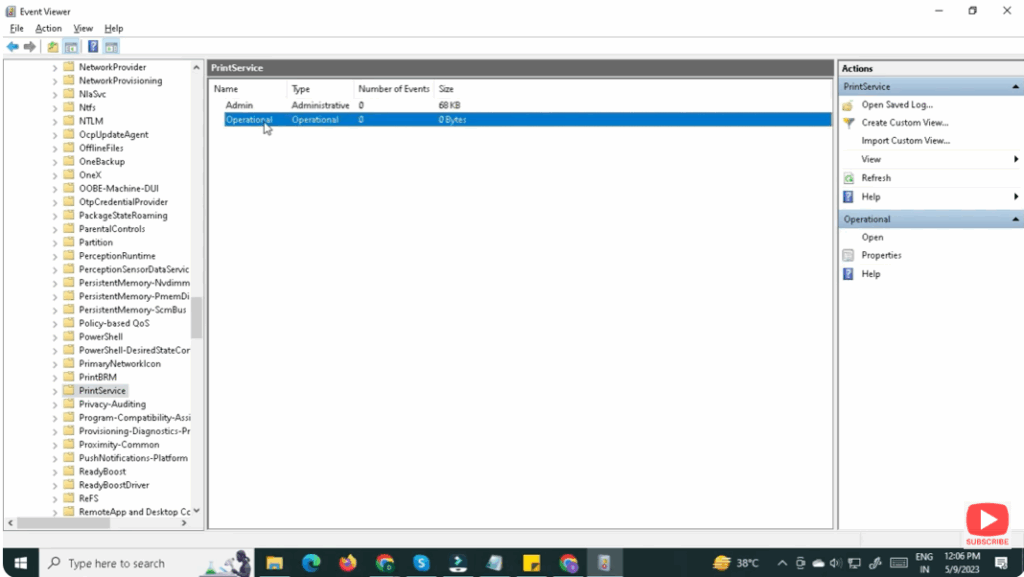
- Right-click Operational, select Properties (or “Enable log” depending on version). Check Enable logging, set a suitable log size, then press OK.
- From now on, Windows will record print jobs. To view history, double-click the Operational log and look for entries with Task Category “Printing a Document”.
- You can filter or group entries by Task Category (e.g., “Printing a Document”) to quickly locate print-jobs.


