
Adding a dynamic Google Map to your PowerPoint presentation makes it easy to share live locations, routes, and interactive content with your audience. Instead of using just a static image, a dynamic map lets everyone zoom in, move around, or even use Street View right inside your slide. This is especially helpful for projects, business meetings, or classroom lessons where you want to make geography more engaging and clear. In this guide, you’ll learn simple ways to add an interactive Google Map to your PowerPoint slides using easy-to-follow steps and free tools.
✅ Method 1: Use a Web / Web Viewer Add-in or Embedded Web Content
- Open PowerPoint, go to the slide where you want the dynamic map.
- Insert a Web Browser / Web Viewer object or add-in (depending on your PowerPoint version) that allows embedding web pages.
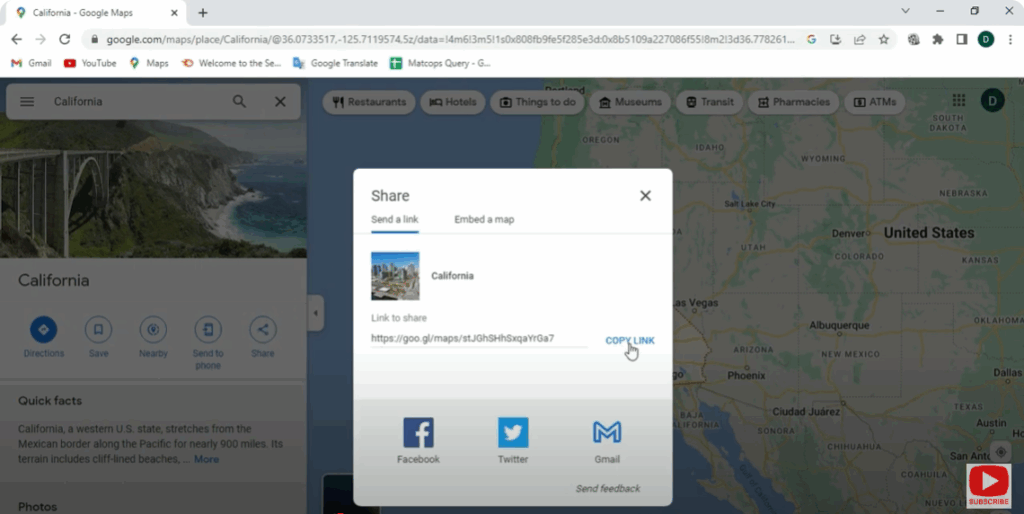
- In the add-in’s settings, enter the Google Maps embed URL (from Google Maps → Share → Embed map → copy the iframe / URL)
- Resize the embedded window on your slide so it looks like a map frame.
- Save and test — in presentation mode, you should be able to scroll, zoom, and interact with the map.
⚠️ Note: Some add-ins or Web Viewer features may be deprecated or unsupported in newer versions of PowerPoint.
Method 2: Link to Google Maps & Open in Browser Mode
If embedding fails, you can simulate dynamic behavior:
- Insert a shape, image, or hotspot on your slide (for example, a map thumbnail).
- Right-click and add a hyperlink to the full Google Maps URL.
- In slide show mode, when you click the shape, it will open Google Maps in a browser window.
- The audience can interact with the full map there (zoom, pan).
Method 3: Use Screenshots + Link for Full Map
A mix of visual and interactive:
- Take a screenshot of the map view you want (using Snipping Tool or similar).
- Insert that screenshot into your PowerPoint slide.
- Add a hyperlink to that screenshot pointing to the live Google Maps URL.
- When clicked, the live map opens in browser for full interaction.


