
Hello friends! Welcome back to my channel. In today’s guide, I’ll walk you through the simple and effective process of cutting any video using VLC Media Player—a free, open-source software that’s available on most operating systems.
Whether you’re trimming out unnecessary parts or saving a specific clip, VLC makes the task easy without requiring any extra apps or tools.

Why Use VLC to Cut Videos?
VLC Media Player isn’t just for playing videos—it also has built-in features like trimming, converting, and streaming media. It’s lightweight, user-friendly, and already installed on many PCs.
Step-by-Step Guide to Cut Videos Using VLC
Step 1: Launch VLC Media Player
Ensure you have the latest version of VLC installed. Open the application on your computer.
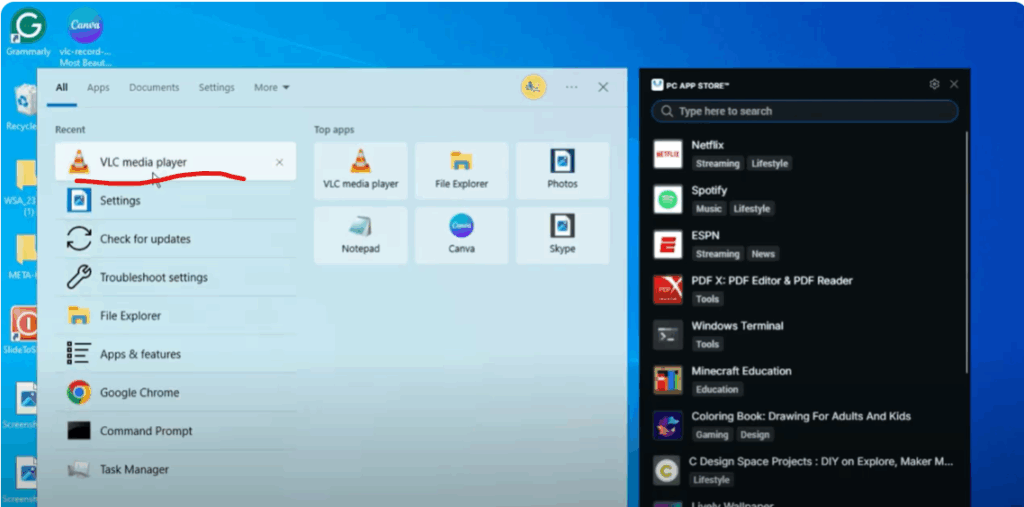
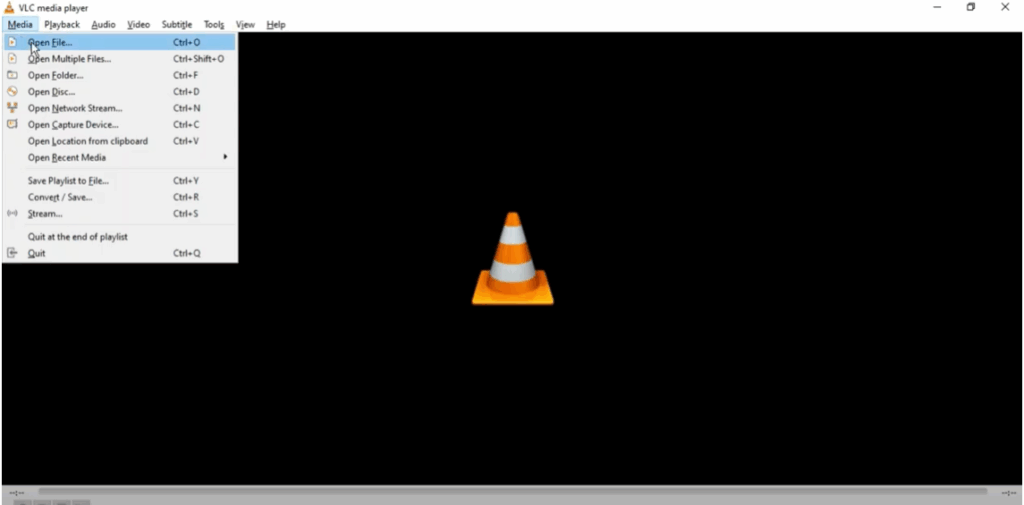
Step 2: Open the Video File
Click on “Media” in the top-left corner of the VLC window and select “Open File.” Choose the video you want to cut from your local drive.
Step 3: Enable Advanced Controls
Go to the “View” menu and select “Advanced Controls.” This adds a few extra buttons above the normal play/pause options—most importantly, the record button (a red circle).
Step 4: Set the Start Point
Play the video and pause it at the point where you want the cut to begin.
Step 5: Start Recording
Click the red record button to begin recording from this point.
Step 6: Set the End Point
Let the video play until it reaches the point where you want to stop. Then press the record button again to stop recording.
Step 7: Locate the Trimmed Video
Your cut video is automatically saved to your system. By default, it’s saved in the “Videos” folder under your user directory.
Final Thoughts
That’s it! With just a few simple steps, you can cut or trim any video using VLC Media Player without installing any additional apps. It’s a fast and convenient method for quick edits.
If you found this tutorial helpful, please like, share, and subscribe to the channel. Thanks for reading, and I’ll see you in the next guide.
Have a nice day!


