
Downloading and installing MySQL on Windows 10/8/7 is easier than it sounds, and it’s the first step if you want to work with databases on your computer. MySQL is one of the most popular database management systems, widely used for websites, applications, and data projects. Instead of feeling overwhelmed by technical terms, you can set it up quickly with a simple installer provided by MySQL. In this beginner-friendly blog, we’ll explain in easy language how to download and install MySQL step by step on Windows 10, 8, and 7, so you can start managing your data without any hassle.
🛠️ Step-by-Step: Download & Install MySQL on Windows
Here’s a detailed walkthrough:
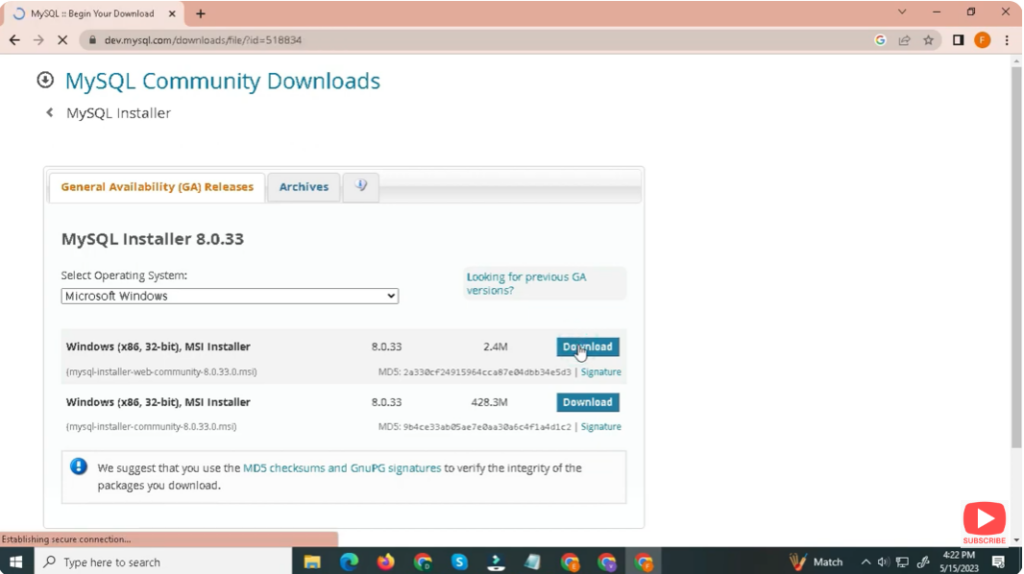
Step 1: Download MySQL Installer
- Open your browser and go to the official MySQL download site — Downloads → MySQL for Windows.
- Download the MySQL Installer (MSI) — either the smaller web-community version (which downloads packages during setup) or the full installer.
- Once downloaded, locate the
.msifile (usually in your “Downloads” folder).
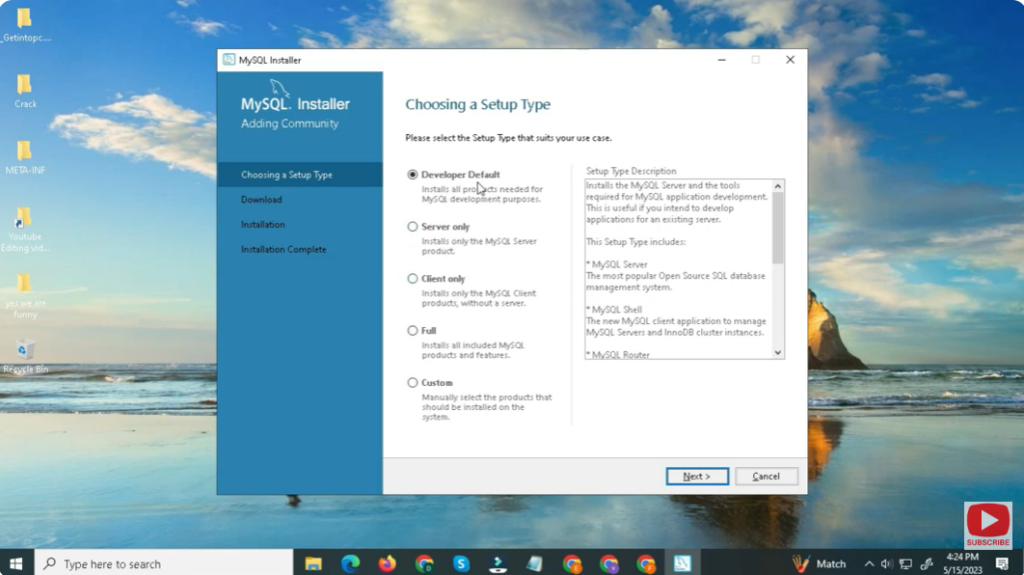
Step 2: Run the Installer & Choose Setup Type
- Double-click the MSI file to launch the installer.
- You’ll see a “Setup Type” screen — options include:
- Developer Default — for full development setup (server + tools).
- Server Only — only installs MySQL server.
- Full — install all MySQL components (server, workbench, connectors, etc.).
- Custom — choose specific components manually.
- For most users, Developer Default or Full is recommended. Click Next to continue.
Step 3: Install Required Components
- The installer checks prerequisites (some optional components may need additional software). If prompted, allow it to download or install missing dependencies.
- Review the list of MySQL products to be installed (server, shell, workbench, drivers). Click Execute → the installer will download and install selected components.
Step 4: Configure MySQL Server Settings
After installation, a configuration wizard appears. Follow these steps:
- Select Server Config Type: For local use/dev, choose something like “Development Machine” (default).
- Networking & Port: Default port is
3306— fine for most setups. - Authentication Method: Recommended — “Use Strong Password Encryption.”
- Set Root Password: Provide a strong password for the root user (or create additional MySQL users).
- Windows Service Setup: Keep MySQL configured to run as a Windows Service; enable auto-start if you want MySQL to start with Windows.
Finally, click Execute/Finish to apply configuration and start the MySQL server.
Step 5: Verify Installation & Connect with MySQL Workbench
- Once installation completes, open MySQL Workbench (installed by default if you chose full/dev-default).
- Connect to the “Local instance MySQL80” with the root password you set.
- As a test — create a new database. For example:
CREATE DATABASE test_db; - Refresh the schema list — you should see
test_dbappearing. If yes, MySQL works correctly.
✅ Final Thoughts
Installing MySQL on Windows 10 / 8 / 7 using the official installer is straightforward — and once done, you get a powerful, full-featured relational database server ready for development, learning, or production use.


