

GPU Accelerated Rendering in Steam uses your computer’s graphics card to make the Steam client run smoother and look better, especially when browsing games or navigating web content. For most users, enabling this feature helps boost Steam’s performance and delivers clearer visuals, but it can cause issues like lag or crashes on some systems. The good news is, you can easily turn GPU Accelerated Rendering on or off in Steam’s settings to match your needs. In this blog, you’ll learn quick steps to enable or disable GPU Accelerated Rendering in Steam to optimize your gaming experience.
🛠 Steps to Enable/Disable GPU Accelerated Rendering in Steam
- Open Steam
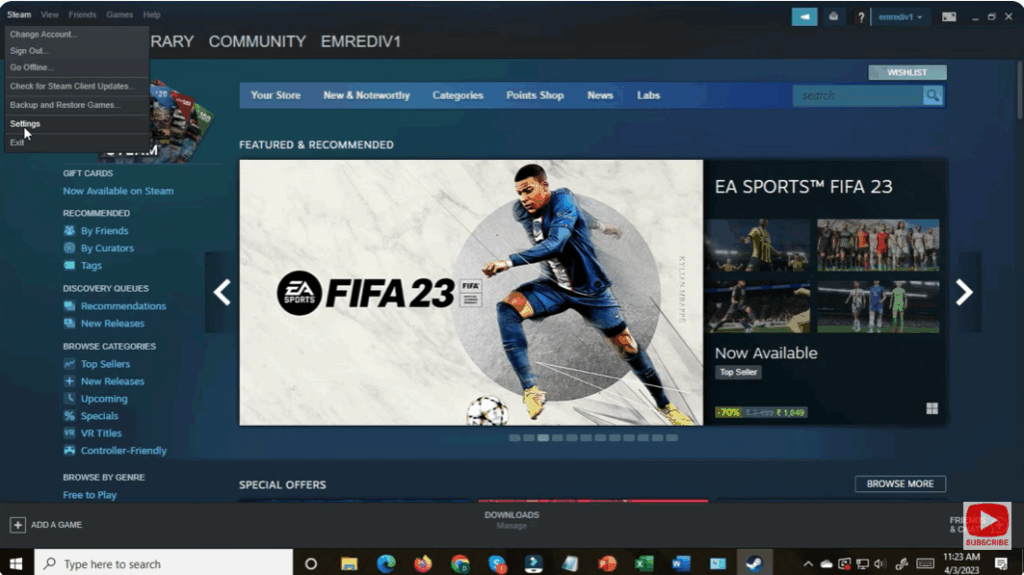
Launch the Steam application on your Windows PC. - Go to Settings
- Click on the Steam menu in the top-left corner.
- Select Settings from the dropdown.
- Open Interface Section
In the Settings window, click on the Interface tab on the left side. - Find GPU Rendering Option
Look for the option: “Enable GPU accelerated rendering in web views” - Enable or Disable According to Your Need
- Tick (✔) the box to Enable GPU acceleration.
- Uncheck the box to Disable GPU acceleration.

- Restart Steam
After making the change, Steam will ask you to Restart to apply settings.
Click Restart Now.
🎯 Conclusion
GPU Accelerated Rendering can improve performance if your system has a strong GPU. But if you notice lag, graphic glitches, or Steam freezing, disabling this feature may help resolve the issue. Just follow the above steps and restart Steam to apply the change.


