

Google Chrome is one of the most popular browsers, but sometimes it may refuse to open or crash repeatedly, causing frustration. If you are facing this issue, here’s a step-by-step guide to fix Chrome crashing on your Windows PC.
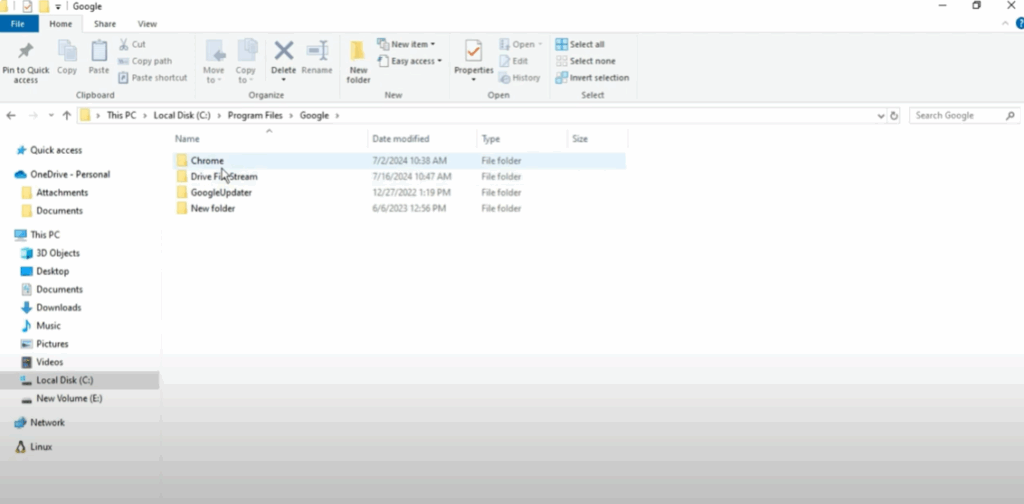
Step 1: Open File Explorer
Go to the Windows menu bar and search for File Explorer. Open it, then click on This PC.
Step 2: Navigate to Chrome’s Installation Folder
- Open the C: drive.
- Go to Program Files.
- Scroll down and locate the Google folder.
- Open the Chrome folder, then Application.
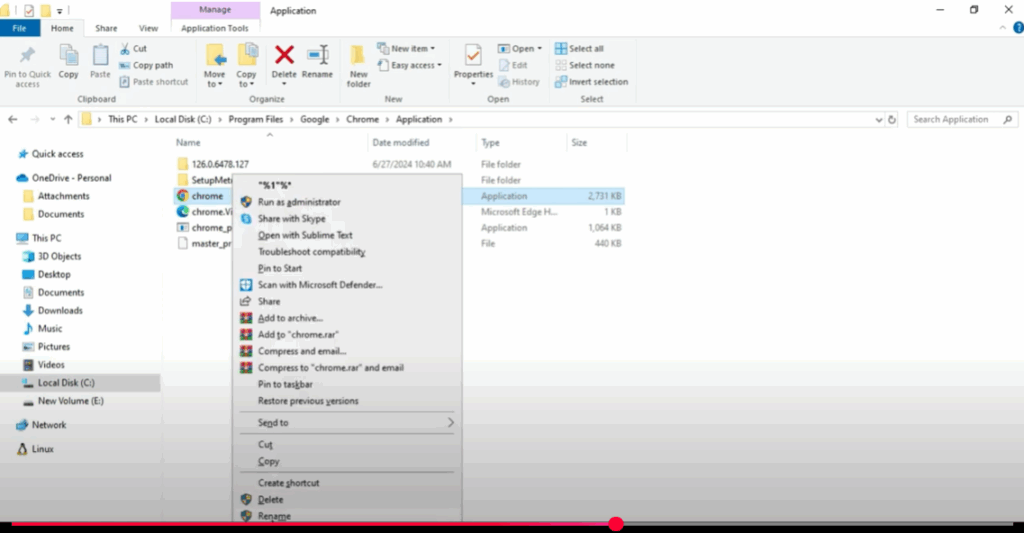
Step 3: Rename the Chrome Application
Inside the Application folder, you will find the chrome.exe file.
- Right-click on it and choose Rename.
- Change the name to chrome1.exe.
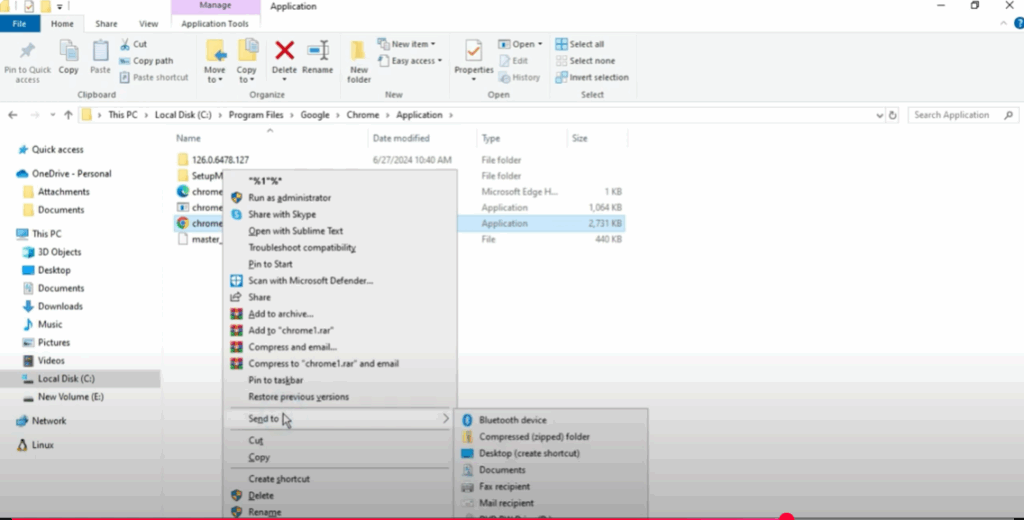
Step 4: Create a Desktop Shortcut
- After renaming, right-click on the chrome1.exe file.
- Select Show more options.
- Click on Send to → Desktop (create shortcut).
Step 5: Launch Chrome and Restart
Go to your desktop and open Chrome from the new shortcut. Once it opens, restart your computer and try opening Chrome again. It should now work without crashing.
By following these simple steps, you can resolve Chrome crashing issues on Windows easily. If you found this guide helpful, don’t forget to share it with others.


