
If fonts in your Windows 11 system appear distorted or missing, they may be corrupted. To fix this, open Control Panel → Fonts → Font settings and click “Restore default font settings.” If the issue continues, run the System File Checker and DISM commands in Command Prompt to repair system files. Reinstall any missing fonts from the Microsoft Store, then restart your PC to restore normal font display.
Step1 : Restore Default Font Settings
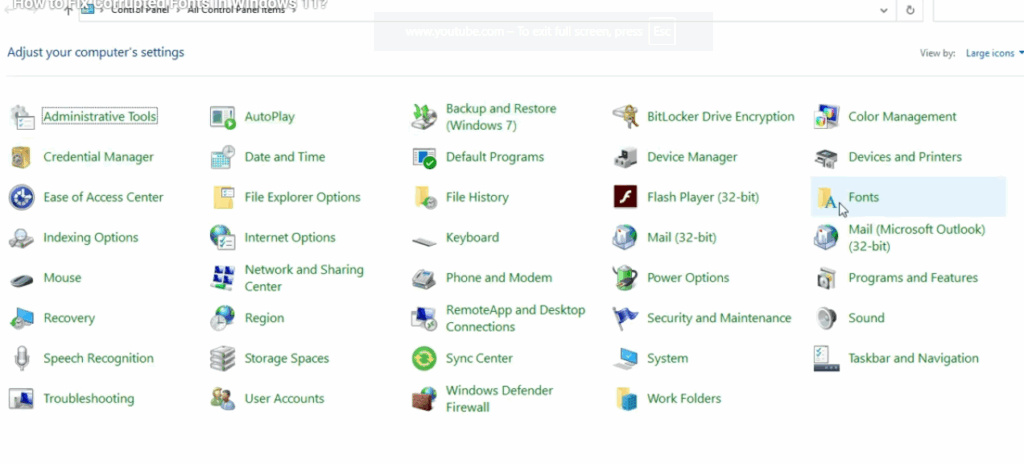
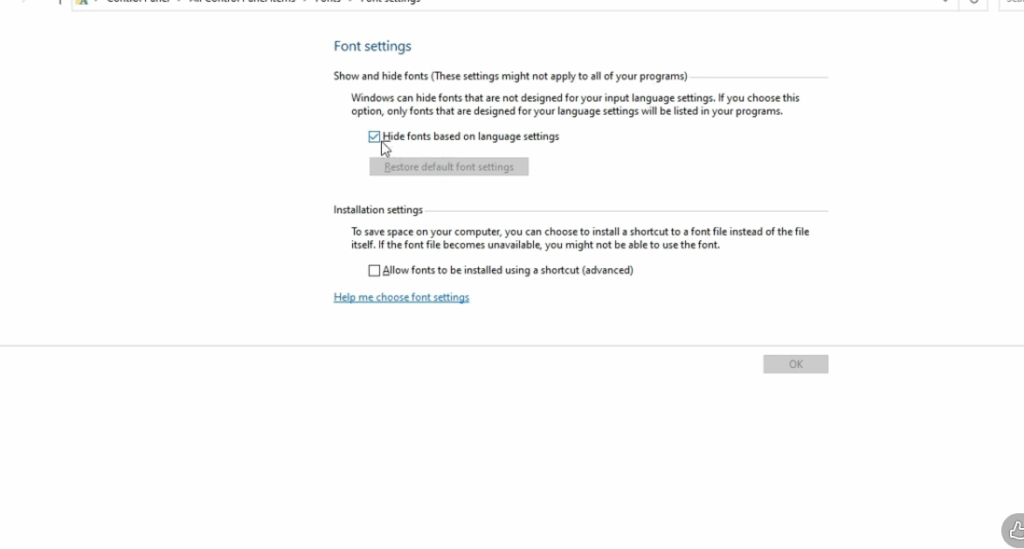
- Open the Control Panel.
- Go to Appearance and Personalization → Fonts → Font settings (on the left sidebar).
- Click Restore default font settings.
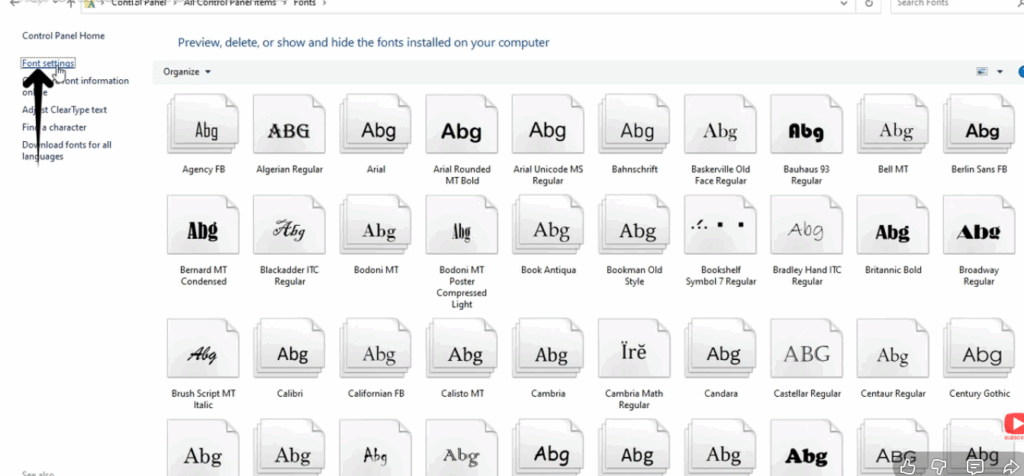
- This resets all font configurations to the original Windows 11 defaults.
- (Show clicking the “Restore default font settings” button)
Step 2: Restart Your PC
- Voiceover: Finally, restart your PC to apply all font repairs and settings.
- Your system fonts should now look clean and normal again.
Conclusion:
Restoring default settings and repairing system files usually resolves font corruption in Windows 11 quickly and effectively. These simple steps help restore your system fonts to their original appearance, ensuring smooth readability and consistent display across all apps. If the issue persists, reinstalling missing fonts from the Microsoft Store or copying them from another healthy Windows system can further fix the problem.


