

The Microsoft Print to PDF feature in Windows 11 is a handy tool that lets you save documents or web pages as PDF files without needing extra software. But sometimes, it may stop working—either nothing happens when you try to print, or the PDF file doesn’t get created. This can be frustrating if you rely on it for work, school, or personal use. The good news is, this issue is usually caused by small glitches, wrong settings, or outdated drivers, and it can be fixed easily. In this beginner-friendly blog, we’ll explain in simple language how to fix the Microsoft Print to PDF not working problem step by step, so you can get back to saving files smoothly.
✅ 6 Effective Fixes for “Print to PDF” Not Working in Windows 11
Here are recommended steps — from quick checks to deeper repairs — to restore the Print to PDF functionality.
1. Re-enable / Add “Microsoft Print to PDF” as Printer
Sometimes the virtual printer may be disabled or removed. Re-adding it often solves the problem:
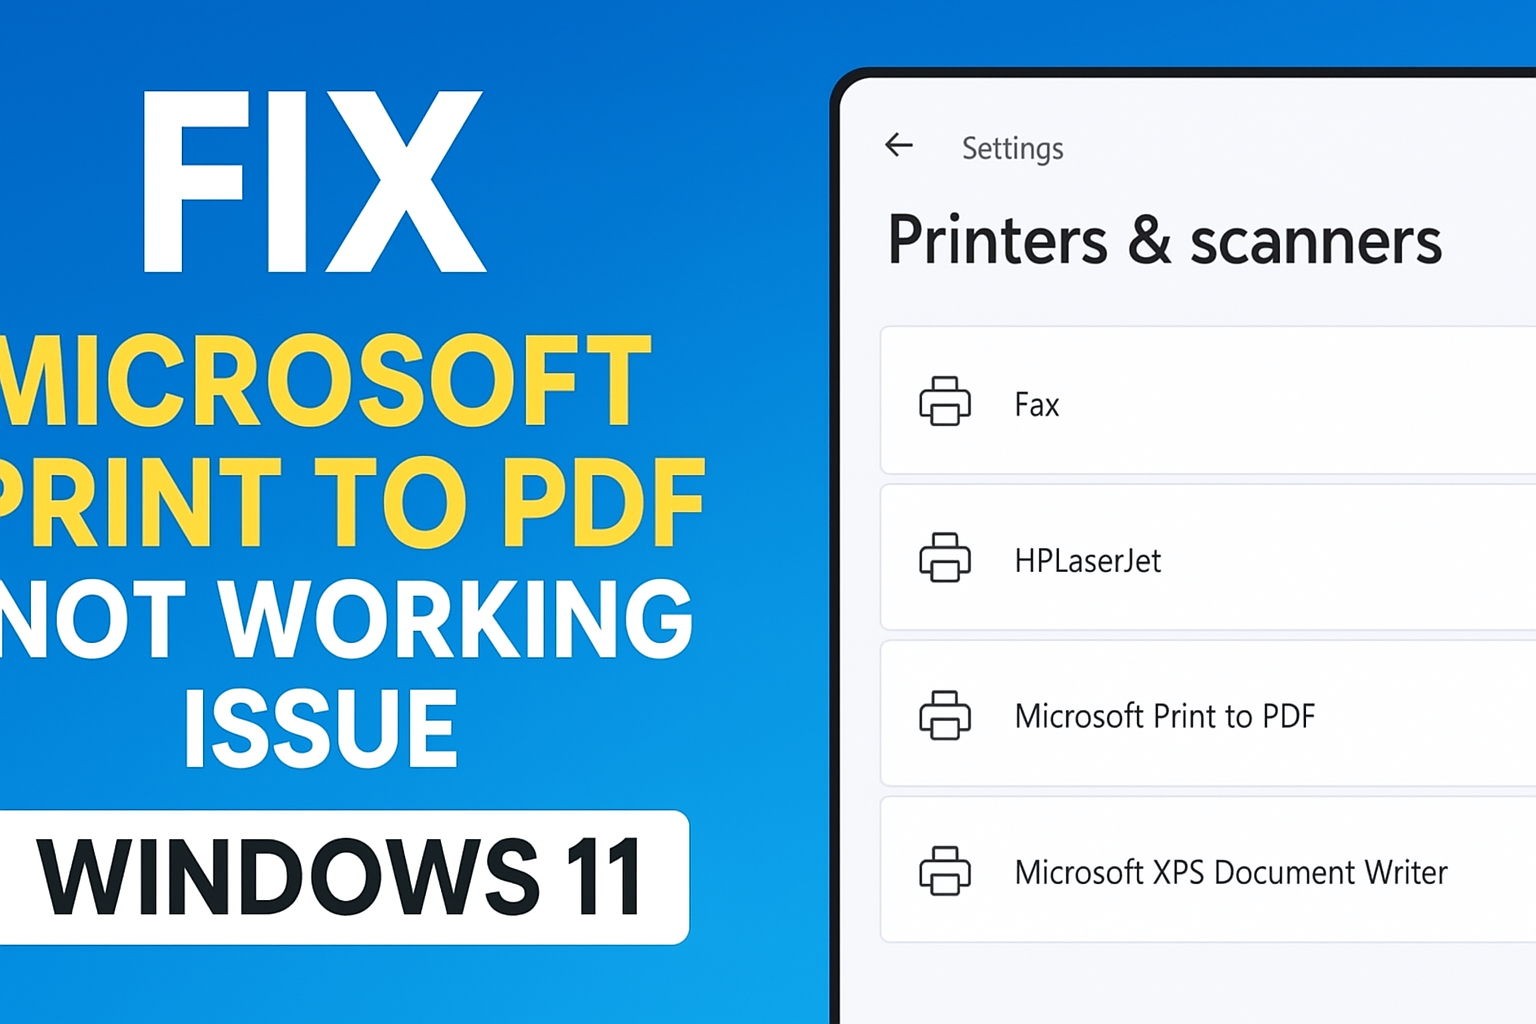
- Open Settings → Bluetooth & devices → Printers & scanners.
- If “Microsoft Print to PDF” is missing: click Add device or printer, then choose Add manually → Add a local printer or network printer with manual settings.
- For “Use an existing port,” choose PORTPROMPT: (Local Port), and select “Microsoft Print to PDF” from the printer list.
- Complete the wizard — then test printing to PDF.
This restores the PDF printer driver if it was accidentally removed or disabled.
2. Set “Microsoft Print to PDF” as Default Printer (Temporarily)
If another printer is set as default, switching to PDF might fail. Try:
- Go to Printers & scanners in Settings.
- Find “Microsoft Print to PDF” → click the three-dot menu → choose Set as default printer.
- Then attempt to print your document as PDF.
Using it as default temporarily ensures the system uses the right driver.
3. Restart Print Spooler Service
Print-related services may hang or glitch — restarting them can clear issues.
- Press Win + R, type
services.msc, press Enter. - Scroll to Print Spooler → right-click → Restart.
- After restart, try printing to PDF again.
This resets printer queue and service, often restoring correct print behavior.
4. Remove / Disable Conflicting Third-Party PDF Printers
If you have other PDF printer applications installed (e.g. Adobe PDF, third-party PDF tools) they may interfere with Microsoft’s built-in printer.
- In Printers & scanners, remove or disable other PDF-printer entries temporarily.
- Then test “Microsoft Print to PDF.”
This eliminates driver conflicts that may block PDF output.
5. Run Windows Printer Troubleshooter
Windows includes built-in troubleshooters to diagnose and fix printing issues:
- Go to Settings → System → Troubleshoot → Other troubleshooters.
- Run the Printer troubleshooter (or any related printing diagnostics).
- Let Windows detect issues — if it suggests fixes, apply them.
Often, this automatically repairs corrupted printer configuration or driver problems.
6. Reset Windows PDF Components / Update Windows
If the issue persists, resetting or updating Windows can fix deeper system-level issues.
- Check for updates: Settings → Windows Update → Check for updates. Install any pending updates.
- If updating doesn’t help — consider running System File Checker (SFC) and DISM to repair system corruption:
sfc /scannow DISM /Online /Cleanup-Image /RestoreHealth - After completion, restart PC and test Print to PDF again.
These steps restore damaged system libraries or PDF-related components that may have broken after updates or third-party installations.
✅ Conclusion
“Microsoft Print to PDF” is a useful built-in tool in Windows 11, but if it stops working, the issue can usually be fixed with a few simple steps — from re-adding the printer to resetting system components. By following the steps above carefully, you can restore PDF printing without third-party tools.


