
Hello friends, welcome back to my channel Tech Gitter Official. In today’s video, we will see how to download and install Microsoft 365 in your Windows PC. If you guys are new on our channel, then you guys subscribe to our channel and press the bell icon so that you get notification of all the upcoming videos.
Before starting the video, let me tell you that if any existing Microsoft is already downloaded in your PC, then first of all, you uninstall it by going to the control panel and going to the uninstall program and uninstall it. If it is installed, if not then there is no problem. You guys continue the video further.
Step 1: Search Office Customization Tool
Now you have to open your Chrome browser and search office customization tool. As soon as you search it, you will see the first website microsoft.com. Open it. After opening it, you will see a screen like this.
First, you will get architecture. You can see which architecture you want to download, 32-bit or 64-bit according to your PC. Here, if you right click on This PC and go to Properties, then you will get to know. My PC is 64-bit. So, I will select 64-bit here.

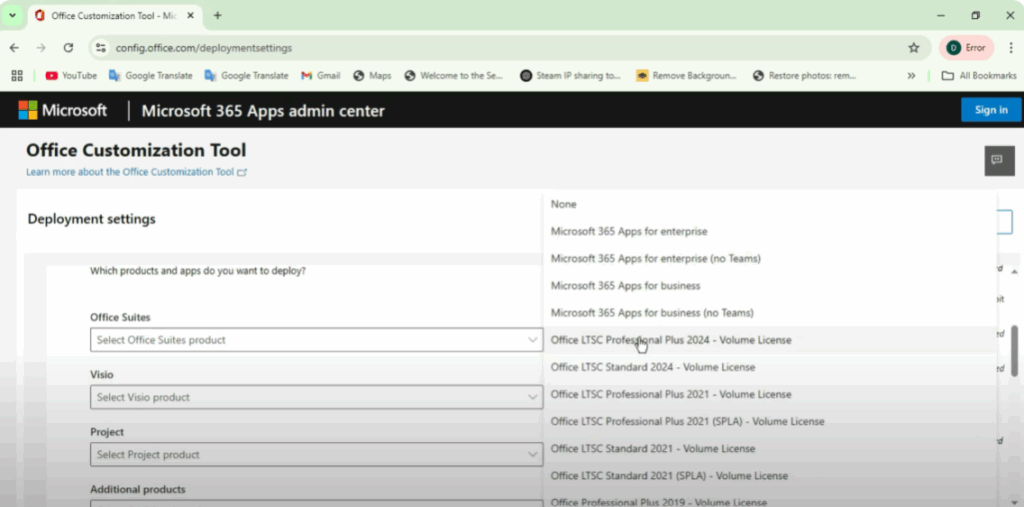
Step 2: Select Office Suite
Next, you have to go to Office Suite. Here you will see Office LTSC Professional Plus 2024 volume license. Select it for now. Office LTE Professional 2024 is available here. If your PC has a higher version available 2025 or 2026, then select it. You can see that I have selected it here.
Step 3: Select Office Apps
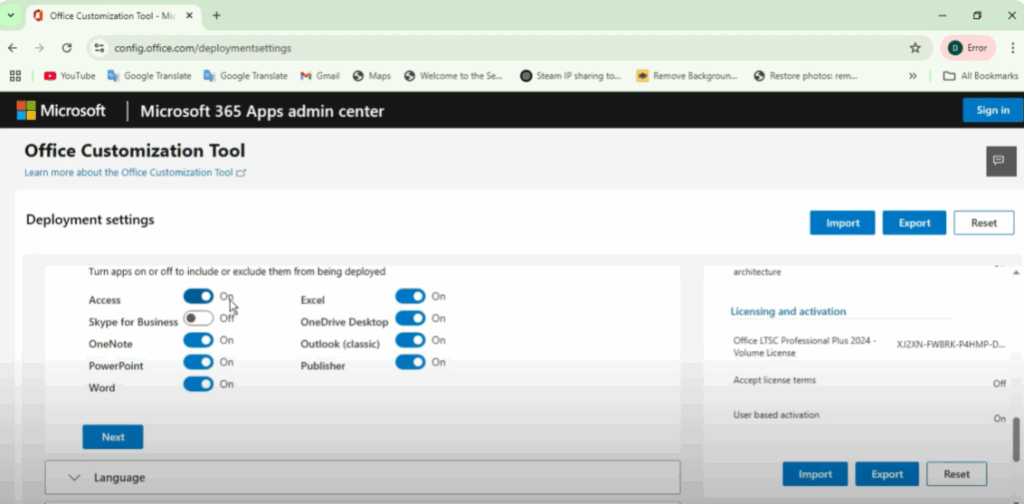
After that, scroll down. Here you will find the apps section. In these apps, you will have to select which office apps you want to install on your PC. Select the apps that you want to install. This will install all those apps on your PC.
So if I need Access, OneNote, PowerPoint, Word, Excel here I will select them and the rest are not useful to me. So I will unselect them.
Step 4: Choose Language
After this, come down. It will ask you to select the language. Here we will select English (United States) as the primary language and click on Next.

Step 5: Updates and Upgrades
You don’t need to do much here. Just click on Next and here you will find updates and upgrades.
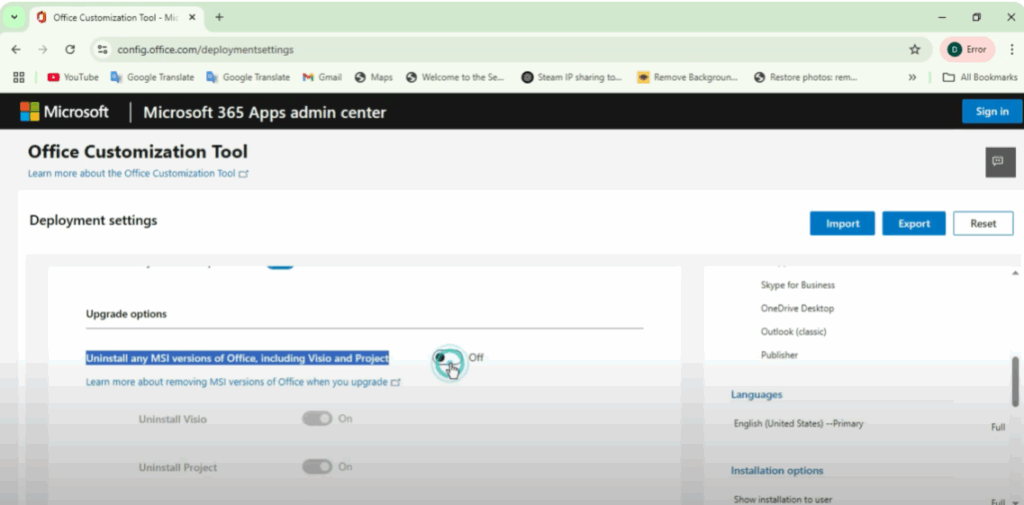
As you can see below, you will see the upgrade option. Here you will find Uninstall any MSI versions of Office including Visio and Project. Uncheck it.
After this, come down and click on Next. Again, you don’t need to do anything. Just keep clicking Next until you reach the end.
Step 6: Export Configuration File
Your work is over here. Now just click on Finish. After clicking on finish, you will see the Export button on the screen. Click on it.
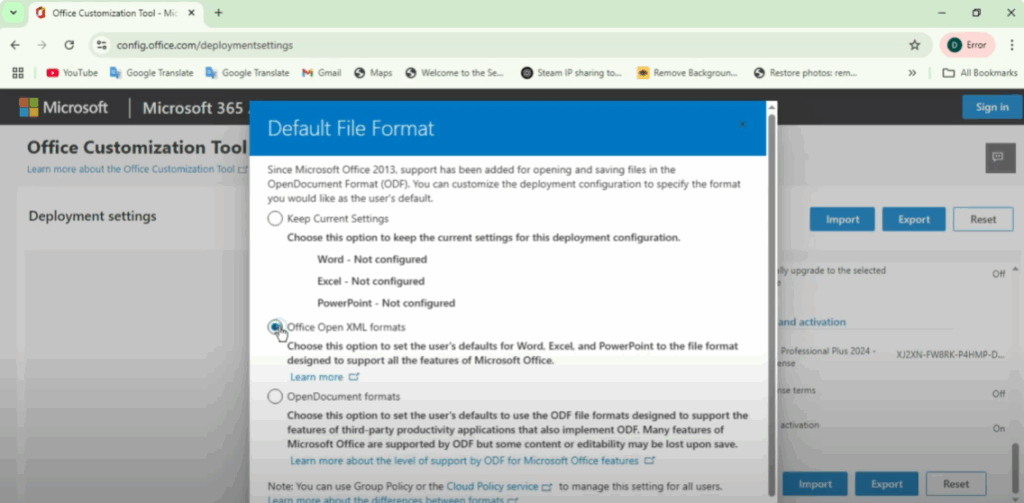
You will see something like this on the screen. Here you will find the option of Office Open XML format. Tick it and then click OK. Accept it. Leave the file name as it is.
Click on Configuration and Export. By doing this, your XML file will be downloaded here.
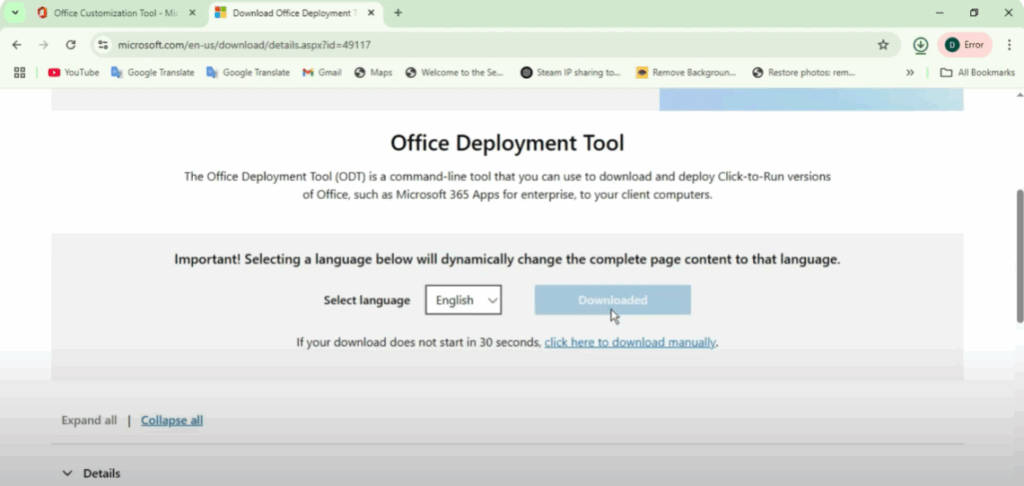
Step 7: Download Office Deployment Tool
Now you have to come to a new tab in your browser and type office deploy tool. Open the official website www.microsoft.com. Select it in English and download it from here.
After installation, all the files that are needed are already here. You have to create a new folder and name it Microsoft (or any name you prefer). Now move all the downloaded files into this Microsoft folder.
Step 8: Run Office Deployment Tool
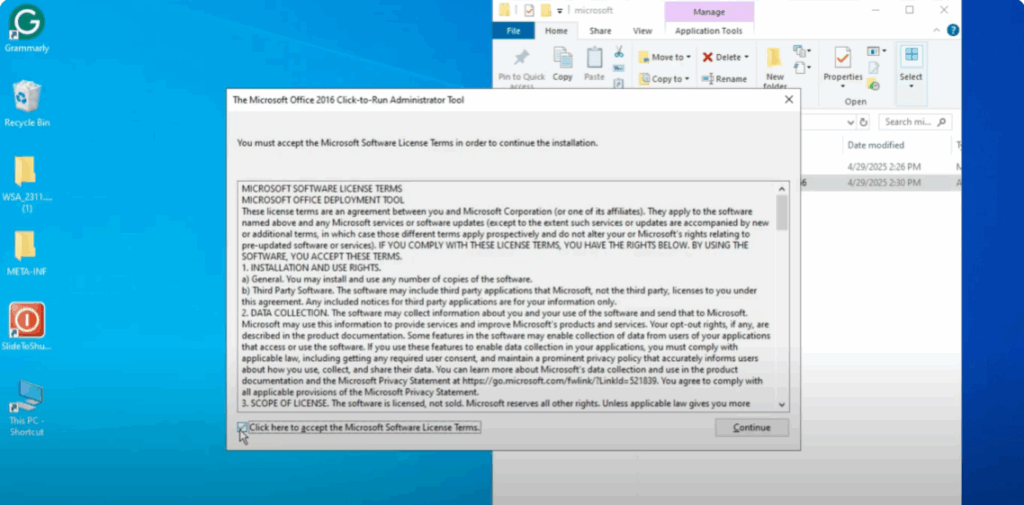
Inside the folder, you will see two files. First, open the Office Deployment Tool. Something like this will open. Check it and click on Continue.
Now you have to select the path of the folder you created (Microsoft folder). I created it on the desktop, so I will go there and select it. Then click OK.
Step 9: Run Command Prompt
Now open Command Prompt (CMD) as administrator.
- Type cmd in Windows search.
- Right-click and select Run as administrator.
- Copy the folder path of the Microsoft folder.
- Type
cdin cmd, then paste the copied path and press Enter.
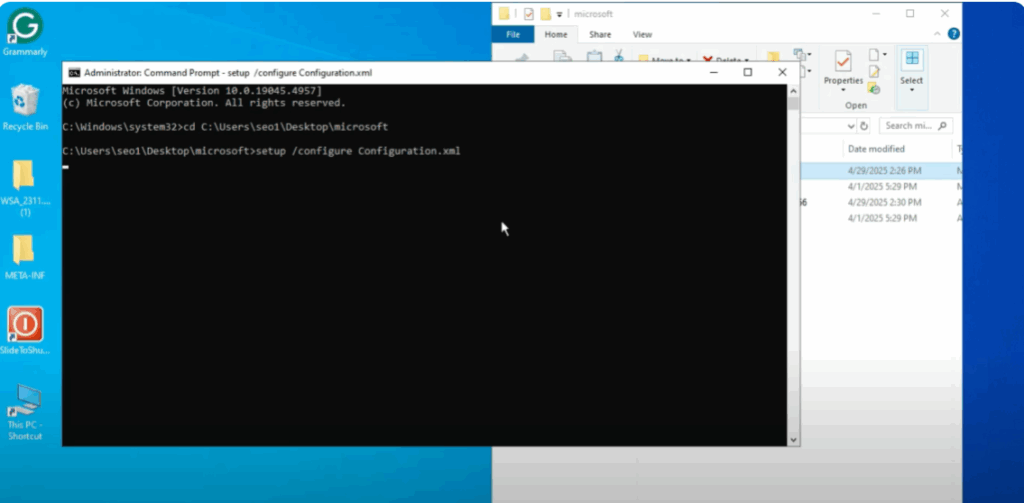
After this, type:
setup /configure configuration.xml
(Here, replace configuration.xml with the exact XML filename you exported earlier).
Step 10: Installation Process
Now, you will see the download happening. Wait until the process is complete. Make sure your PC is connected to the internet until Microsoft 365 is fully installed.
Once completed, click Close.
Step 11: Open Microsoft 365
Now you can open Microsoft apps like Word, Excel, PowerPoint, and more. As you can see, it’s working perfectly.
That’s all for today. If you found this guide helpful, don’t forget to like, share, and stay connected with the channel. See you in the next video!


