
If your computer has only one big drive, it can sometimes feel messy to store everything in one place. That’s where partitioning your hard drive comes in handy. Partitioning means dividing your hard disk into smaller sections, so you can create a new drive (like D: or E:) without adding extra hardware. This makes it easier to organize files, keep work and personal data separate, or even install another operating system.
We will move forward step by step, so read carefully without skipping. Missing even a single step may result in failing to partition the drive.
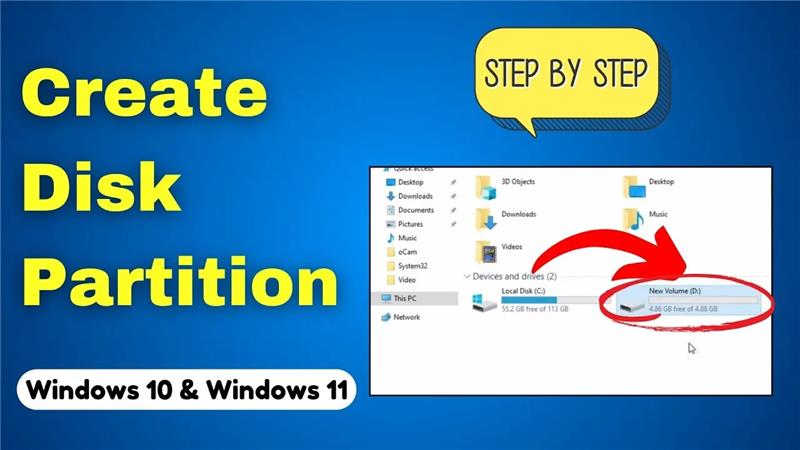
Step 1: Open File Explorer
Type File Explorer in the search bar. Open it and click on This PC on the left side. Here, you will see only a single C drive. Some data is stored in this drive. If this drive gets completely full, we will need more space to store data. That’s why we are going to create another drive here so we can free up storage on the C drive.

Step 2: Open Disk Management
First, we have to open the Run command in Windows.
Type:
diskmgmt.msc
Click OK.

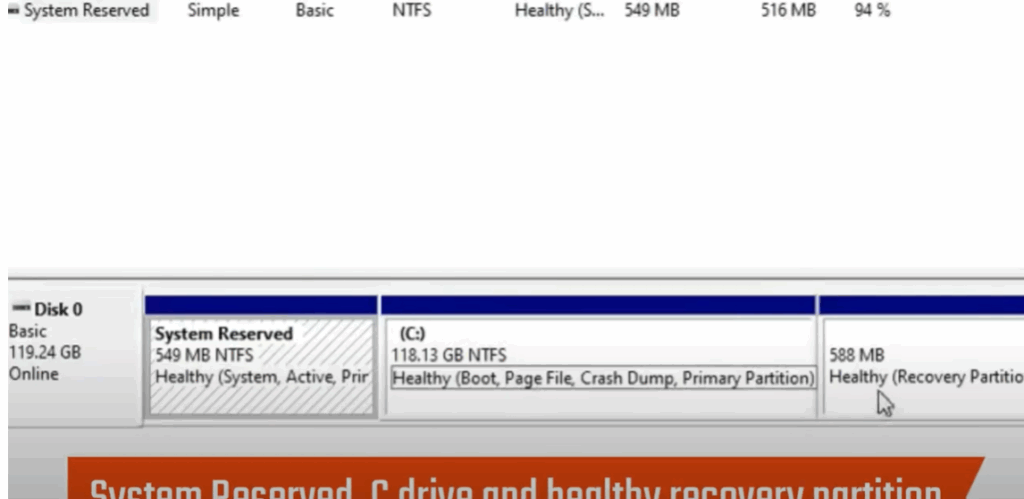
You will now see a window like this, which is Disk Management. Here you will see System Reserved, C Drive, and Healthy Recovery Partition. Do not touch the system reserved or recovery partitions.
Step 3: Shrink the C Drive
Select the largest drive (C drive). Right-click on it and select Shrink Volume.
As soon as you click, Windows will start calculating the available space. This may take 2–3 minutes, so don’t worry if it looks stuck.
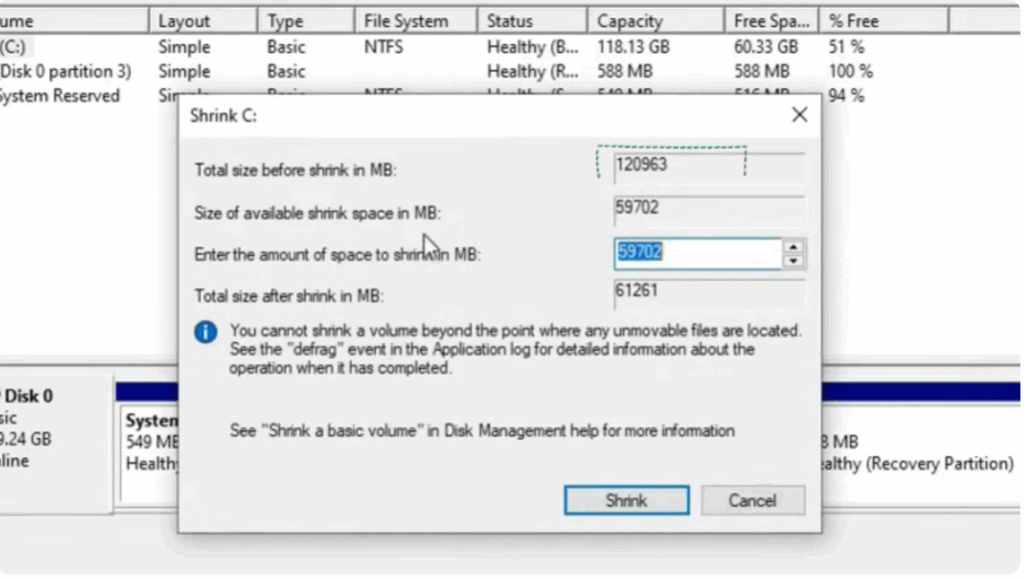
A dialogue box will appear showing:
- Total size before shrink
- Size available for shrink
Suppose the available size is 59,000 MB. To convert MB into GB, divide by 1024. For example:
59,000 ÷ 1024 ≈ 57 GB
If you want a 5 GB partition, multiply 5 × 1024 = 5,120 MB. Round it to 5000 and enter that in the box.
Click Shrink. After waiting, you will see a new section marked Unallocated.
Step 4: Create a New Simple Volume
Right-click on the unallocated space and select New Simple Volume. A wizard will appear.
- Click Next.
- Assign a drive letter (for example, D). Click Next.
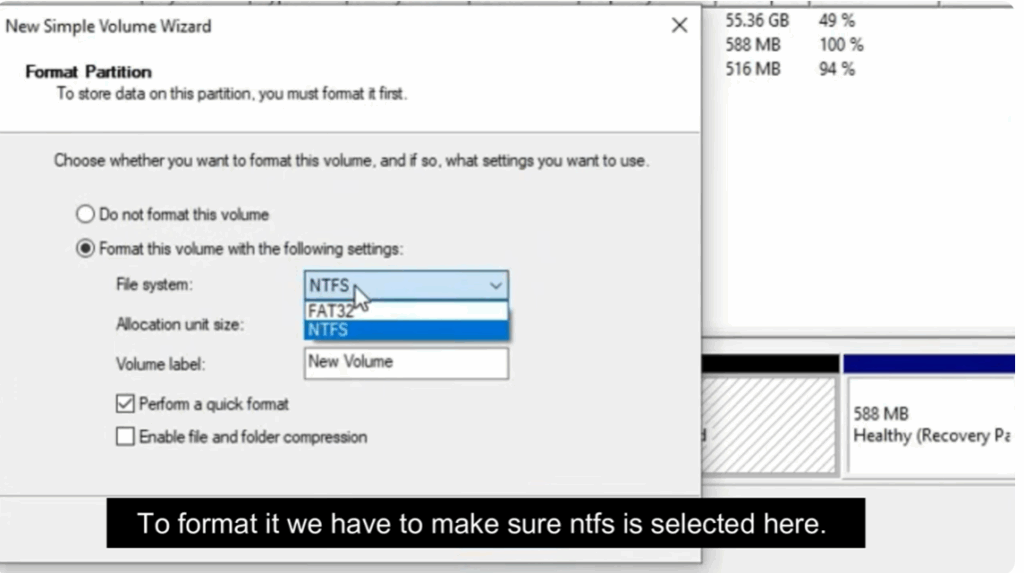
- Choose file system: Select NTFS (not FAT32). Leave allocation size and volume label as default.
- Click Next, then Finish.
Step 5: Verify the Partition
Once complete, you’ll see a new volume created. Close the Disk Management window and go to File Explorer. Under This PC, the new drive (D:) will appear.
Final Notes
Partitioning your hard drive in Windows 10 or 11 is a smart way to keep your files organized, improve system management, and even prepare your PC for multiple operating systems. The process may sound technical at first, but with built‑in tools like Disk Management, it becomes simple and safe if you follow the steps carefully. Always remember to back up your important data before making changes to your drives, as this ensures your files stay protected in case something goes wrong. Once done, you’ll have a cleaner, more organized system with separate drives for work, personal files, or anything else you need.


