
Updating your computer’s BIOS (Basic Input/Output System) improves hardware compatibility, fixes bugs, and boosts performance, but it must be done carefully to avoid bricking your motherboard. A failed update can make your PC unbootable if power is lost or the wrong file is used. In this blog, you’ll learn the safe step-by-step process: backing up data, downloading official BIOS from your motherboard maker, using stable power, and flashing correctly to update BIOS without risks.
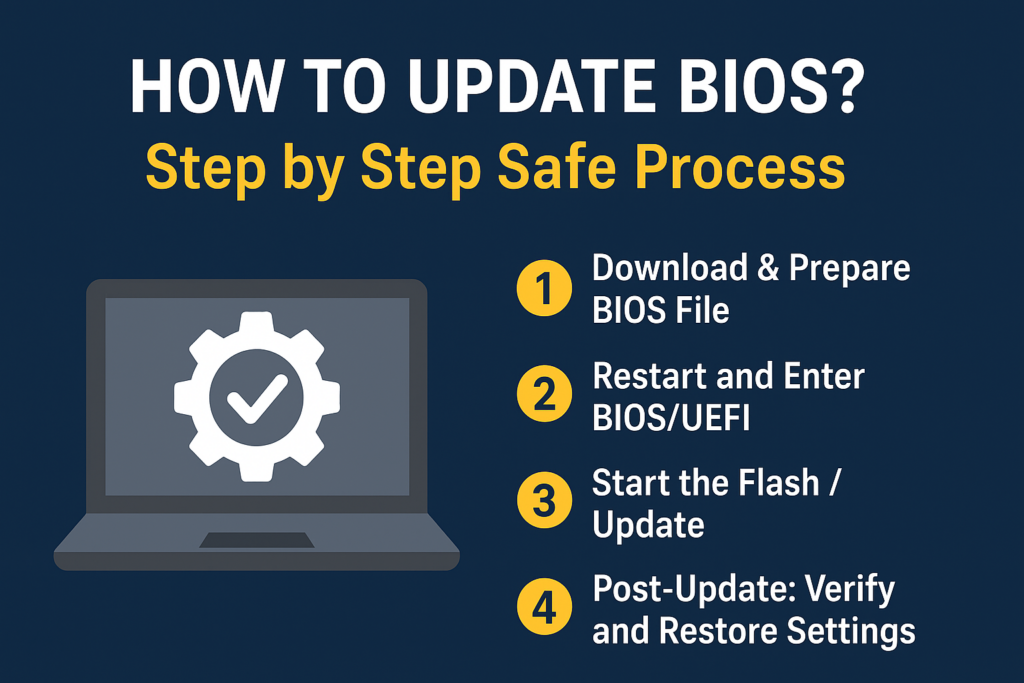
🔧 Step-by-Step: Safe BIOS Update Process
Here’s the recommended safer approach — using BIOS/UEFI built-in utility and a USB flash drive. This method reduces OS-level interference.
1. Download & Prepare BIOS File
- Go to your motherboard or laptop manufacturer’s support page → find the BIOS / firmware section for your exact model. Download the latest stable BIOS.
- Extract the downloaded archive (if compressed). Inside should be a file — commonly with extension like
.BIN,.CAP,.ROM, or similar. Also check if there are instructions or README. - Format a USB flash drive as FAT32, and copy the BIOS file to the root directory (not inside folders).
2. Restart and Enter BIOS / UEFI Setup
- Reboot your PC / laptop. During boot-up, press the key to enter BIOS/UEFI setup — commonly
Del,F2,F10,Esc, or as specified by your system. - Once inside, locate the built-in BIOS Flash Utility (names vary by manufacturer — e.g. EZ Flash, Q-Flash, M-Flash, etc.).
3. Start the Flash / Update
- With the USB plugged in, select the BIOS file. Confirm you want to proceed. The update process begins.
- Important: once the flash begins — do not power off, restart, remove USB, or interrupt in any way. Even momentary power loss can corrupt BIOS and brick the board.
4. Wait — Be Patient
- The screen may go blank, or system may restart several times — this is normal. Wait until the BIOS utility indicates completion.
- Once done, the system usually restarts automatically.
5. Post-Update: Verify and Restore Settings
- After boot, re-enter BIOS/UEFI to verify the new BIOS version.
- It’s recommended to load default/optimized settings (often the update resets custom settings). Then re-apply any custom BIOS settings you had (boot order, RAM timings, overclock, etc.).
- Boot into OS, check hardware functioning — ensure storage, RAM, peripherals are all working fine.


