

Hello friends how are you all. Welcome back to my channel Tech Gitter. If you’re using an Intel integrated graphics card and want to increase your video RAM without using any additional software then this video is for you. By following these steps you’ll not only boost your computer’s performance but also potentially increase your FPS in games.
Let’s get started.
Update Your Graphics Driver
First let’s make sure your graphics driver is up to date.
- To do this open the Device Manager. You can find it by typing device manager in the search menu and opening it.
- Once in the Device Manager go to Display adapters and find Intel.
- Right click on it and select Update driver.
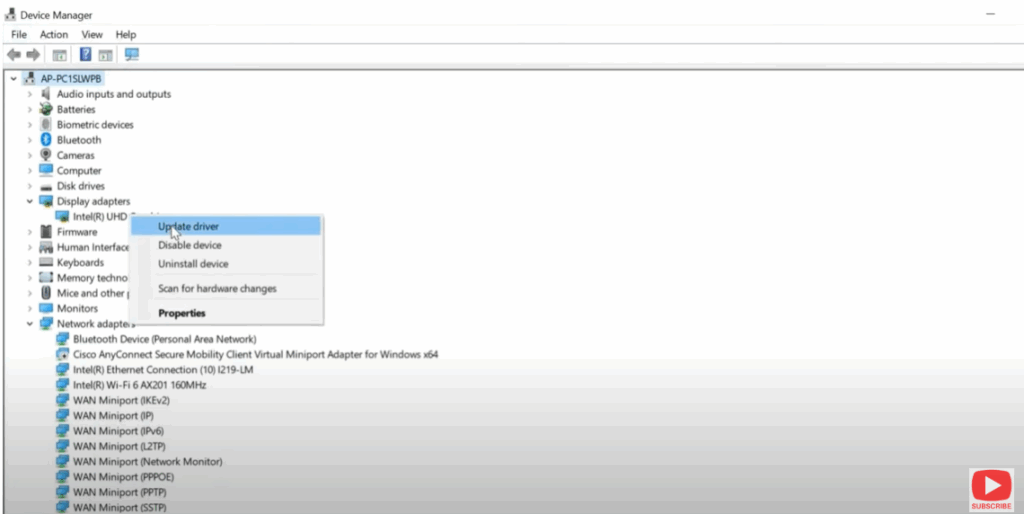
- Click on Search automatically for drivers.
- If it says that the best drivers are already installed, you’re good to go. Just close it and move to the next step.
Check Display Settings
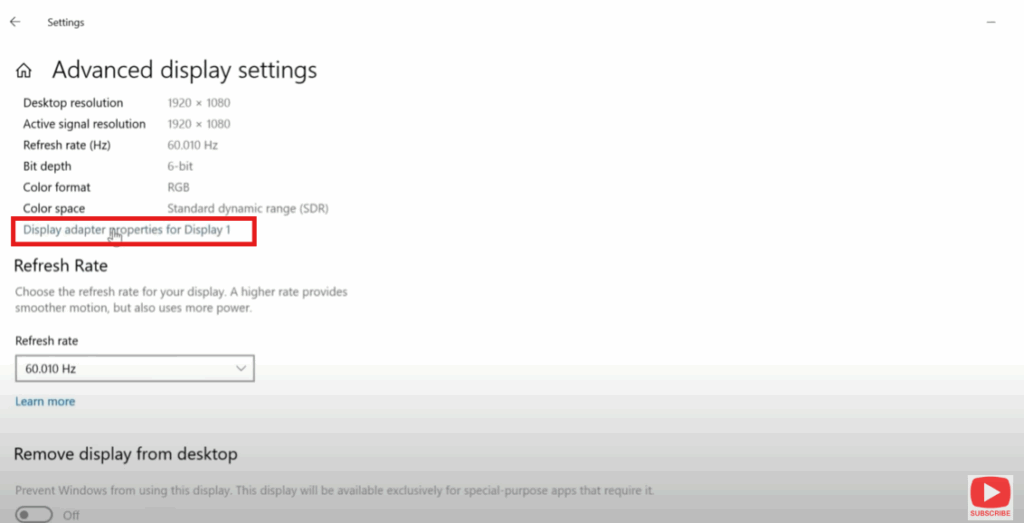
- Right click anywhere on your desktop and go to Display settings.
- Scroll down and click on Advanced display settings.
- Then click on Display adapter properties.
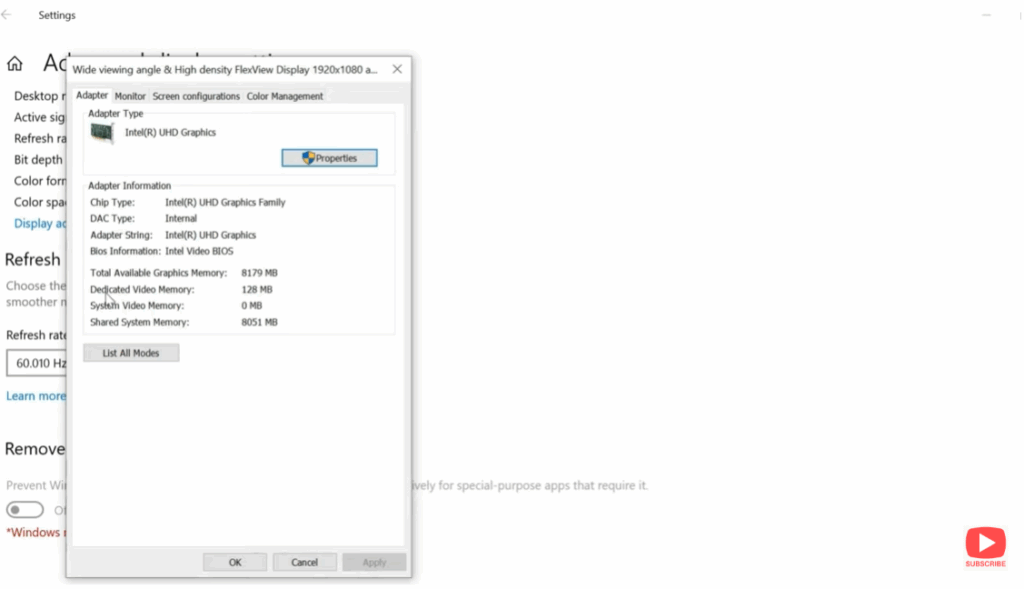
Here you’ll see your dedicated video memory. For example, I have 16 GB of RAM and my integrated Intel Graphics has 8 GB of video memory, but my dedicated video memory is just 128 MB. We’ll increase that next.
Change Dedicated Video Memory
- Press the Windows + R keys together to open the Run dialogue.
- Type regedit and hit OK.
- When prompted for permission, click Yes.
You will see a window like this:
- Go to HKEY_LOCAL_MACHINE and click on the right arrow key to expand it.
- Then click on Software and expand it too.
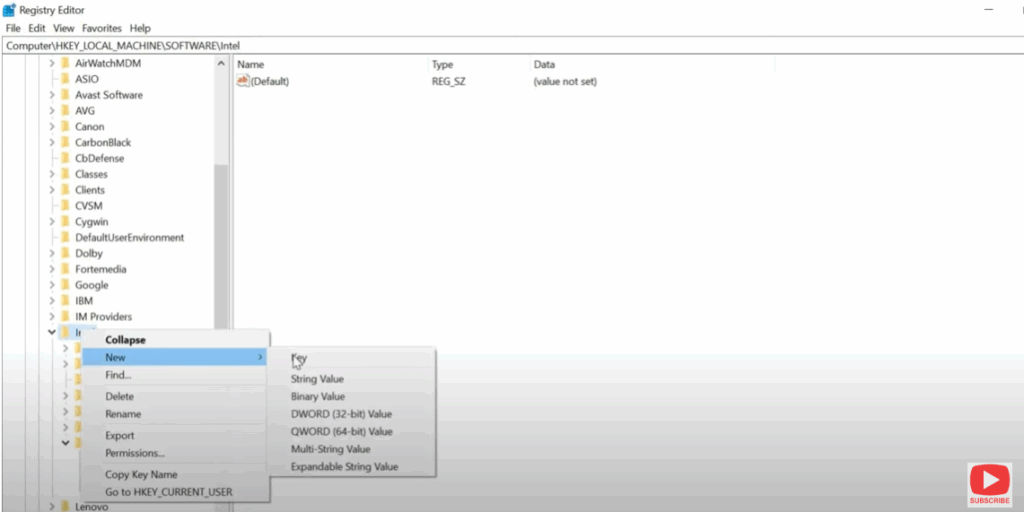
- After this go to Intel → Software.
- Right click on it, then click on New → Key and type GMM (make sure this is in all capital letters). Press Enter.
Now:
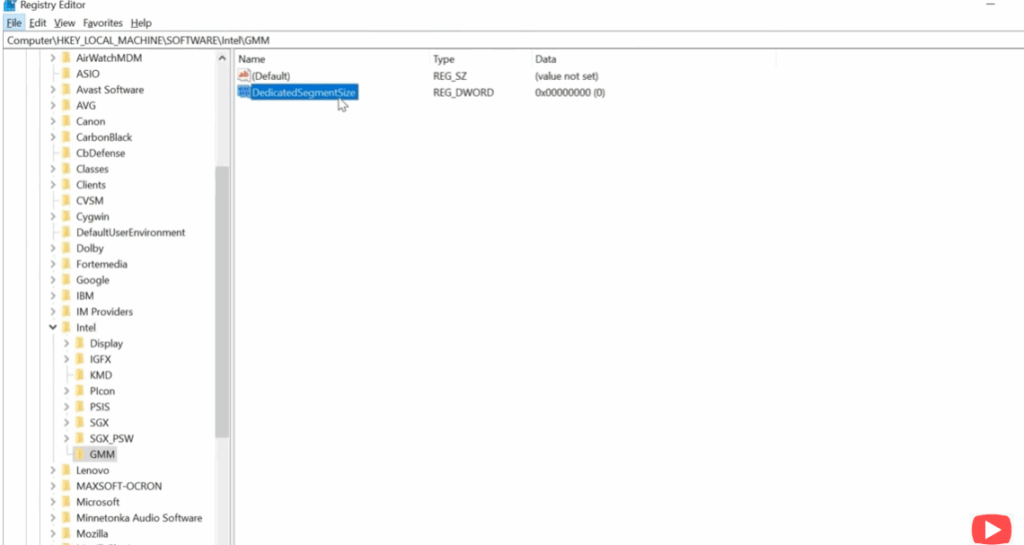
- Right click and then click on DWORD (32-bit) Value.
- Type DedicatedSegmentSize (make sure you don’t put any spaces) and press Enter.
- Right click on it and click on Modify.
Enter the Value
Here we need to put the value according to RAM size:
- If you have 2 GB RAM, enter 256.
- If you have 4 GB RAM, enter 512.
- If you have 8 GB RAM, enter 1024.
- If you have 16 GB RAM, enter 2048.
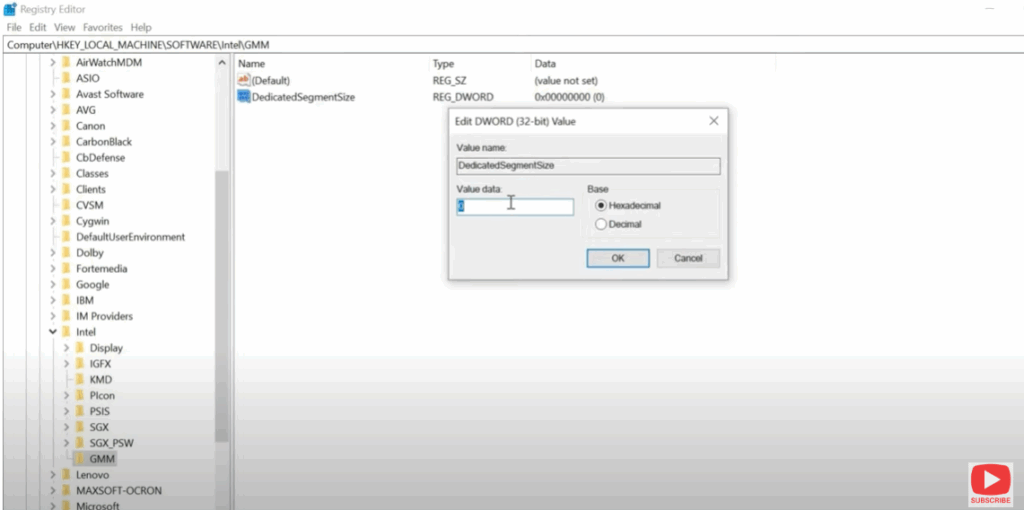
Because I have 16 GB RAM I will type 2048 here and click OK.
Restart Your Computer
After this we just have to restart the computer. Now check whether there is any difference showing in your computer and gaming FPS or not.
Hope you got help after watching this video. If you like the video then please like and share it. And if you are new to the channel then subscribe to it.
See you in the next video. Have a nice day.


