
Hi everyone and welcome back to the channel. In this video, I’m going to walk you through how to download, install, and activate Turboax on your Windows 11 computer. Whether you’re a beginner or just need a refresher, this step-by-step guide is super easy to follow. So, let’s get started.

Step 1: Go to the Turbotax Download Page
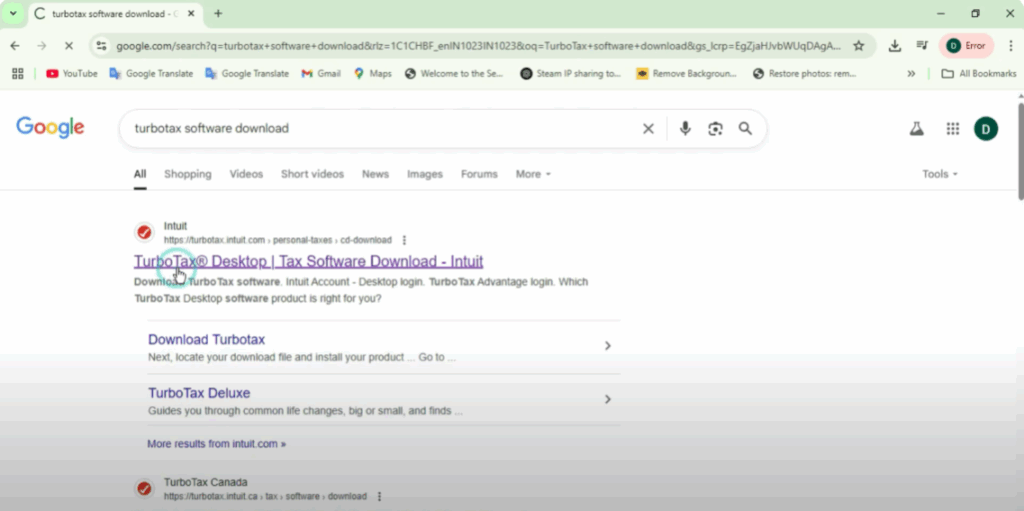
First, open your web browser. You can use Google Chrome, Microsoft Edge, or any browser you prefer. In the address bar or search bar, type Turbotax software download, then press enter. One of the top search results should be from intuitit.com and the title will usually say something like Turbotax Personal Taxes CD/Download. Click on that link to open the official Turbotax download page.
Step 2: Select Your Turbotax Product
On the official page, you’ll see a section near the top that says Download Turbotax Software. Click on that to go to the product selection area. Here, you’ll see several versions of Turbotax listed, such as Turbotax Basic, Deluxe, Premiere, Home, and Business. Choose the version that matches your purchase or the one that suits your needs. For this tutorial, I’ll select Turbotax Basic, but don’t worry, the process is identical for all versions. Click on the product to continue.

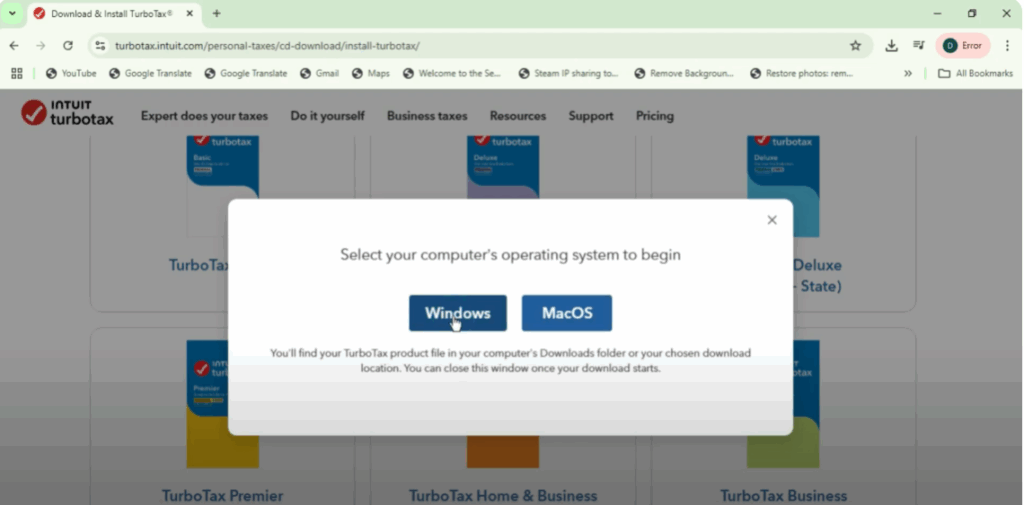
Step 3: Choose Operating System
Next, you’ll be asked to choose your operating system. If you’re using Windows 11, go ahead and click on the Windows option. If you’re on a Mac, choose MacOS instead. Once you make your selection, the download will begin automatically. It’s a fairly large file, so give it a minute or two depending on your internet speed.
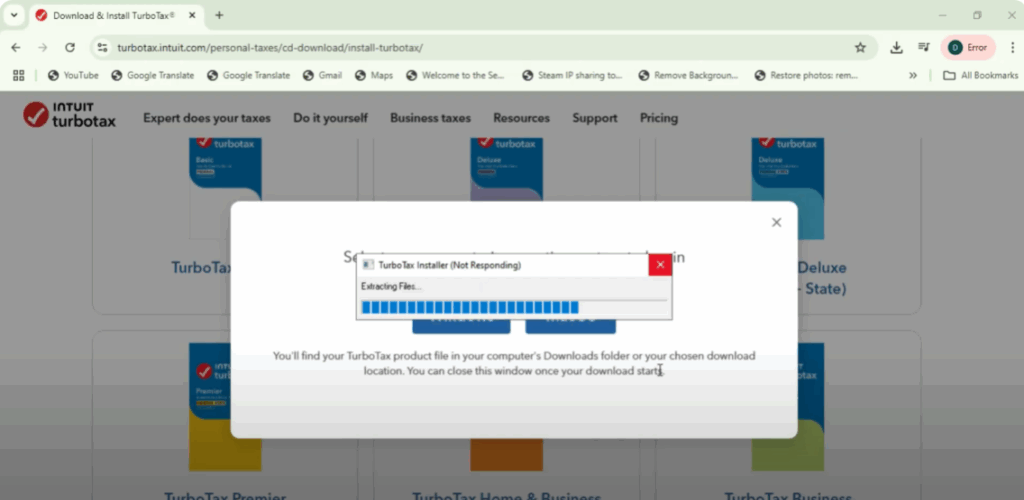
Step 4: Install Turbotax
Once the download is complete, locate the downloaded file, usually in your Downloads folder. The file will be named something like Turboax.exe. Double-click the file to begin the installation. A user account control prompt may appear—click Yes to allow the installer to make changes.
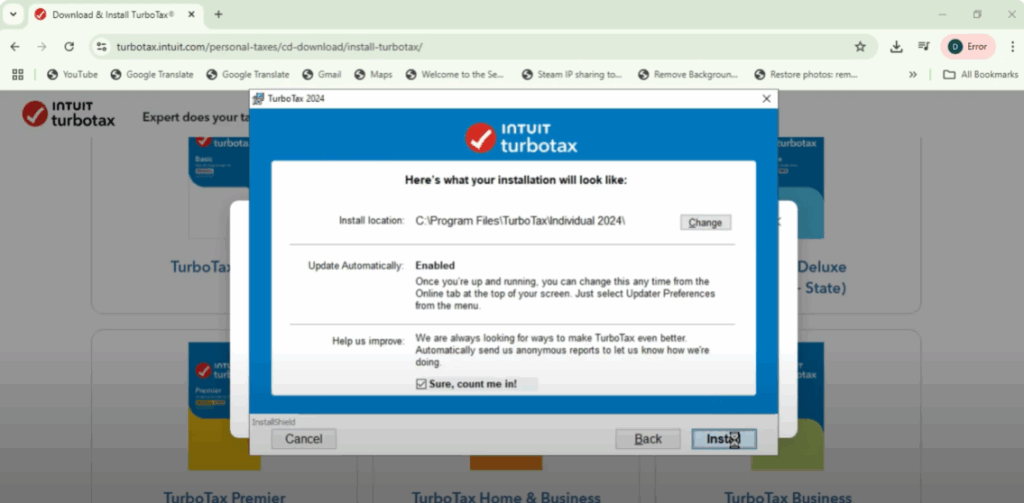
The Turbotax installation window will now open. Here’s what you need to do:
- Read the license agreement and click I accept to proceed.
- Click Next.
- Choose whether to enable automatic updates.
- Decide if you want to help Intuit improve the product by allowing feedback.
- Select your installation location (default is the C:\ drive). You can leave it as it is or change it.
- Finally, click Install to begin the installation.
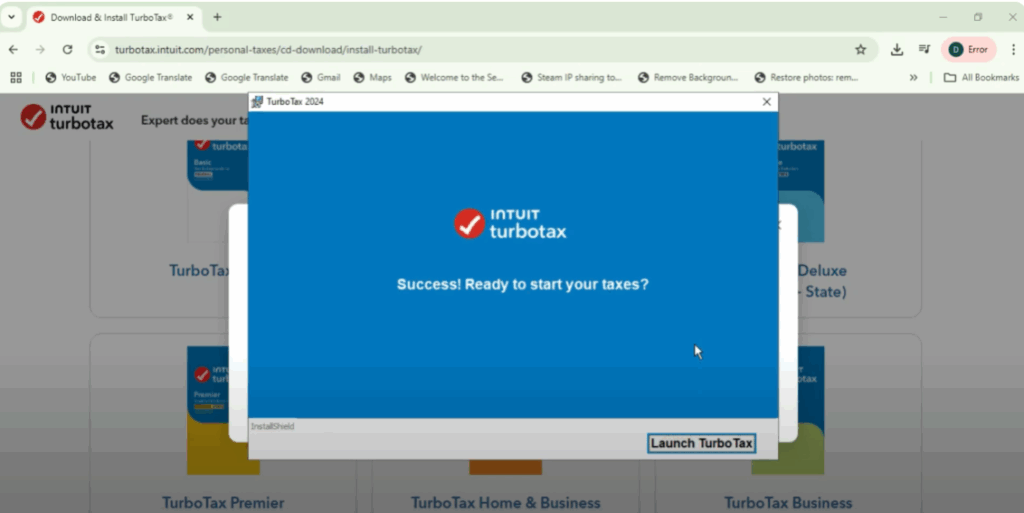
Step 5: Launch Turbotax
The installation process may take a few minutes. Once it’s complete, you’ll see a message that says Success. Ready to start your taxes. Click on Launch Turbotax to open the program. When Turbotax launches for the first time, it may take a moment to initialize.
Step 6: Sign In and Activate
Now, you’ll see a screen prompting you to sign into your Intuit account. If you already have an account, log in with your email and password. If not, click on Create Account and follow the steps to register.
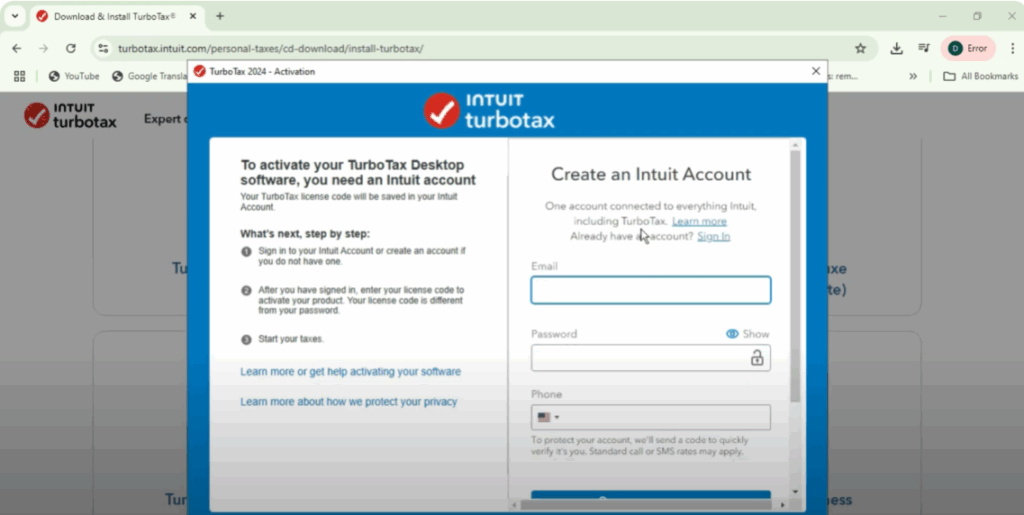
After logging in, you’ll be asked to enter your Turbotax license code. This code is usually found on the CD case or inside your purchase email if you bought it online. It is 14 or 16 characters long and is different from your account password. Enter the license code in the provided box and then click Activate.
Step 7: Start Filing Your Taxes
After activation, you’re all set. You’ll now see the Turbotax dashboard where you can click on Start Your Taxes and begin your tax return for the year.
And that’s it! You’ve successfully downloaded, installed, and activated Turbotax on your Windows 11 computer.
If this tutorial helped you out, please give it a thumbs up, subscribe to the channel, and leave a comment if you have any questions. Thanks for watching and good luck with your taxes.


