

Want to make your Microsoft Excel workspace more organized and easier to use? Customizing tabs and groups lets you create your own layout, so the tools you use most are always within reach. Whether you’re working on reports, budgets, or data analysis, this simple trick can save you time and clicks. In this blog, we’ll show you how to personalize the Excel ribbon by adding, removing, or rearranging tabs and groups—so Excel works the way you want it to!

How to Customize Tabs & Groups in Excel
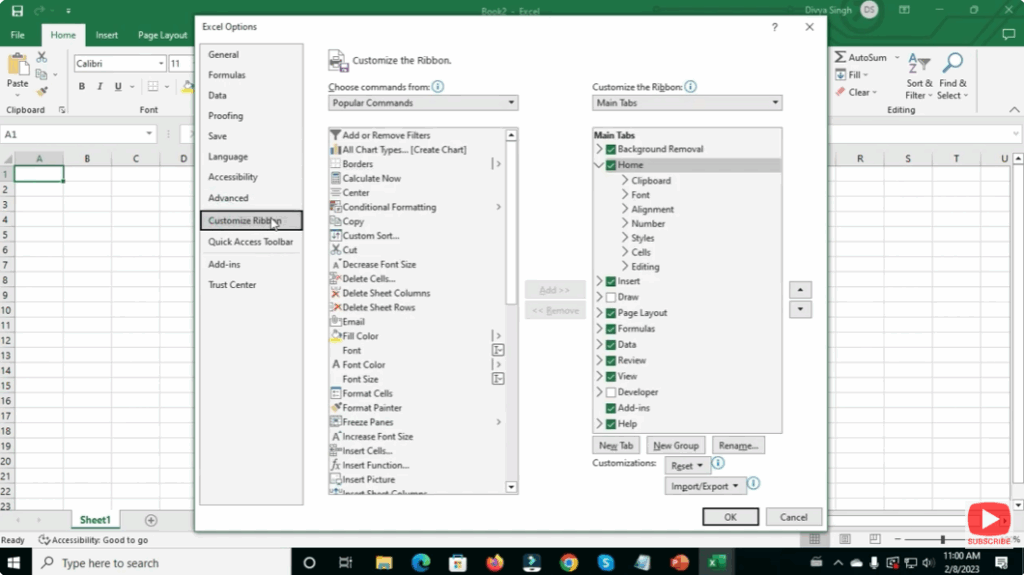
Step 1: Open Excel Options
- Open Microsoft Excel.
- Click on File (top-left corner).
- Select Options from the bottom of the list.
This opens the Excel Options window.
Step 2: Go to Customize Ribbon
- In the left menu, click Customize Ribbon.
- Here you will see two sections:
- Main Tabs (all tabs displayed in Excel)
- Commands (all available tools & features)
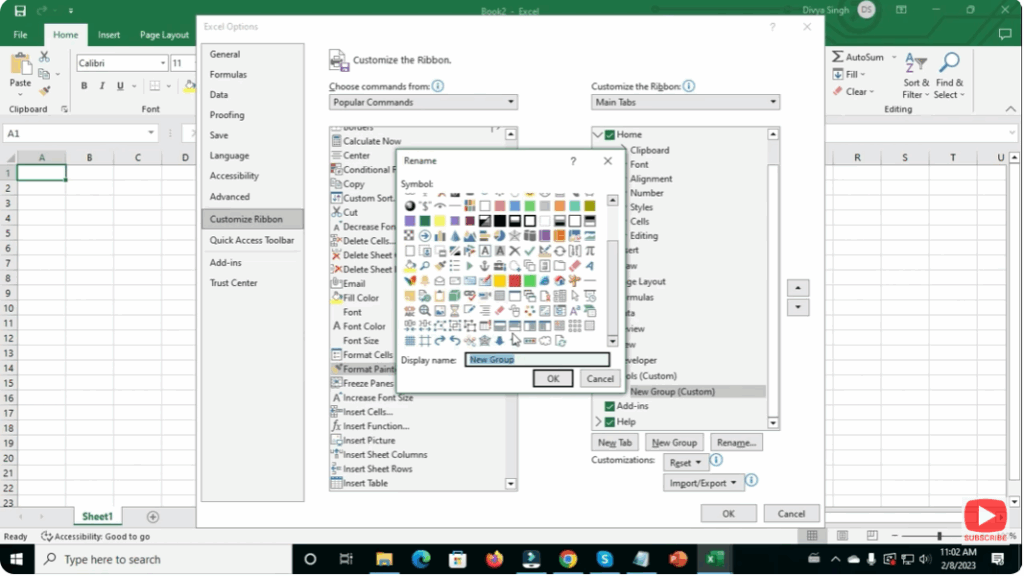
Step 3: Create a New Tab
- Click New Tab on the right side.
- The new tab appears as New Tab (Custom).
- Click Rename to rename it — for example,
My Tools.

Step 4: Add a New Group
- Select the new tab.
- Click New Group.
- Rename it based on the type of tools you will add.
- Example: Formatting Tools, Data Tools, etc.
Step 5: Add Commands to Your Group
- On the left side, choose commands you want to add.
- Select a command → Click Add.
- The command now appears inside your custom group.
You can add:
- Cut / Copy / Paste
- Sort & Filter
- Insert Chart
- Formulas
- Macros
- And many more tools.
Step 6: Rearrange Tabs
- Select any tab and use Up or Down arrows to change the order.
Step 7: Save and Apply
- Once customization is complete, click OK.
- Your new Custom Tab will now appear in the Excel Ribbon!
Final Thoughts
Customizing Tabs and Groups in Microsoft Excel is an excellent way to boost productivity and work smarter. Whether you’re a student, accountant, office worker, or data analyst — having your frequently-used tools accessible in one place can save a lot of time.


