
Welcome back to Tech Gitter Official!
In this guide, I’ll walk you step-by-step through downloading, installing, and activating Microsoft Office on your Windows PC. If you’re new to our platform, be sure to subscribe and hit the bell icon so you don’t miss any future tutorials.

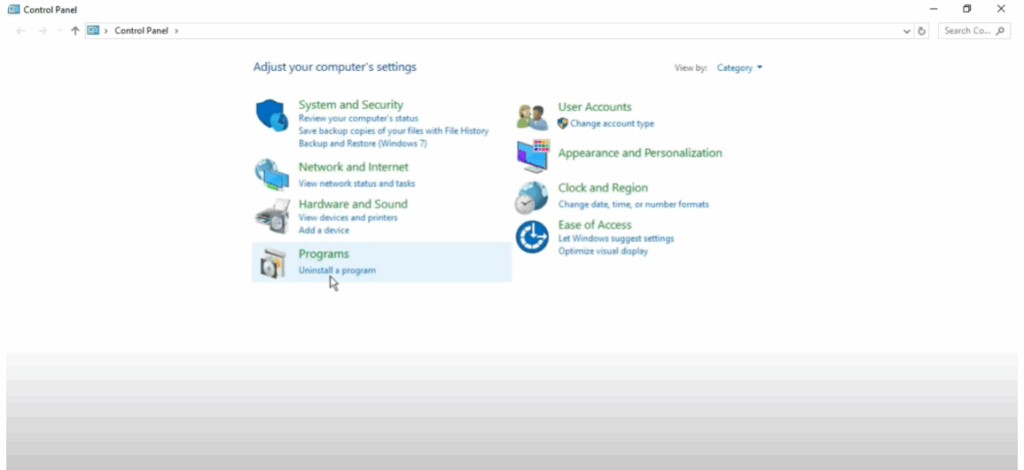
Step 1 – Remove Any Previous Microsoft Office Version
Before installing the new version, check if any older Microsoft Office installation exists on your PC.
- Go to Control Panel → Uninstall a Program.
- If you see any previous Office versions, uninstall them first.
- If no previous version exists, you can skip this step.
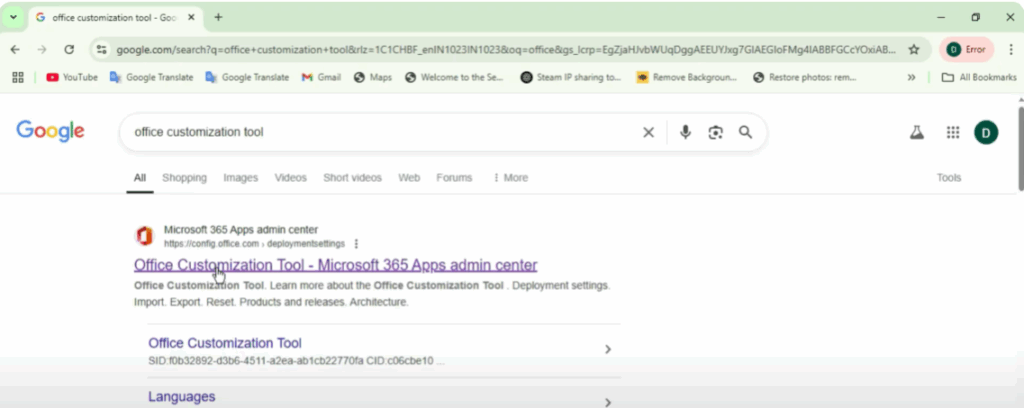
Step 2 – Access the Office Customization Tool
- Open Google Chrome (or any browser).
- Search for Office Customization Tool.
- Click on the first official microsoft.com link.
- Once the page opens, you’ll see customization options.
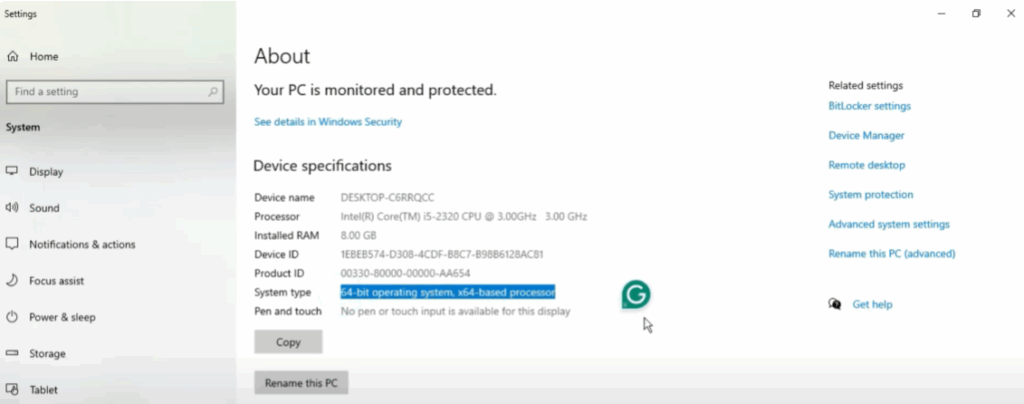
Step 3 – Select Your Architecture
You’ll need to choose between 32-bit or 64-bit based on your PC’s configuration:
- Right-click This PC → Properties to check your system type.
- Select the correct option in the customization tool (e.g., 64-bit for most modern PCs).
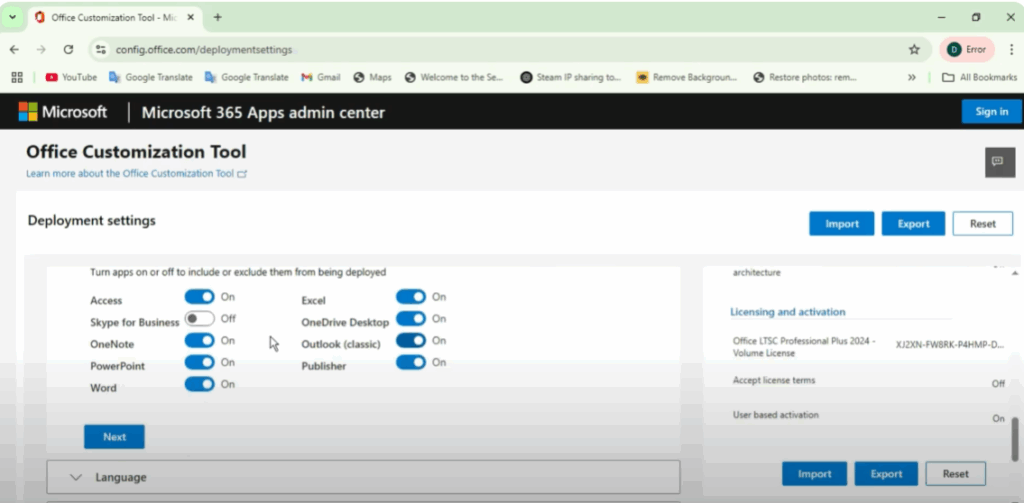
Step 4 – Choose the Office Suite & Apps
- Under Office Suite, select Office LTSC Professional Plus 2024 (or higher version like 2025/2026 if available).
- Scroll down to Apps and tick only the ones you need (e.g., Word, Excel, PowerPoint, OneNote, Access).
- Uncheck unnecessary apps to save space.
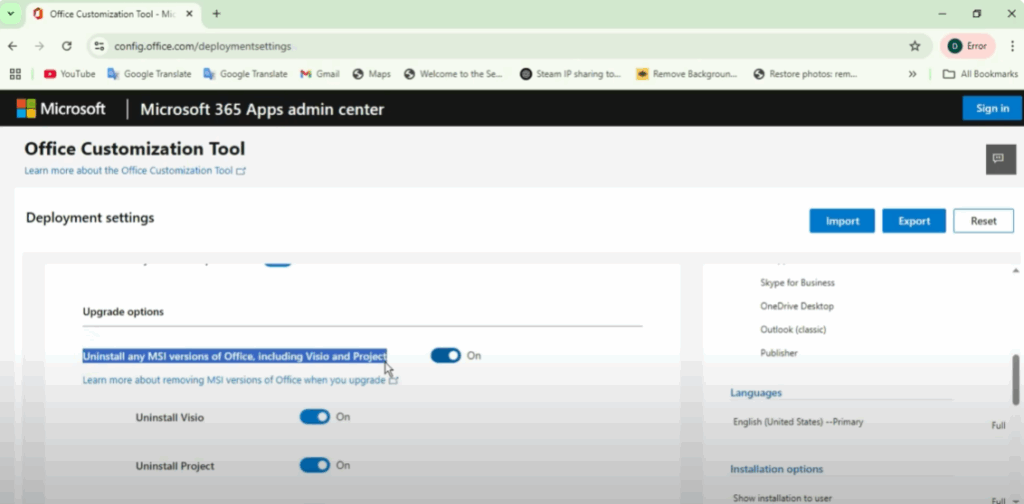
Step 5 – Language & Settings
- Select English (United States) as the primary language.
- Click Next through the settings screens.
- In the Updates & Upgrades section, uncheck “Uninstall any MSI versions of Office including Visio and Project.”
- Continue clicking Next until you see the Finish button.
Step 6 – Export the Configuration File (XML)
- Click Finish.
- Select Export → Tick Office Open XML format → Click OK.
- Accept terms and keep the default file name.
- Click Configuration → Export.
- Your XML configuration file will be downloaded.

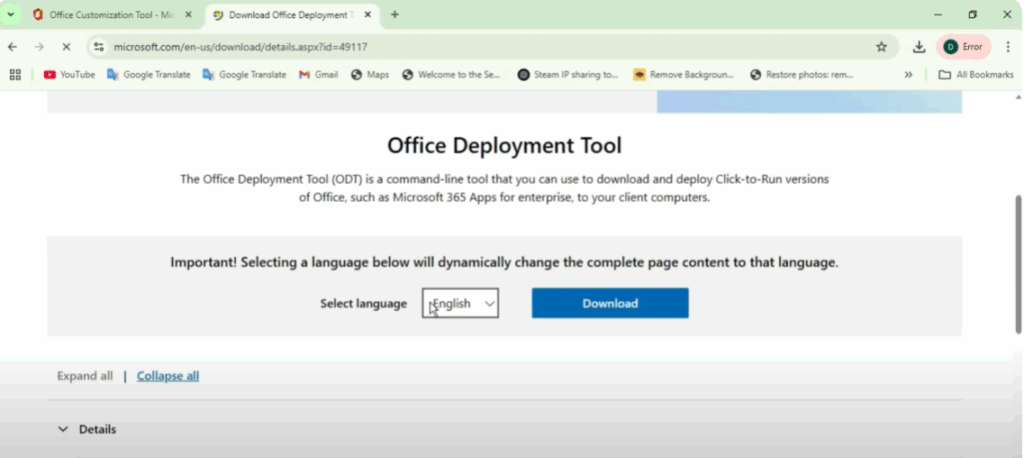
Step 7 – Download the Office Deployment Tool
- Open a new browser tab and search Office Deployment Tool.
- Go to the official microsoft.com link and download it.
- Create a new folder (e.g., “Microsoft”) on your desktop.
- Move both the XML file and Office Deployment Tool files into this folder.
Step 8 – Install Microsoft Office
- Open the Office Deployment Tool file.
- Accept the terms and select the Microsoft folder you created.
- Open Command Prompt (CMD) as administrator.
- Navigate to your folder path using the
cdcommand. Example: bashCopyEditcd C:\Users\YourName\Desktop\Microsoft - Run the setup command: pgsqlCopyEdit
setup /configure configuration.xml - The installation will begin. Ensure your PC remains connected to the internet until the process completes.

Step 9 – Verify Installation
Once installation is complete:
- Close the installer.
- Open Microsoft Word, Excel, or any other selected app to confirm it’s working perfectly.
That’s it! You’ve successfully downloaded, installed, and set up Microsoft Office on your PC. If this guide helped you, don’t forget to like, share, and stay connected for more tech tutorials.


