
If you’re looking to set up MySQL Server 8.0.36 along with MySQL Workbench and MySQL Shell on your Windows PC, this step-by-step guide will walk you through the entire installation and configuration process.
Step 1: Download MySQL Installer
- Open your preferred web browser and search for MySQL.
- Click the first result, which should be the official MySQL website.
- Navigate to the Downloads section.
- Scroll down and select MySQL Community Downloads.
- Click MySQL Installer for Windows.
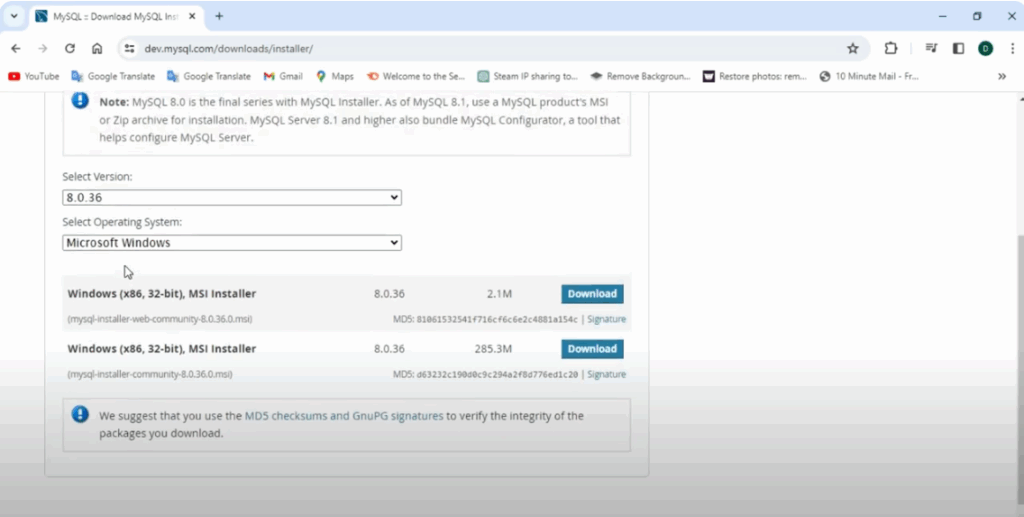
- From the list of available versions, choose the latest version of the installer for your operating system.
- You’ll see two download options – select the second option.
- Click Download, then choose No thanks, just start my download. The installer will start downloading.
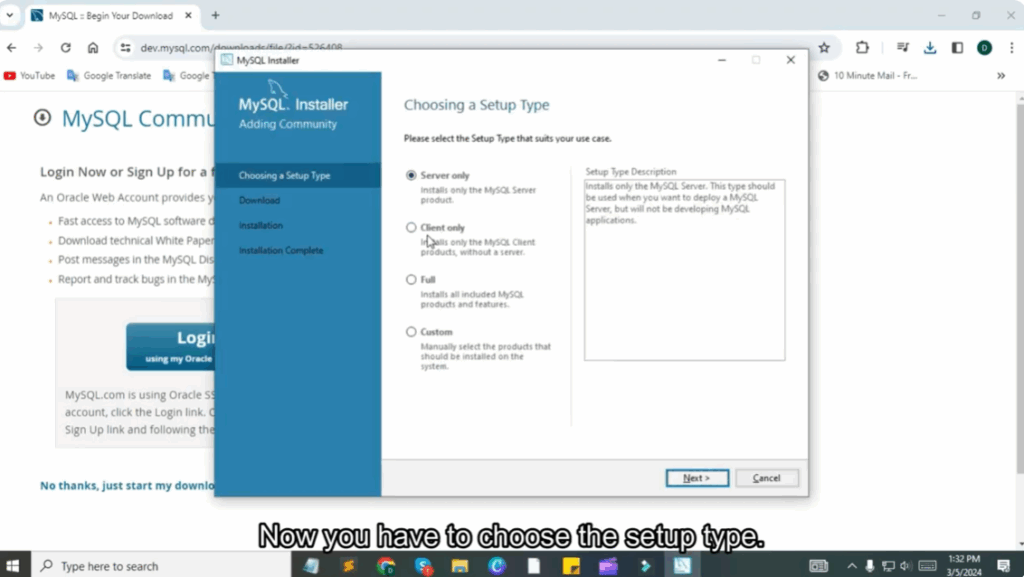
Step 2: Launch the Installer and Select Setup Type
- Once the download is complete, open the installer file.
- When prompted to select the setup type, choose Custom to manually select the products you want to install.
- Click Next to proceed.
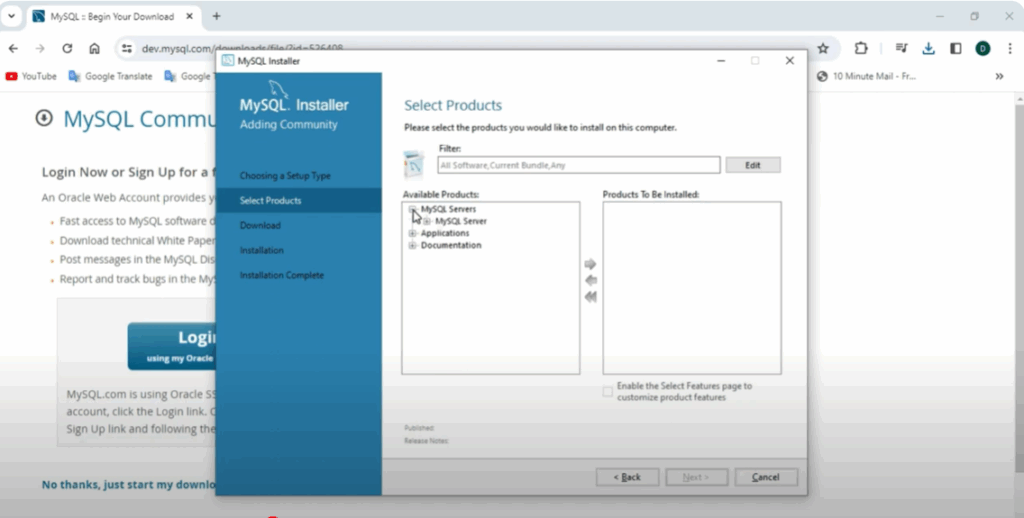
Step 3: Select MySQL Products to Install
- Under Available Products, expand the MySQL Server section and choose MySQL Server 8.0 (64-bit).
- Drag it to the Products to be Installed section.
- Next, expand the MySQL Workbench section and choose MySQL Workbench 8.0.36. Drag it to the installation list.
- Similarly, expand the MySQL Shell section and select MySQL Shell 8.0.36, then drag it to the list.
- Ensure you have all three selected: MySQL Server, Workbench, and Shell.
- Click Next, then click Execute to begin the installation.
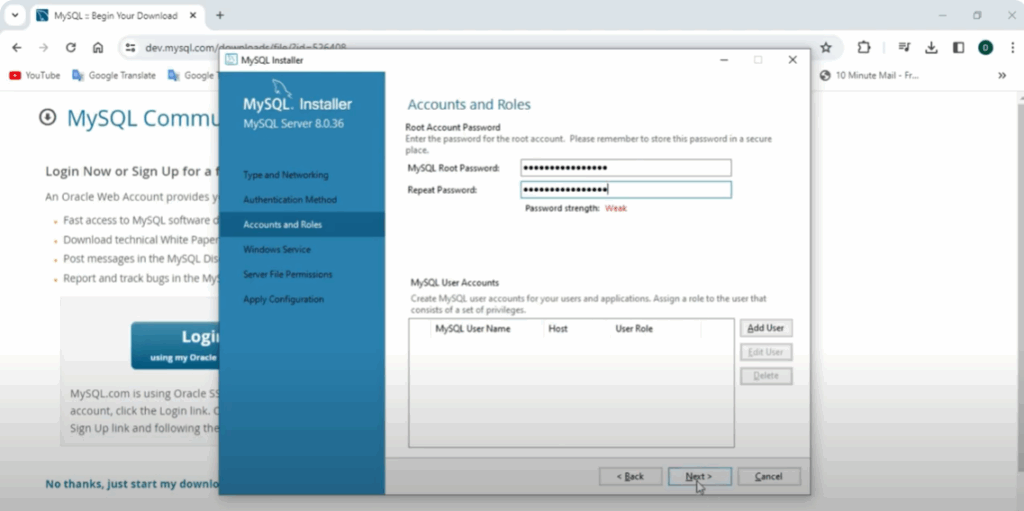
Step 4: Configure MySQL Server
- After installation, click Next to start product configuration.
- The default port number 3306 will be displayed – leave it as is and click Next.
- Keep the default authentication method and click Next.
- Set a root password and confirm it.
- Continue through the Windows Service and Server File Permissions options by clicking Next.
- Click Execute to apply the configuration.
- When the configuration is complete, click Finish. This will open MySQL Workbench.
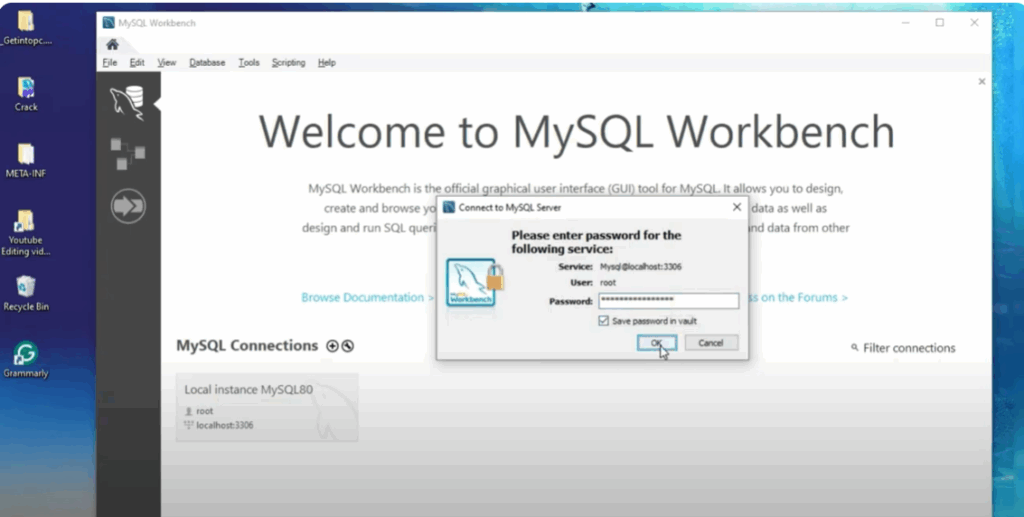
Step 5: Open MySQL Workbench
- In MySQL Workbench, click on your saved connection.
- Enter your root password, select Save Password, and click OK.
- Your MySQL Workbench is now ready for use.
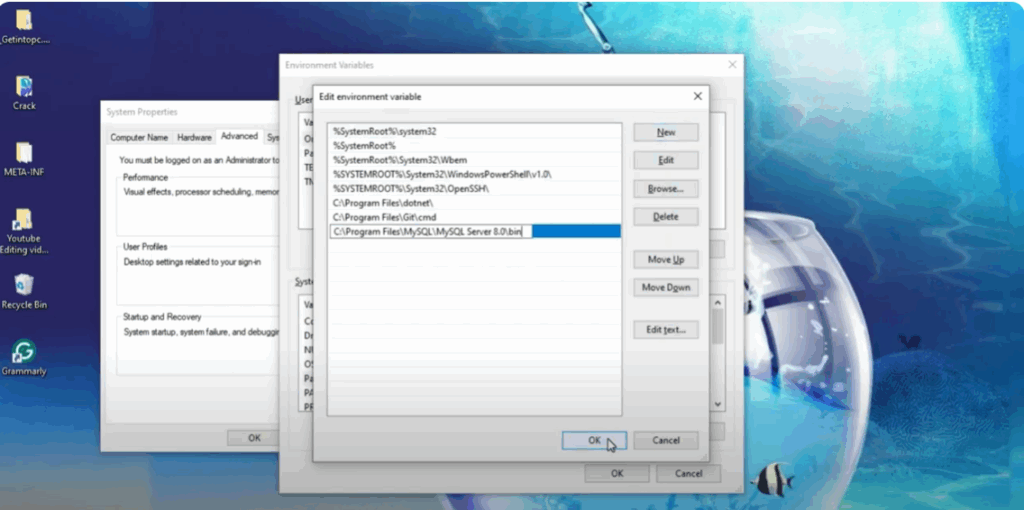
Step 6: Set MySQL Environment Variables
- Open File Explorer and go to your C: drive.
- Navigate to Program Files > MySQL > MySQL Server 8.0 > bin.
- Copy the bin folder path.
- Search for System Environment Variables in Windows Search and open it.
- In the Advanced tab, click Environment Variables.
- Under System Variables, select Path and click Edit.
- Click New, paste the copied path, and click OK.
- Apply and save your changes.
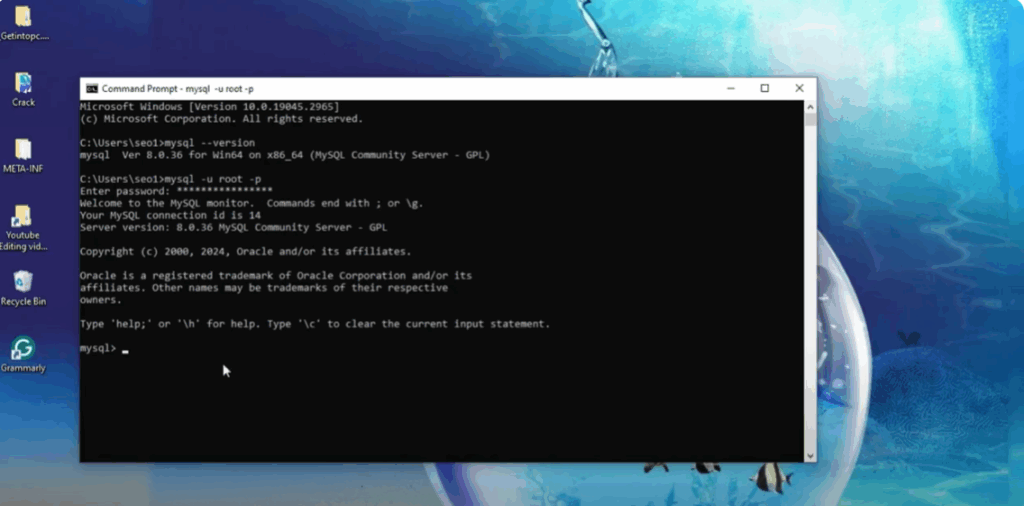
Step 7: Verify Installation in Command Prompt
- Open Command Prompt.
- Type: nginxCopyEdit
mysql -VPress Enter – you should see MySQL 8.0.36 displayed. - To start MySQL for the first time, type: cssCopyEdit
mysql -u root -p - Enter the root password you created earlier and press Enter.
- You’ll see a Welcome to the MySQL monitor message, confirming that the server is running successfully.
You have now successfully installed and configured MySQL Server 8.0.36, MySQL Workbench, and MySQL Shell on your Windows PC.
If you found this guide helpful, don’t forget to share it with others who might be setting up MySQL.


