
Realtek audio drivers installed but no sound in Windows 11 is a common problem after updates, often due to driver conflicts, disabled devices, or Windows installing generic drivers instead. Even with Realtek showing in Device Manager, speakers stay silent frustrating gamers and users. In this blog, discover the 2026 fix using advanced methods like disabling Microsoft UAA Bus Driver, rolling back to OEM drivers, and resetting audio services to restore sound quickly.
First, press Win plus X and select device manager from the menu.
When the window opens, expand the section sound video and game controllers.
Now, look for real tech audio in the list.
Once you find it, right click on Realtech Audio and select uninstall device.
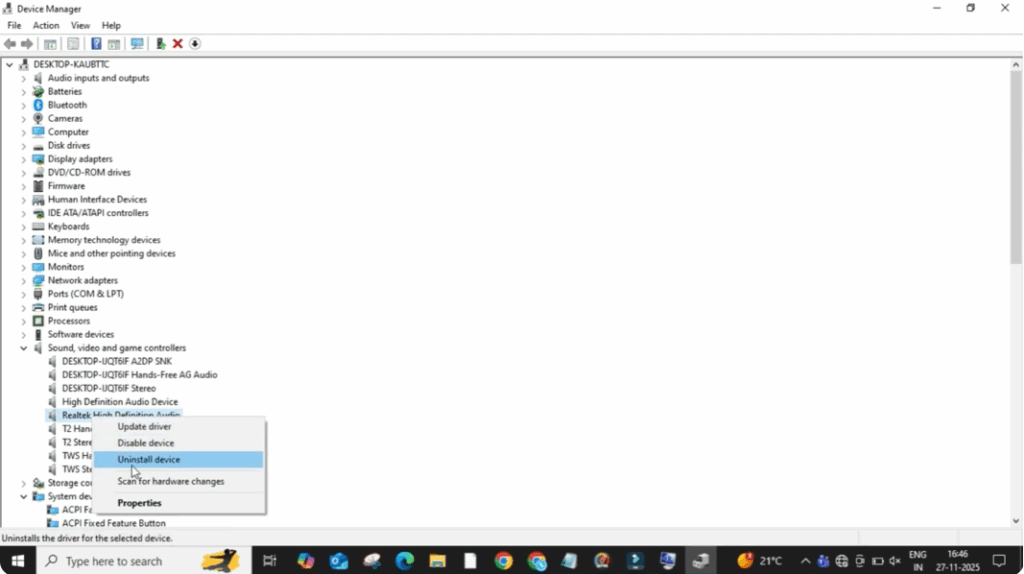
A small box will appear.
Make sure you check the option attempt to remove the driver software for this device.
After that, click on uninstall.
Once the uninstall process completes, restart your PC.
When the system reboots, Windows will automatically detect the missing driver and reinstall the required realtech audio driver on its own.
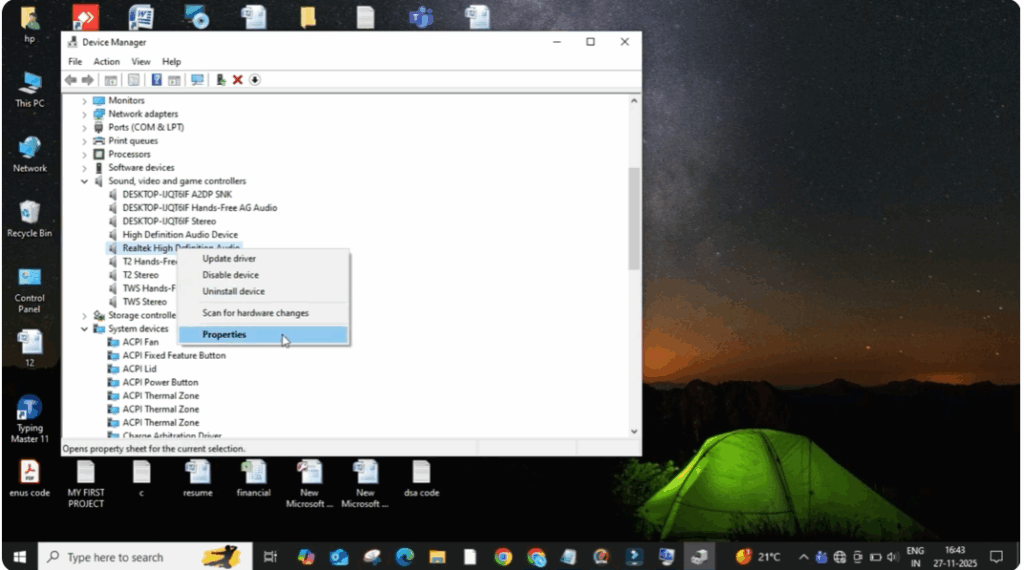
After the restart, again, right click on the Windows icon and open device manager.
Expand sound, video, and game controllers one more time.
Right click on realtech audio and select properties.
Now go to the driver tab and click on update driver.
Then select search automatically for drivers.
If Windows shows a message saying the best drivers are already installed, simply close the window.

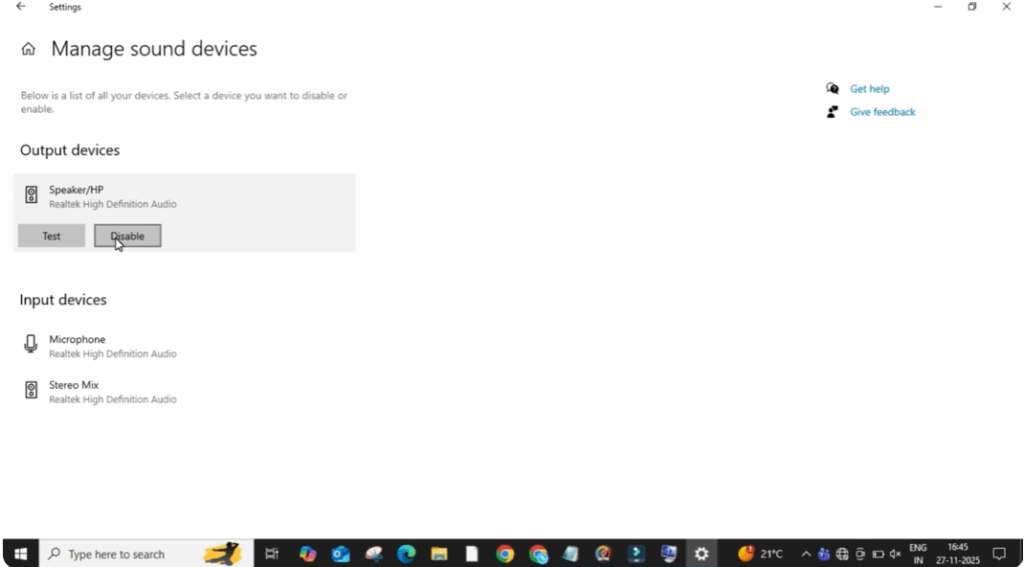
Next, click on the search bar and type sound.
Now open manage sound devices.
Under the output section, you will see your audio device.
Click on it, disable it once, and then enable it again.
This refreshes the audio system and fixes most sound issues after installing drivers.
After doing this, your audio should start working normally again.
That’s it.


