

Windows 11 users often face frustrating slowdowns, crashes, and glitches that make their PC feel sluggish or unreliable after updates. One powerful fix can restore smooth performance by addressing common issues like bloated services, driver conflicts, and resource hogs. In this blog, you’ll discover this essential Windows 11 maintenance solution that cleans up your system, optimizes settings, and prevents future problems to save your PC’s speed and stability.

Step One: Disable Bing Web Search in Windows Settings
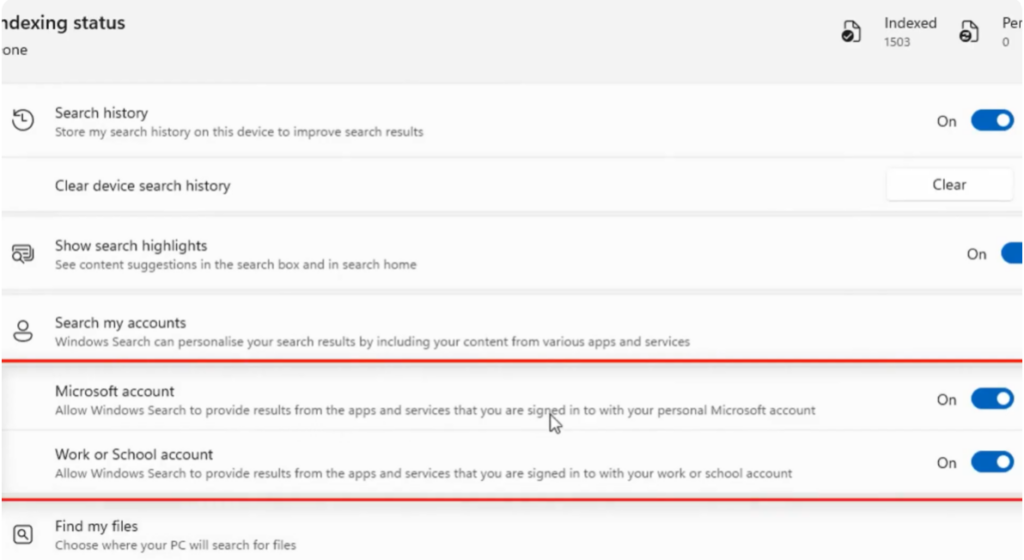
First, open Settings on your Windows 11 PC. Go to Privacy and Security, then open Search permissions. Look for Search my accounts and turn off Microsoft account. If you see Allow Windows Search to provide results for apps and services, keep it enabled, but turn off Work or school account if it’s active. This step prevents web search results from appearing in the Windows search box.
Step Two: Disable Bing Search Using Registry Editor (All Editions)
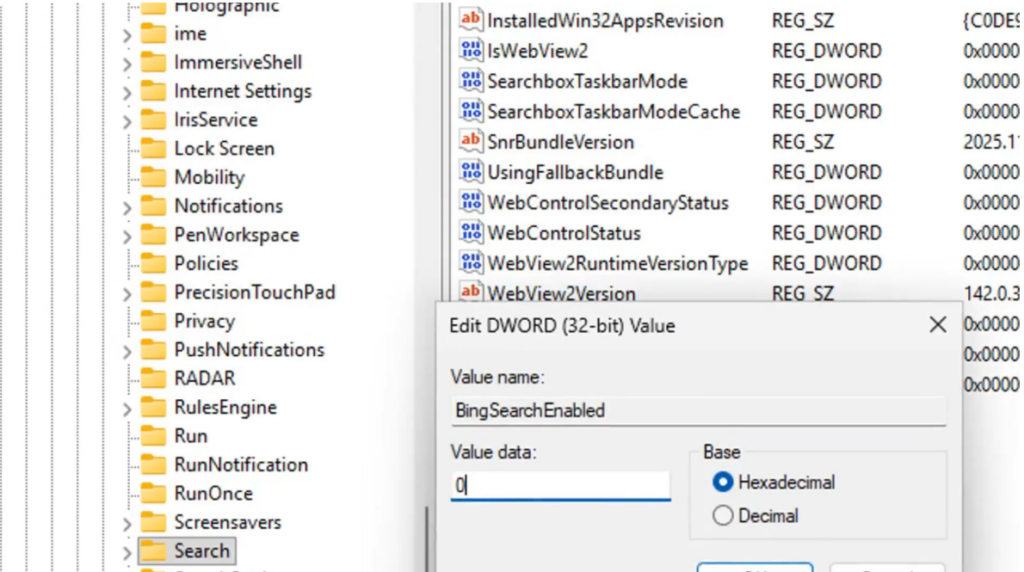
Press Windows + S, type regedit, and open the Registry Editor. Accept the User Account Control prompt. Now navigate to HKEY_CURRENT_USER > Software > Microsoft > Windows > CurrentVersion > Search. In the right panel, right-click, choose New, then select DWORD (32-bit) Value. Name it BingSearchEnabled and set its value data to 0. This disables Bing search inside the Windows search box and works on Windows Home, Pro, and other editions.
Step Three: Disable Bing via Group Policy Editor (Windows 11 Pro Only)
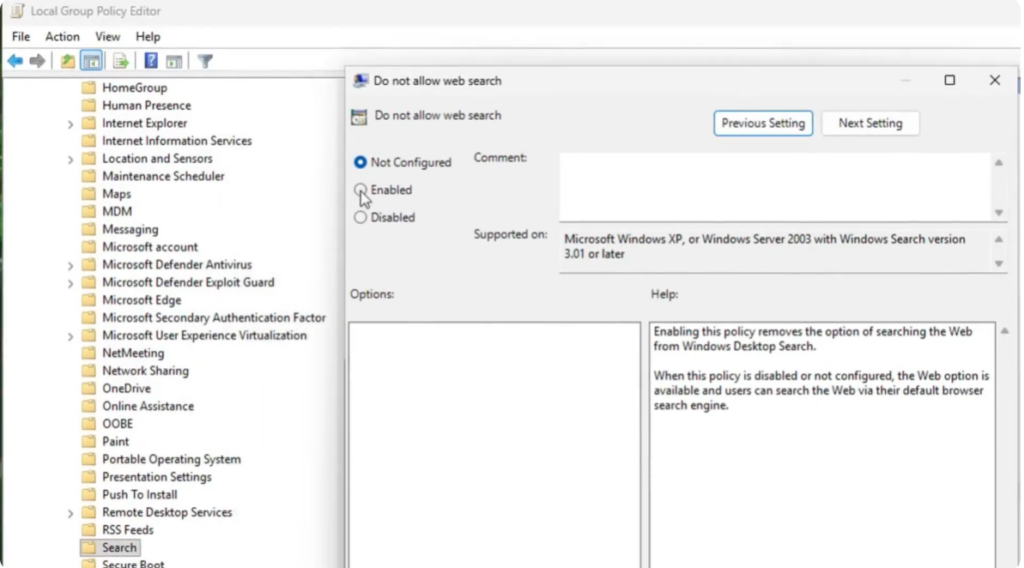
If you’re using Windows 11 Pro, press Windows + S, type gpedit.msc, and open the Group Policy Editor. Navigate to Computer Configuration > Administrative Templates > Windows Components > Search. Enable the following policies: Do not allow web search, Don’t search the web or display web search results in Search, and Don’t search the web over metered connections. This completely blocks web search results in Windows Search.
Step Four: Change Bing Settings in Microsoft Edge
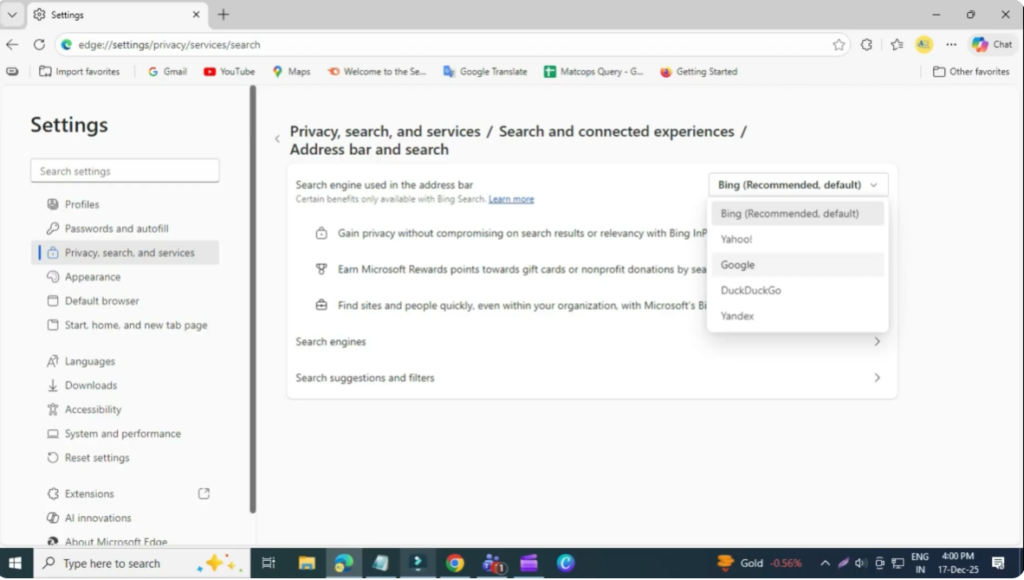
Open Microsoft Edge, click the three dots, and go to Settings. Navigate to Privacy, search, and services, then open Address bar and search. Change the default search engine from Bing to your preferred option, such as Google. This removes Bing from Edge and reduces its integration with the Windows search experience.
Step Five: Remove the Bing Icon from the Desktop
Go to Settings > Personalization > Background. Change your background from Windows Spotlight to a Custom background. This removes the Bing search icon that appears on the desktop.
Step Six: Uninstall the Bing Search Application
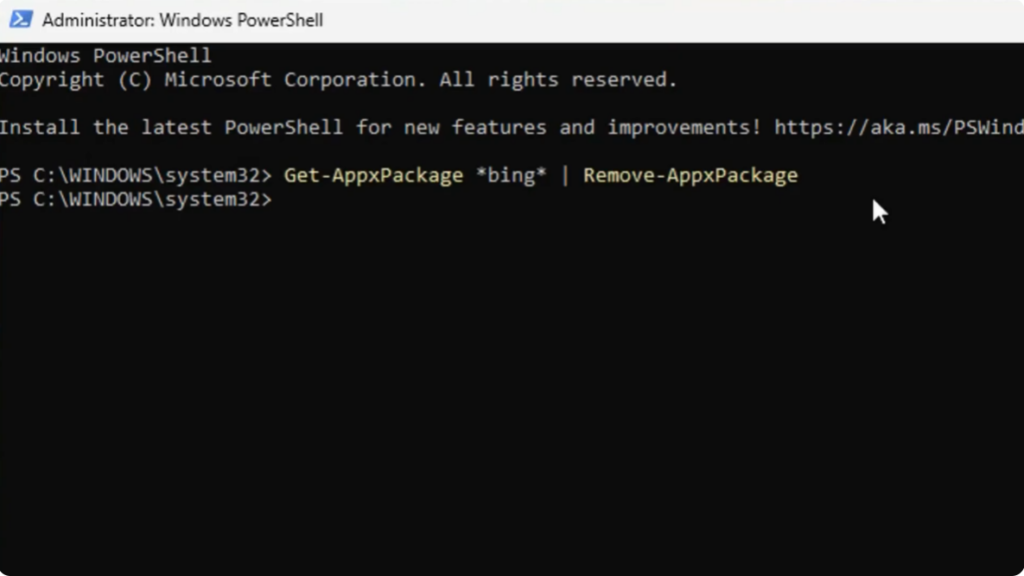
Windows doesn’t allow uninstalling Bing Search directly from the Apps menu, so you’ll need to use PowerShell. Open PowerShell as administrator and run the command:Get-AppxPackage *Bing* | Remove-AppxPackage
This command officially removes the Bing Search application from your PC.
After following all these steps, your Windows 11 system will be free of Bing Search. You won’t see web results in the search box, Bing icons in Edge or on the desktop, and the Bing app itself will be removed from your system. That’s it.


