
Sometimes your internet data plan is limited, and you don’t want Windows to use too much of it in the background. That’s where the Metered Connection feature in Windows 11 comes in handy. By turning it on, you can control how much data your computer uses, stop automatic updates, and save bandwidth. The good news is, enabling this option is very simple and takes only a few clicks. In this blog, we’ll explain step by step how to turn on Metered Connection in Windows 11, in easy language so anyone can follow along.
How to Enable Metered Connection in Windows 11
Here are the steps to turn on Metered Connection for both Wi-Fi and Ethernet on your Windows 11 PC:
- Open Settings
- Press
Win + Ito open the Settings app. - Navigate to Network & Internet.
- Press
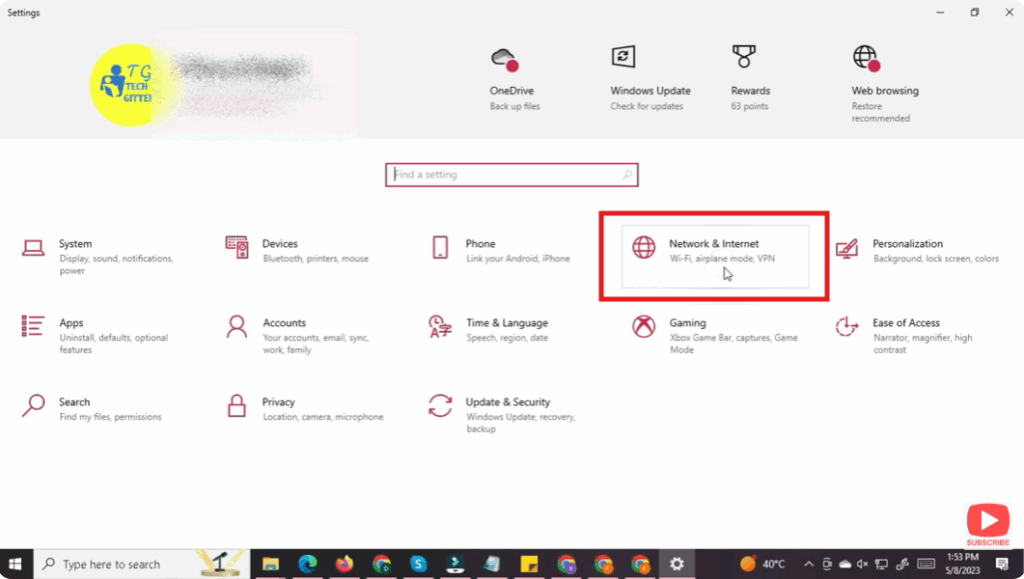
- Select Your Connection Type
- Depending on your current network, click on Wi-Fi or Ethernet in the Network & Internet section.
- For Wi-Fi: choose the network name (your connected Wi-Fi).
- For Ethernet: choose the wired network adapter.
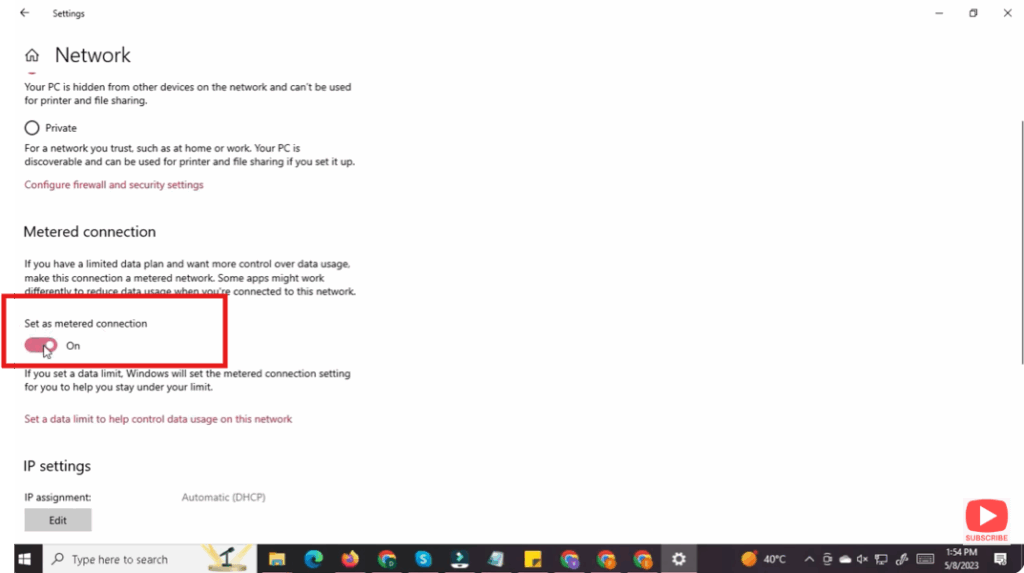
- Turn On Metered Connection
- Scroll down in the connection’s properties.
- Toggle “Metered connection” ON.
- Once enabled, Windows will start treating the network as metered.
✅ Final Thoughts
Turning on metered connection on Windows 11 is a smart way to control how much data your system and apps use — especially when you’re on a limited or pay-as-you-go plan. By enabling this feature, you can reduce automatic updates, limit background sync, and better manage your data usage.


