

Hello friends, welcome back to my channel Tech Gitter Official. Today I’m going to show you how to get Windows 11 version 25H2.
Microsoft has released it to developers and you can install it right now using Windows Update or with a clean USB installation.
Method 1: Install via Windows Update
Let’s start with the easiest method: installing via Windows Update.
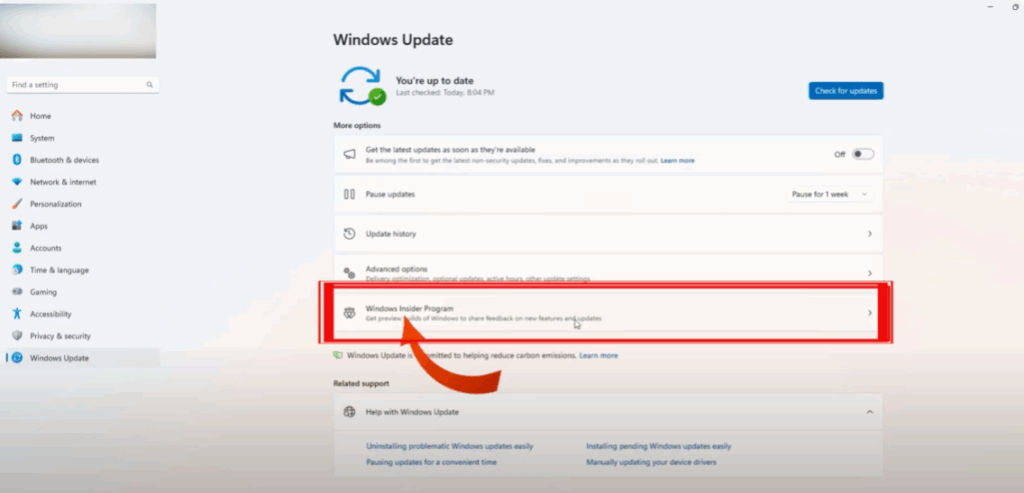
- Open Settings on your Windows PC.
- Go to Update and Security (or Windows Update in Windows 11).
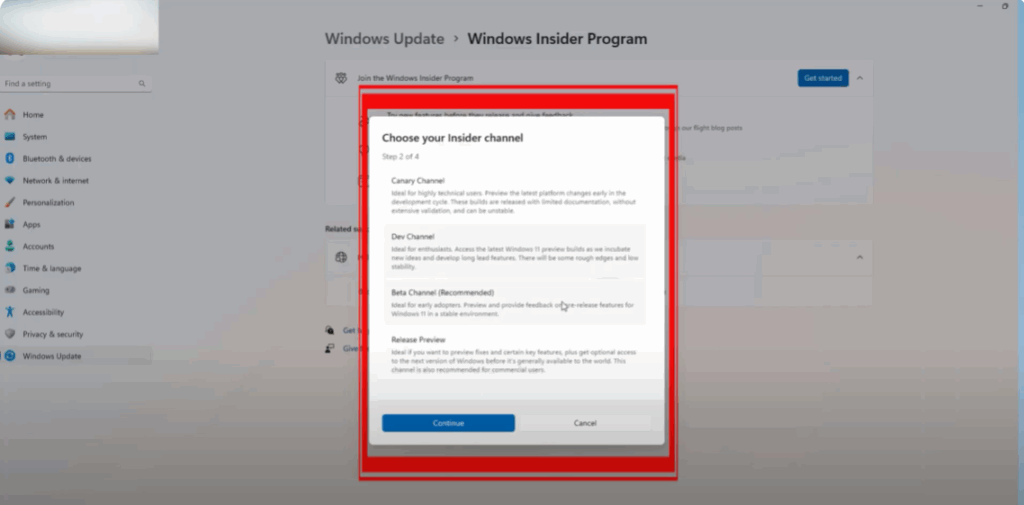
- Select Windows Insider Program from the left-hand menu and click Get Started, linking your Microsoft account.
- Choose your Insider Channel: Dev Channel, Beta Channel, or Release Preview.
- Confirm and agree to the terms.
- Restart your PC to apply the changes.
- After it restarts, go to Windows Update and check for updates to get Insider builds.
What’s New in Version 25H2?
Version 25H2 isn’t a massive overhaul like 24H2 was. Think of it more as an enablement package. It focuses on refinements, stability improvements, and a few handy changes that make everyday use smoother.
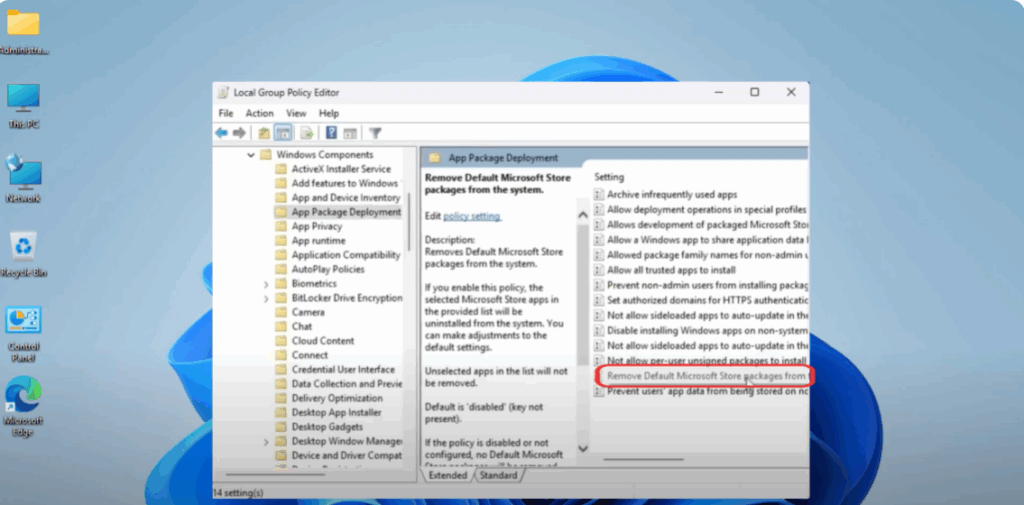
One cool new addition for Windows 11 Pro users is the ability to remove unwanted Microsoft Store apps without extra tools.
- Search for Edit Group Policy.
- Go to Administrative Templates → Windows Components → App Package Deployment.
- Open the option Remove default Microsoft Store packages from the system.
- Set it to Enabled.
- Choose the apps you want gone and click Apply.
Method 2: Clean Install via ISO
If you prefer a completely fresh start, you can do a clean install by downloading the ISO file.
- Head to uupdump.net.
- Select the Developer Channel.
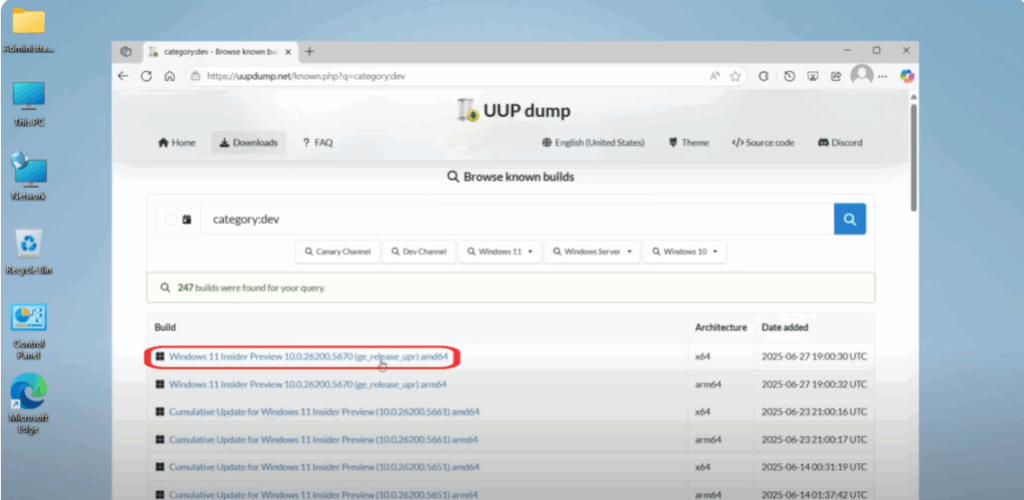
- Pick the latest Windows 11 25H2 build for your device.
- Choose your edition and language.
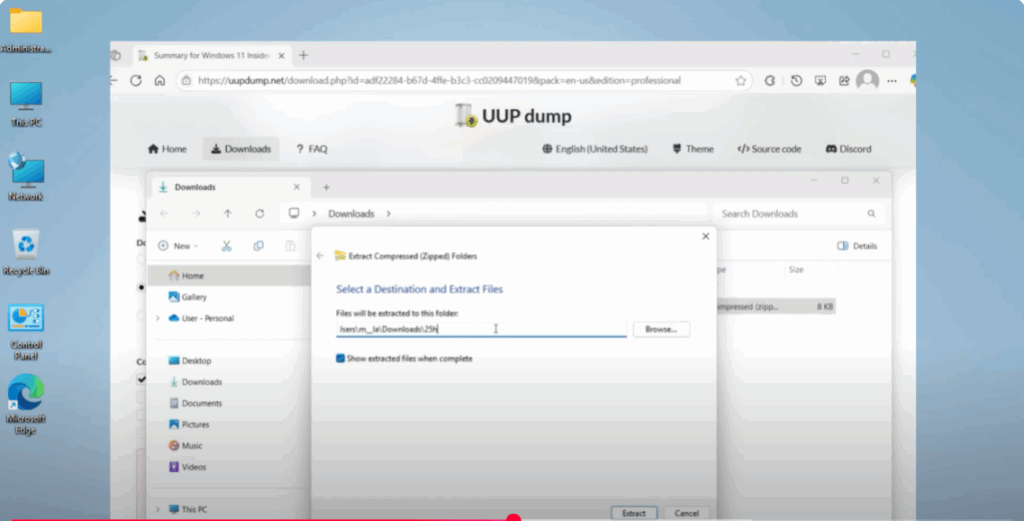
- Check the box for Include Updates and download the ZIP package.
- Extract it and rename the folder to something simple like
25H2.
- Open Download Windows CMD as an administrator.
- When prompted, type R to continue.
This process can take up to an hour and will need at least 70–100 GB of free space. When finished, your ISO file will appear in the same folder.
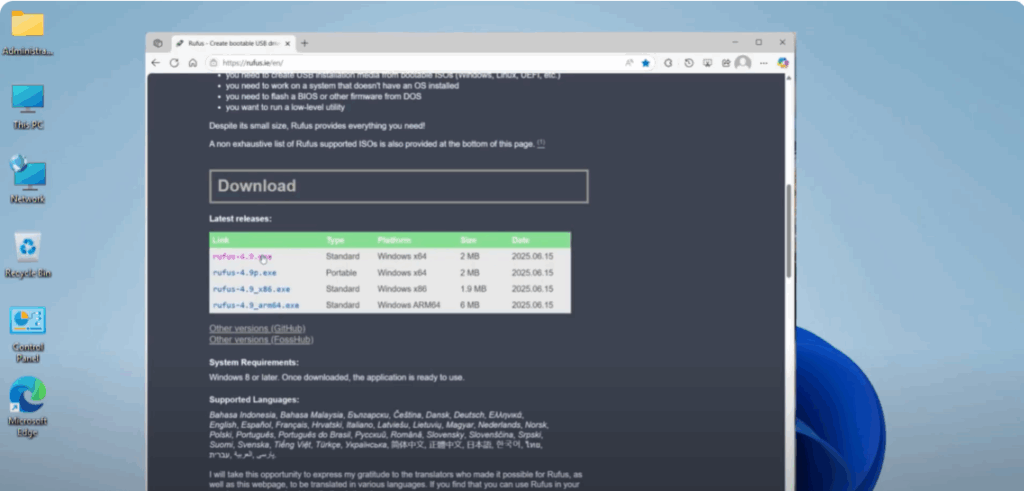
Create a Bootable USB
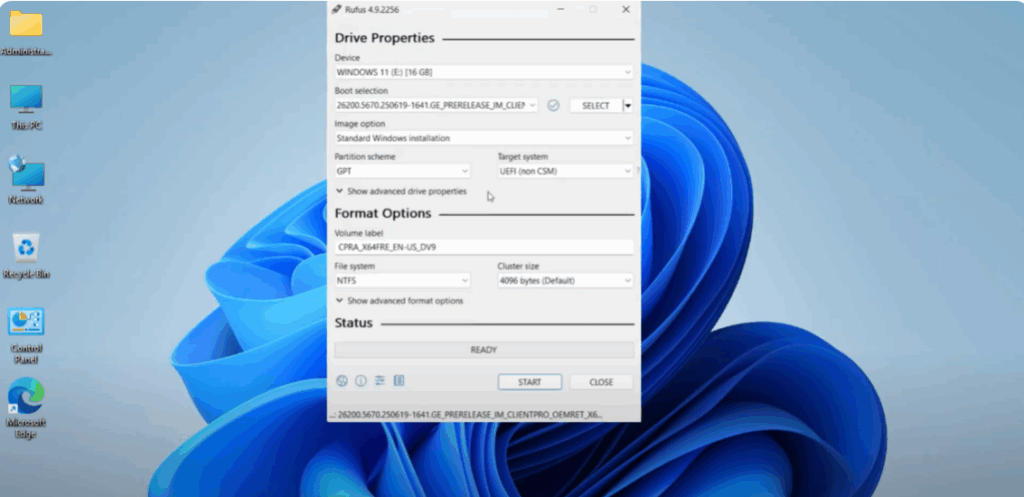
- Download Rufus.
- Plug in a USB drive with at least 16 GB of storage.
- Select your ISO file.
- Give it a label.
- If your PC doesn’t meet Windows 11 requirements, enable the Bypass Option.
- Click Start.
- Confirm the USB will be erased and wait for Rufus to finish.
Install Windows 11 25H2
- Restart your PC and boot from the USB drive.
- Select your language, time, and keyboard layout.
- Move on to installation.
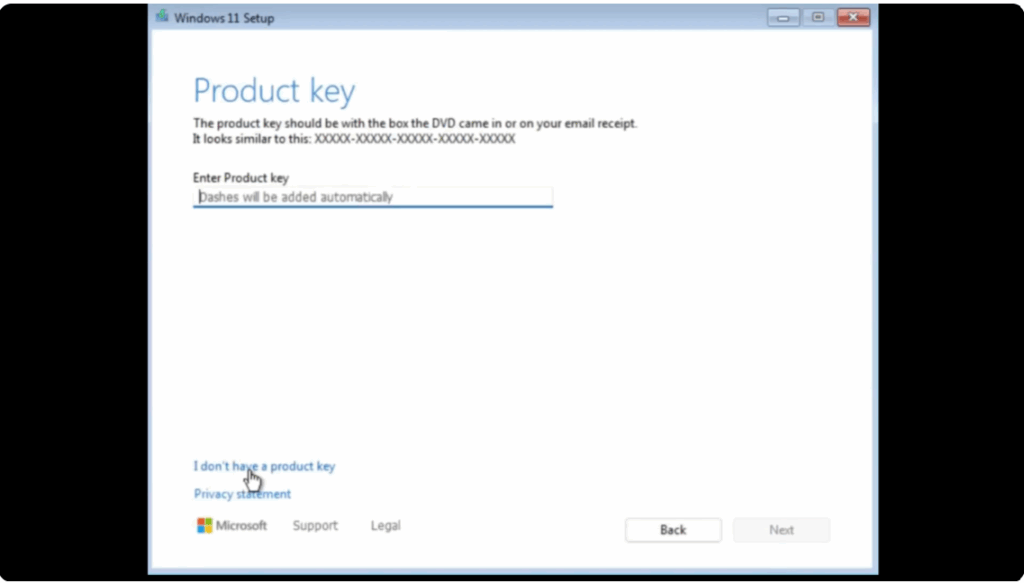
- If you don’t have a product key, skip that step for now.
- Choose your edition and accept the license agreement.
- Delete any old partitions and install Windows on the unallocated space.
After setup:
- Go through the first-time setup wizard.
- Give your PC a name.
- Sign in with your Microsoft account.
- Set a PIN and adjust your privacy settings.
- Skip restoring backups for a fresh system.
Once at the desktop:
- Press Windows + R, type Winver, and you should see Windows 11 version 25H2 displayed.
- Run Windows Update for patches.
- Check Device Manager for missing drivers.
- Reinstall apps and restore your files.
Conclusion
That’s it! You’re now running Windows 11 25H2 ahead of everyone else. It’s a smaller update compared to 24H2, but much smoother.
If this video was helpful, leave a comment. Thanks for watching. Don’t forget to like, share, and subscribe to Tech Gitter Official.


