
If your Windows Installer is broken in 2025, you might notice that apps won’t install or update properly, leaving you stuck and frustrated. This problem is more common than you think, and the good news is it usually has simple solutions. The Windows Installer is an important tool that helps your computer set up new programs, so when it stops working, fixing it quickly is important. In this beginner-friendly blog, we’ll explain in easy language how to repair a broken Windows Installer step by step, so you can get back to installing apps without any hassle.
Firstly, right click on any empty space on your taskbar and click on task manager. After task manager opens, go to the services tab. Here you will see a long list of services running on your system. Scroll down slowly and find the service named Msizerver. This service controls the Windows installer. If its status is showing as stopped, then right click on it and click on start. After starting it, Windows Installer will begin working in the background again.
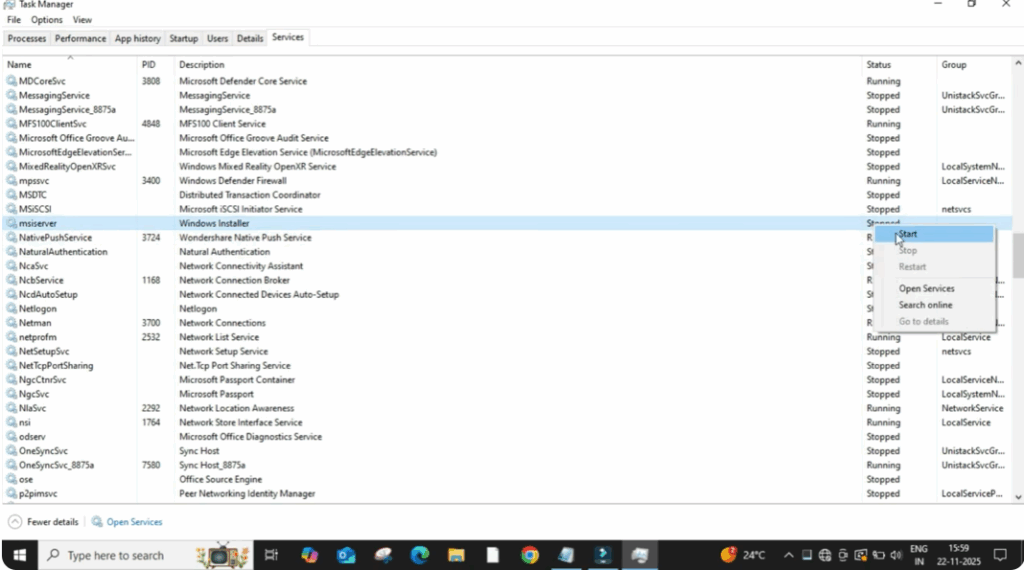
Now, close the window and try installing your application. In many cases, the issue gets fixed right here. If this method doesn’t work for you, then move to the next step.
Click on the search bar and type services and then open the services window. Once it opens again, scroll down and look for Windows Installer. When you find it, double click on it. So, a small properties window opens here. First, click on stop to temporarily stop the service. It might take a few seconds. After it fully stops, click on start again to restart the installer system properly. Once everything is correct, click on apply and then okay.
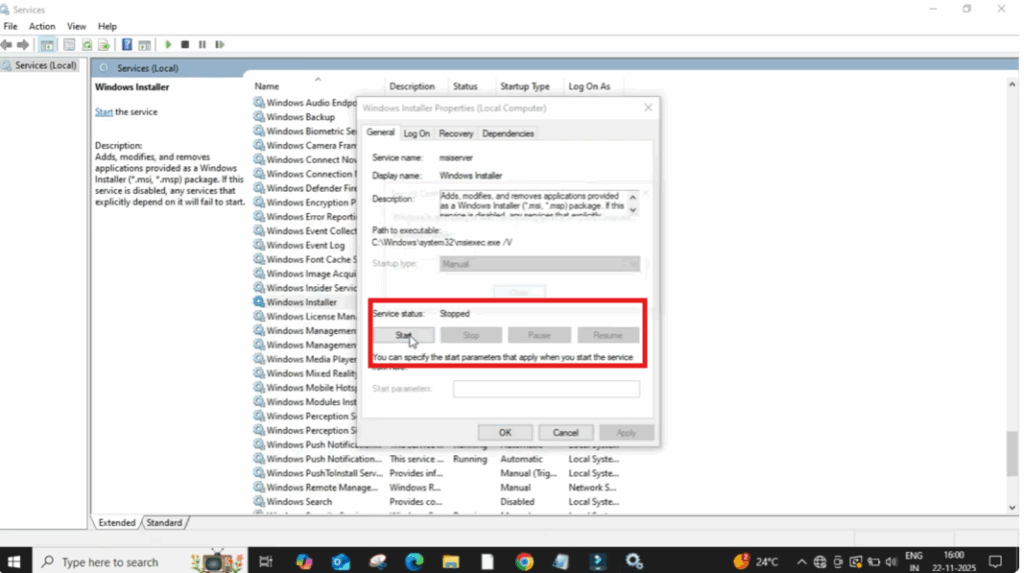
After doing this, close everything and restart your PC once. In most cases, refreshing the installer services fixes all installation issues.


